And here it is... the bit that will go wrong with your vSphere installation - vCenter Single Sign On!
Now when this was initially released there were several problems, seemingly due to installation bugs with SSO, most of these appear to have been resolved according to the release notes and installations I've performed since, however there are some caveats that if you do not pay attention to, will cause you an issue during the install.
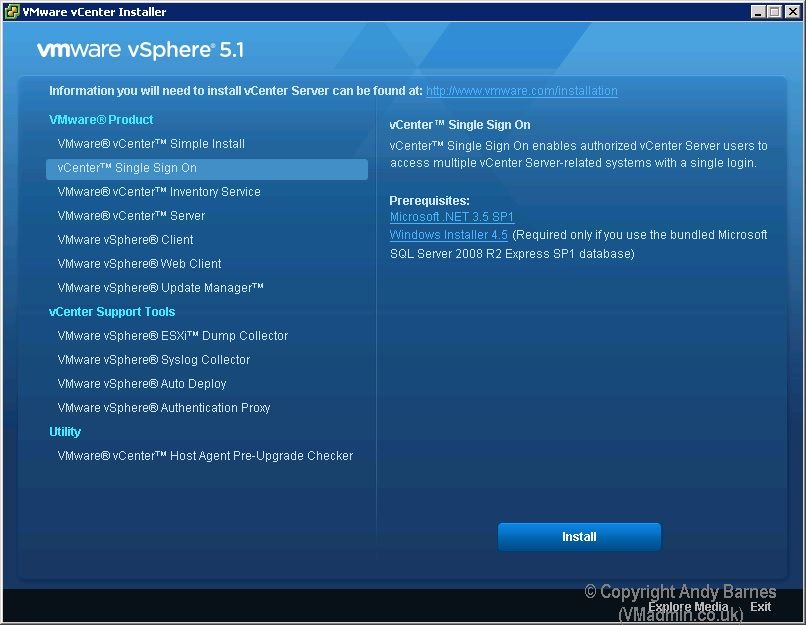
First thing to note when running the vSphere 5.1 installer and you get the below bunch of install options (see first image), DON'T go for the "Simple Install", firstly my experience is this does not work everytime, secondly if one of the components do have a problem (usually SSO) you can work on the problems with that component.
Before we get ahead of ourselves, you might be asking what is the Single Sign On thing?!
"vCenter Single Sign On (SSO) is a component of the VMware Cloud Suite. SSO deals with identity management for administrators and applications that interact with the vSphere platform.
SSO is based on identity management technology built by RSA and specifically tailored for VMware Cloud Infrastructure deployment."
In english what this means is that previously when you logged into vCenter via vSphere Client you authenticated directly with Active Directory.
However now when vSphere Client connects to vCenter, it's authenticating via vCenter SSO. Which in turn has your AD as an authentication method.
As the environment expands what VMware are trying to do is use SSO for authenticating all their products, so of course we have the vSphere Web Client now and vCloud, all use SSO.
If you have any more questions on this it's best looking at the vCenter Single Sign On FAQ
Now then next thing you might be thinking is where do I install this, do I need another server for SSO?
No SSO, vCenter, vSphere Client, vSphere Web Client and vSphere Update Manager can all be installed on a single server (and in most cases it is).
If you want you can also install each one on it's own dedicated server.
Here we will be installing all the components on the one server.
1. Insert DVD or unzip "VMware-VIMSetup-all-5.1.0-xxxxxx.zip"
If it does not autorun, use "autorun.exe" in the root of the cd or folder. Click "vCenter Server" to start the installation.
2. Click "vCenter Single Sign On"
Note: DON'T go for the "Simple Install"
3. The vCenter Single Sign On installation wizard will start. Good luck! Click Next.

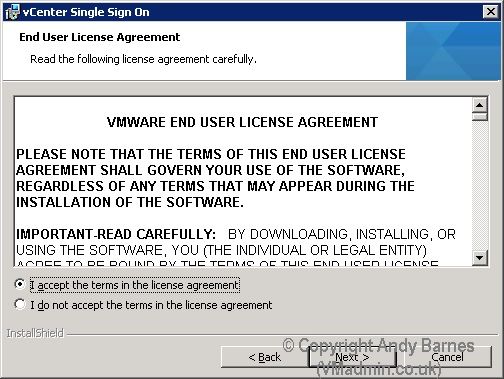
4. Read the license, agree and Click Next.
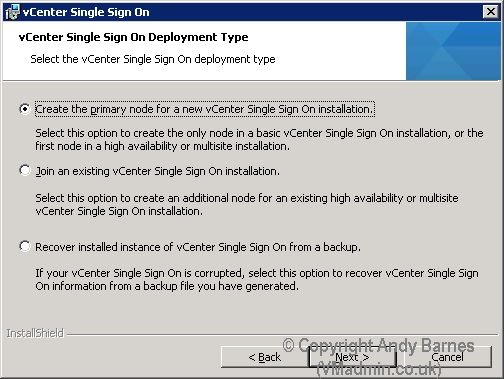
5. Select "Create the primary node for a new vCenter Single Sign On installation"
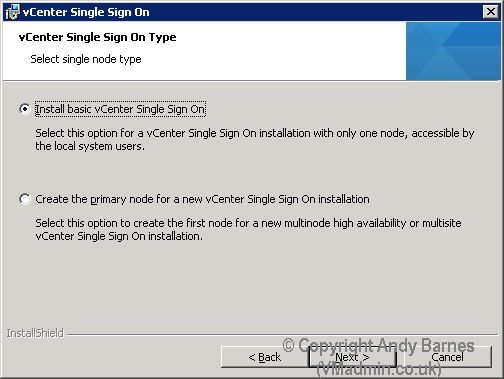
6. Select "Install basic vCenter Single Sign On"
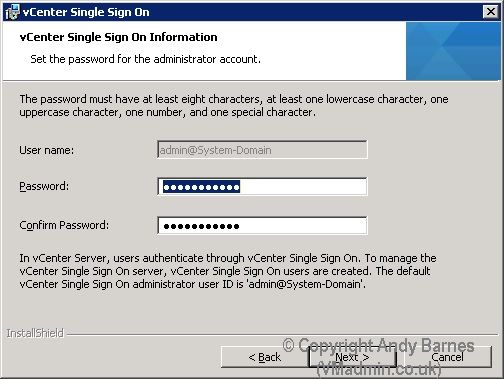
7. Enter a password for the vCenter SSO administrator account
Note: See this as a local user in the SSO database, it's not a local windows user or AD user.
If all the windows auth stops working you can still login with this "admin@System-Domain" user so make sure you remember you keep this safe.
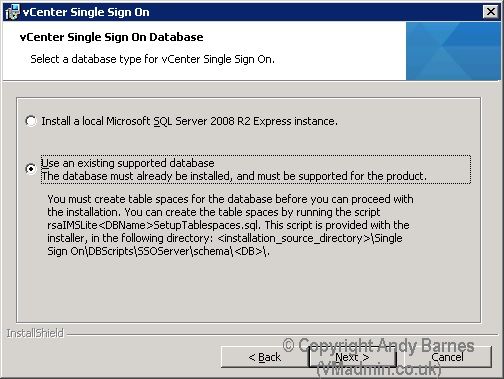
8. You can use SQL express or a full SQL server, select your required database option.
Here I will use a full SQL server running on another server.
Very Important Note:
If you are using a full SQL server for vCenter SSO, you need to create the database beforehand.
However it's not that strightforward, you cannot just right click create new database as SSO requires some specifically named DATA and INDEX tablespaces.
If you ignore this your installation will fail.
9. Use the below SQL script to create your SQL databases with the correct filegroups (RSA_DATA and RSA_INDEX) changing the DB name and filepaths only:
-- PROJECT IMS
-- MODEL IDENTITY MANAGEMENT SERVICE
-- COMPANY RSA, the Security Division of EMC
-- DATABASE MSSQL
USE MASTER
GO
-------------------------------------------------------------------------------------
-- Create database
--
-- Using this script is not mandatory. The database can be created with
-- SQL Management Studio, ensuring that there are two tablespaces, named RSA_DATA
-- and RSA_INDEX, and that there are only alphanumeric characters in the database name.
--
-- Before running this script, customize the file paths (CHANGE ME) below.
-- 1. Decide on a folder to hold the database files (10 GB of space required).
-- For example, it can be the DATA folder of the SQL Server, usually
-- C:\Program Files\Microsoft SQL Server\MSSQL10_50.<instance name>\MSSQL\DATA
-- 2. Replace all 3 occurrences of C:\CHANGE ME with the path to the folder
-- The database name can also be customized, but cannot contain
-- reserved keywords like database or any characters other than letters, numbers,
-- _, @ and #.
-- Advanced users can put the different files (RSA_DATA, RSA_INDEX and LOG)
-- on different storage devices to improve performance. RSA_INDEX is a small file which
-- is recommended to be stored on a fast device.
-- For more details, please refer to Microsoft documentation at http://technet.microsoft.com/en-us/library/ms143547.aspx
-------------------------------------------------------------------------------------
CREATE DATABASE "VMware-SSO" ON PRIMARY(
NAME='RSA_DATA',
FILENAME='E:\MSSQL\DATA\VMware-SSO-RSA_DATA.mdf',
SIZE=10MB,
MAXSIZE=UNLIMITED,
FILEGROWTH=10%),
FILEGROUP RSA_INDEX(
NAME='RSA_INDEX',
FILENAME='E:\MSSQL\DATA\VMware-SSO-RSA_INDEX.mdf',
SIZE=10MB,
MAXSIZE=UNLIMITED,
FILEGROWTH=10%)
LOG ON(
NAME='translog',
FILENAME='F:\MSSQL\Data\VMware-SSO-translog.ldf',
SIZE=10MB,
MAXSIZE=UNLIMITED,
FILEGROWTH=10% )
GO
-- Set recommended performance settings on the database
ALTER DATABASE [VMware-SSO] SET AUTO_SHRINK ON
GO
ALTER DATABASE [VMware-SSO] SET RECOVERY SIMPLE
GO
CHECKPOINT
GO
-------------------------------------------------------------------------------------
-- To drop the database, the command is:
-------------------------------------------------------------------------------------
-- DROP DATABASE VMware-SSO
10. You also need to create a SQL user that has "db owner" privileges on this SSO database.
Very Important Note:
Don't use any special characters in the username or password for this SSO SQL user otherwise the installation WILL fail.
That's nothing such as @ !&^%$£>< etc etc
For example "Password1" will work "P@ssword1" will not.
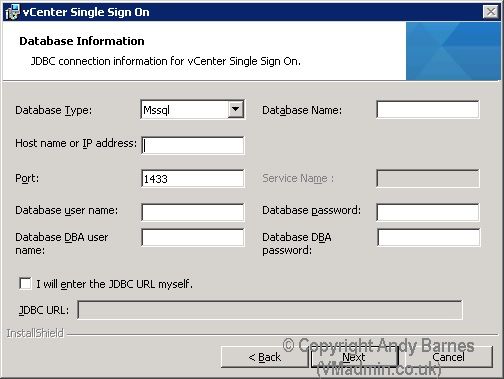
11. Enter your database server information, IP, username etc.
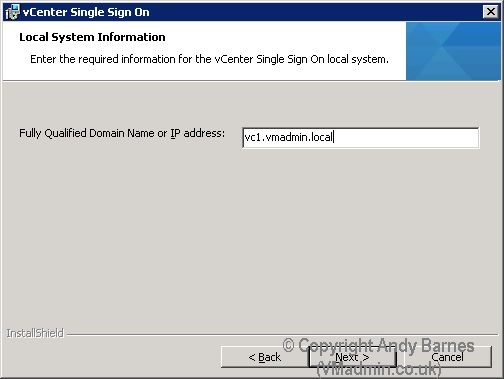
12. Enter the FQDN of the SSO server.
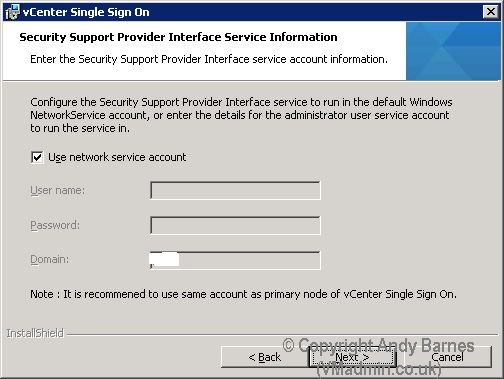
13. Enter the account details SSO will run under. Tick to use Network Service.
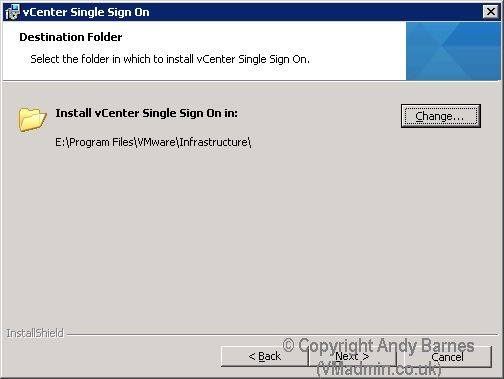
14. Set the installation folder
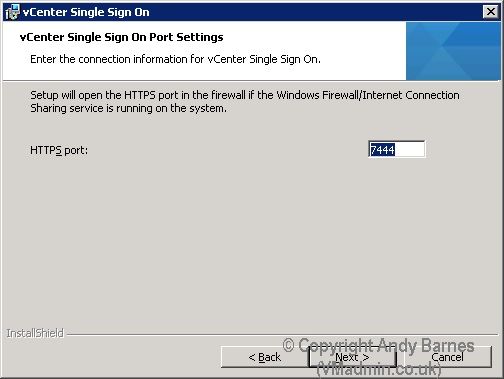
15. Leave the SSO HTTPS port as 7444 (default).
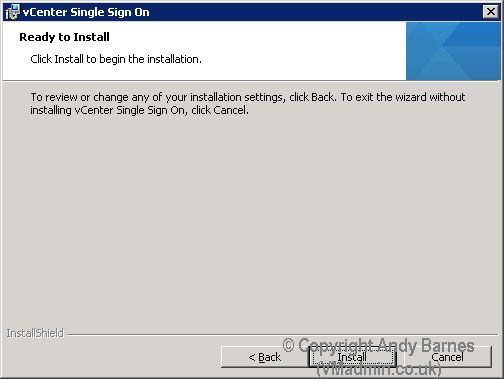
16. Now click "Install" and let the installer run. If you get any errors check VMware's KB.
Most errors I've ever got installing this are due to incorrect database settings and the username/password containing special characters (which breaks it).
17. Once this has installed you should see the vCenter SSO service in services.msc
18. We now continue onto the next installation step.. vCenter Inventory Service..
- vSphere 5.1 - Part 1 - ESXi Server 5.1 Install
- vSphere 5.1 - Part 2 - vCenter Single Sign On (SSO) Install
- vSphere 5.1 - Part 3 - vCenter Inventory Service Install
- vSphere 5.1 - Part 4 - vCenter Server Install
- vSphere 5.1 - Part 5 - vSphere Client Install
- vSphere 5.1 - Part 6 - vSphere Web Client Install
- vSphere 5.1 - Part 7 - vSphere Update Manager Install
Share this blog post on social media:
Tweet


Latest Blog Posts
- vSphere 7 U1 - Part 3 - Creating a Datacenter, HA/DRS Cluster and Adding a Host
- vSphere 7 U1 - Part 2 - Deploying vCenter 7.0 U1 VCSA
- vSphere 7 U1 - Part 1 - Installing ESXi 7.0 U1
- Veeam CBT Data is Invalid - Reset CBT Without Powering Off VM
- View Administrator Blank Error Dialog/Window After Upgrade