So far in this Horizon View 6.0 how to series, we have installed a single View Connection Server and installed View Composer on the vCenter server.
We are now going to proceed configuring the service accounts for View to connect to vCenter and join desktops to the domain followed by the events database. Additionally we need to create an OU and delegate permissions on this OU.
If you missed any of the previous parts of the series or want go back/forward here is the jump list:
- Horizon View 6.0 - Part 1 - Installing Horizon View Connection Server
- Horizon View 6.0 - Part 2 - Installing Horizon View Composer
- Horizon View 6.0 - Part 3 - Configuring Horizon View Administrator, Events DB, vCenter and Active Directory
- Horizon View 6.0 - Part 4 - Creating a Windows 8.1 Golden/Master/Template Image
- Horizon View 6.0 - Part 5 - Creating an Automated Desktop Pool with Linked Clones
- Horizon View 6.0 - Part 6 - Creating an RDS Host Farm and Application Pool
- Horizon View 6.0 - Part 7 - Creating an RDS Desktop Pool
1. Open Active Directory Users and Computers on you're domain controller
2. First create an OU which will contain the virtual desktops will be provisioned within.
Tip: I recommend creating a separate OU for the virtual desktops. Using an existing OU which contains physical desktops or creating the VDI OU as a child OU of you're physical desktops can lead to GPO scope problems later.
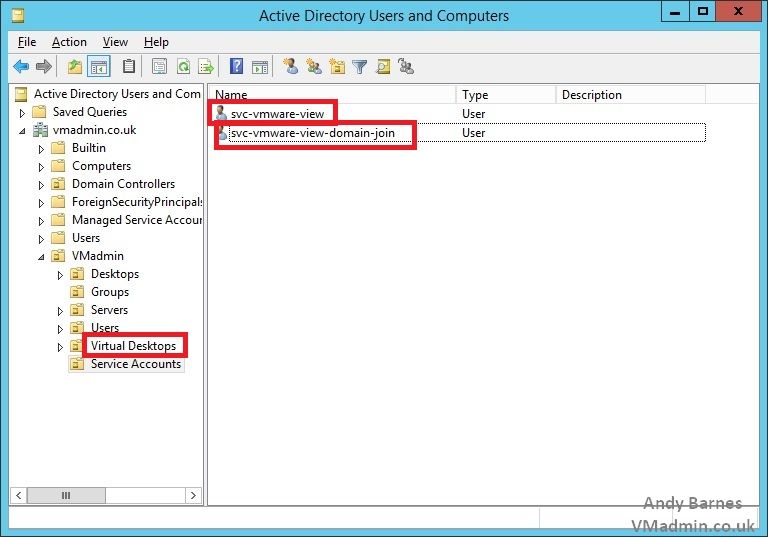
3. Create two normal user accounts:
- svc-vmware-view-domain-join - This account will be used by View Composer to join the virtual desktops to the domain in the OU you created above.
- svc-vmware-view - This account will be used by the View Connection Server(s) to connect to vCenter server to provision and manage VMs.
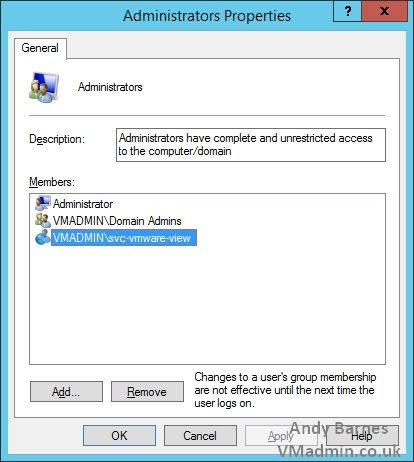
4. Add the svc-vmware-view account to the local administrators group on the vCenter server.
This is required for View Composer, if you are not using View Composer you do not need to add the account to the local administrators group on the vCenter server.
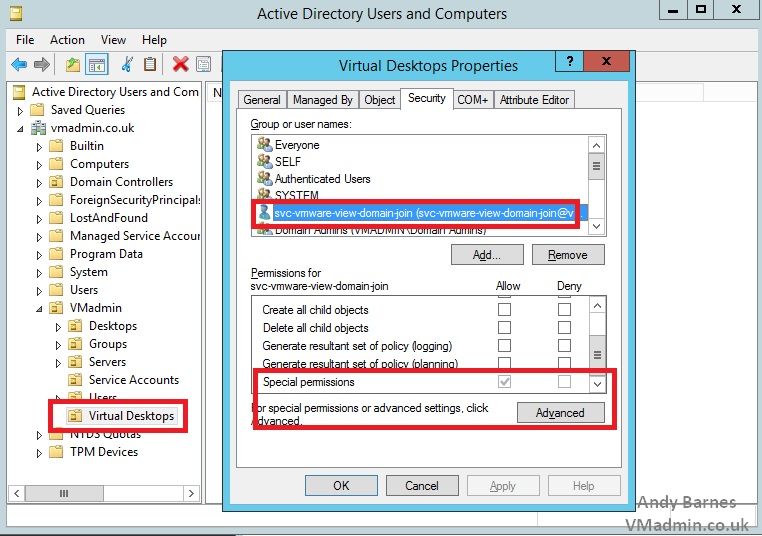
5. Now delegate the svc-vmware-domain-join permissions on the virtual desktops OU you created so that it can create computer objects within that OU (and child OUs if you create OUs for different desktop pools later).
Under Permissions Tick: List Contents, Read All Properties, Write All Properties, Read Permissions, Create Computer Objects and Delete Computer Objects
Under Properties Tick: Write All Properties
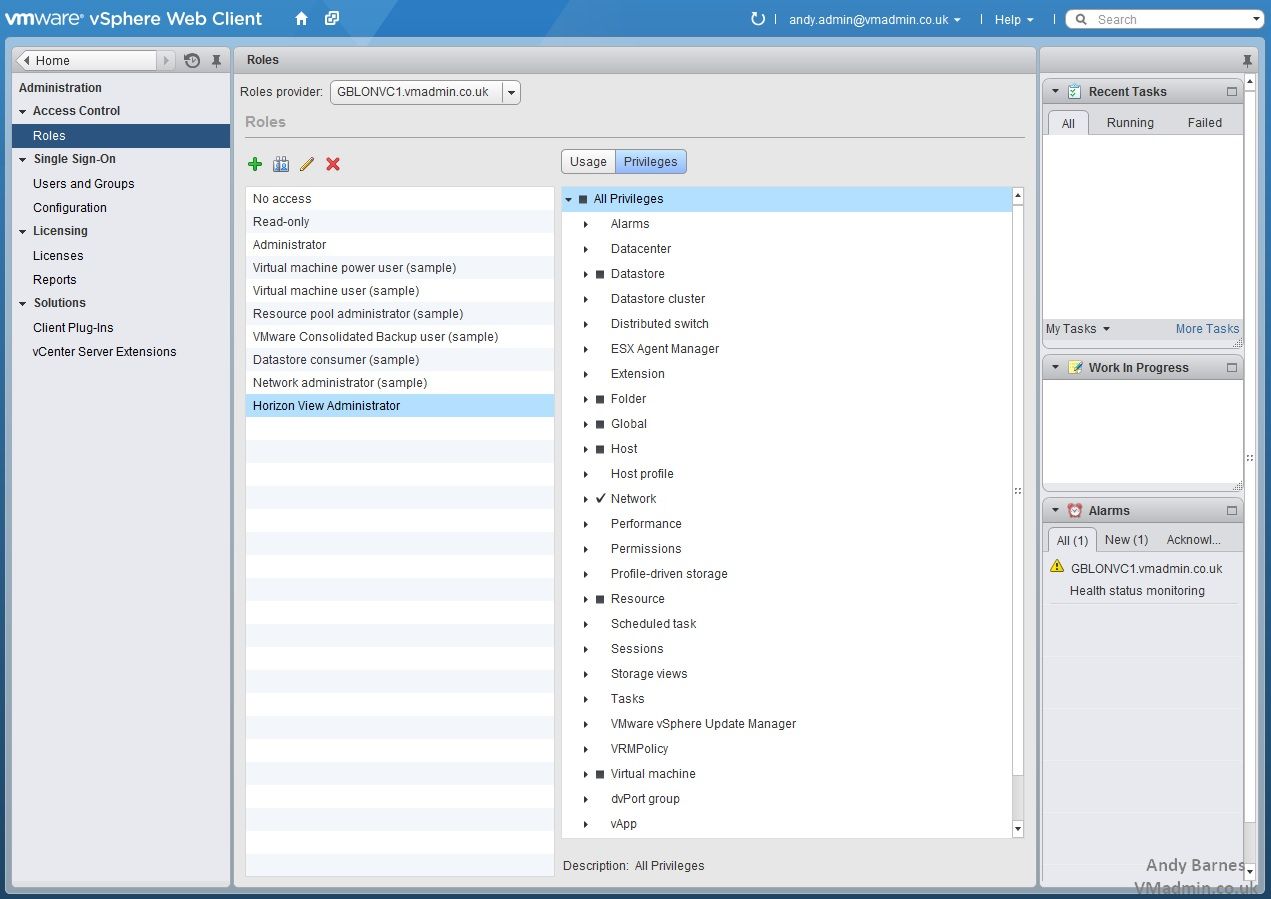
6. Create a new vCenter Role for View
Login to the vSphere Web Client
Go to Home --> Administration --> Access Control --> Roles
Create a new role named "View Administrator" and add the following privileges to the role:
Note: You can use the existing Administrator role for View, however this grants additional permissions which View does not require.
7. Grant the svc-vmware-view account permissions within vCenter server
Select the vCenter server object within the vSphere web client
Select the Manage tab and the Permissions sub tab
Grant the svc-VMware-view account permissions via the View Administrator role you just created

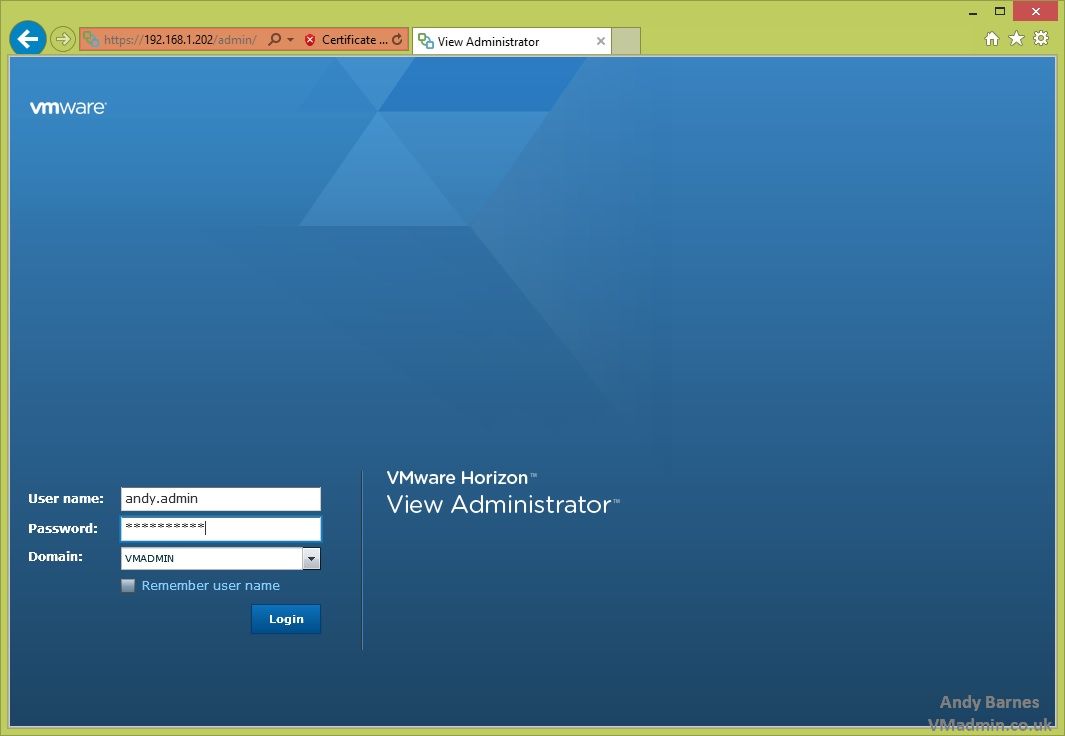
8. Login to View Administrator
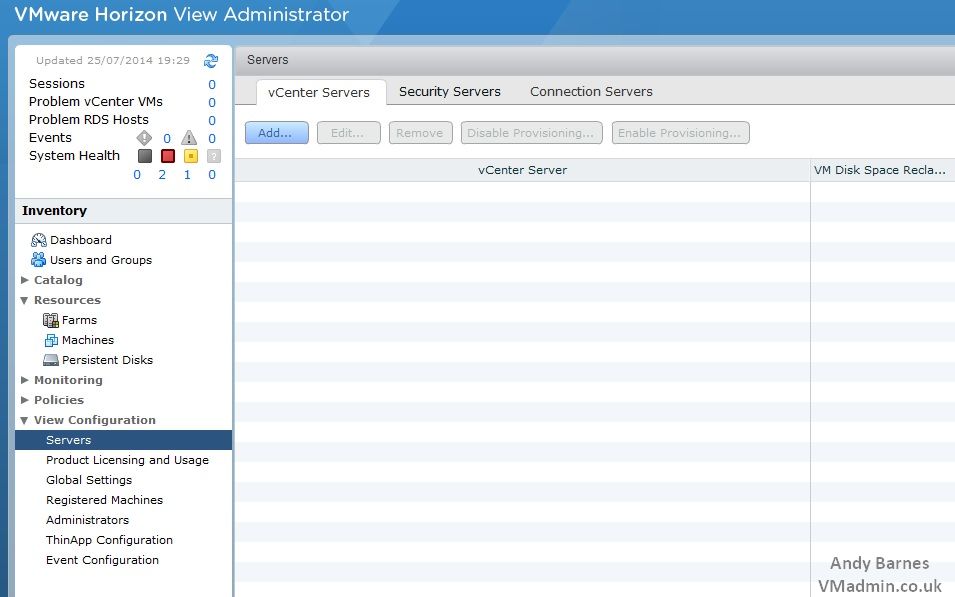
9. Add a vCenter server to View
Go to View Configuration --> Servers --> vCenter Servers
Click Add
10. Enter the IP or FQDN of the vCenter server
Enter the service account details created earlier (svc-vmware-view)
Keep the concurrent provisioning operations at their defaults.
Accept the certificate presented from the vCenter server.

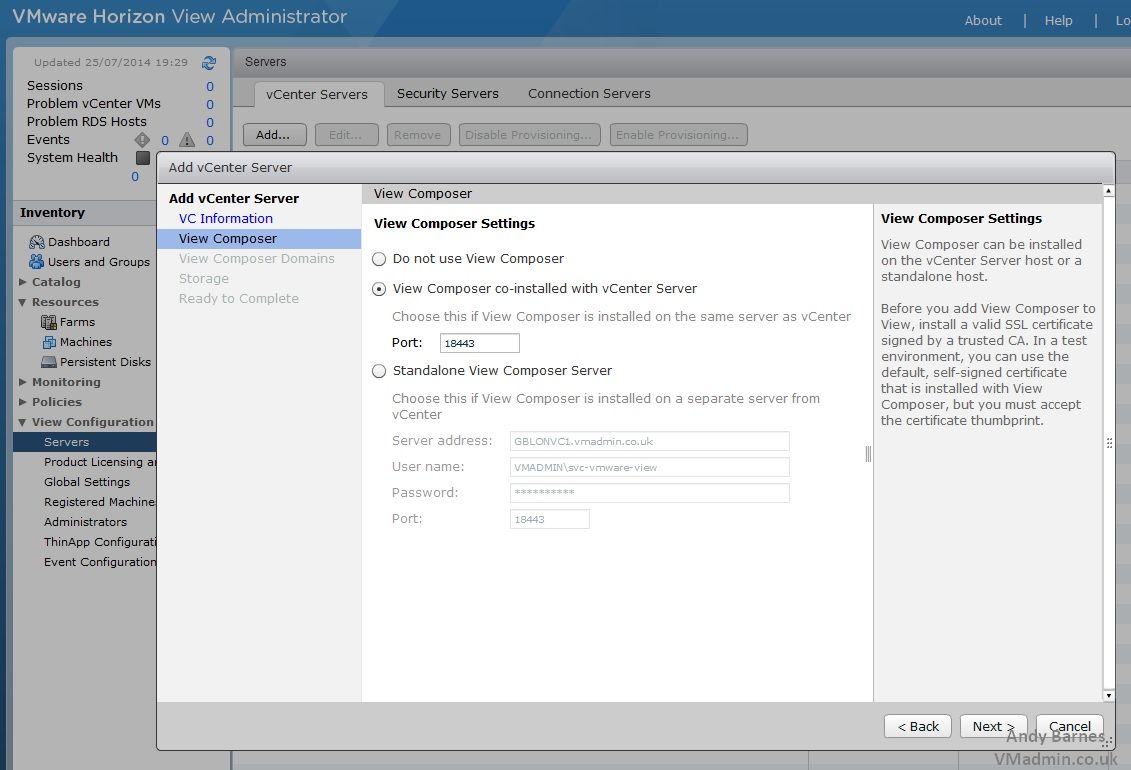
11. Enable View Composer
We installed View Composer on the vCenter server earlier in part 2 which will enable us to create linked clone desktop pools.
Select "View Composer co-installed with vCenter server"
Accept the certificate presented for View Composer.
Note: The account View uses to access vCenter server (svc-vmware-view) must be a member of the local administrators group on the vCenter server otherwise it will be unable to connect to View Composer.
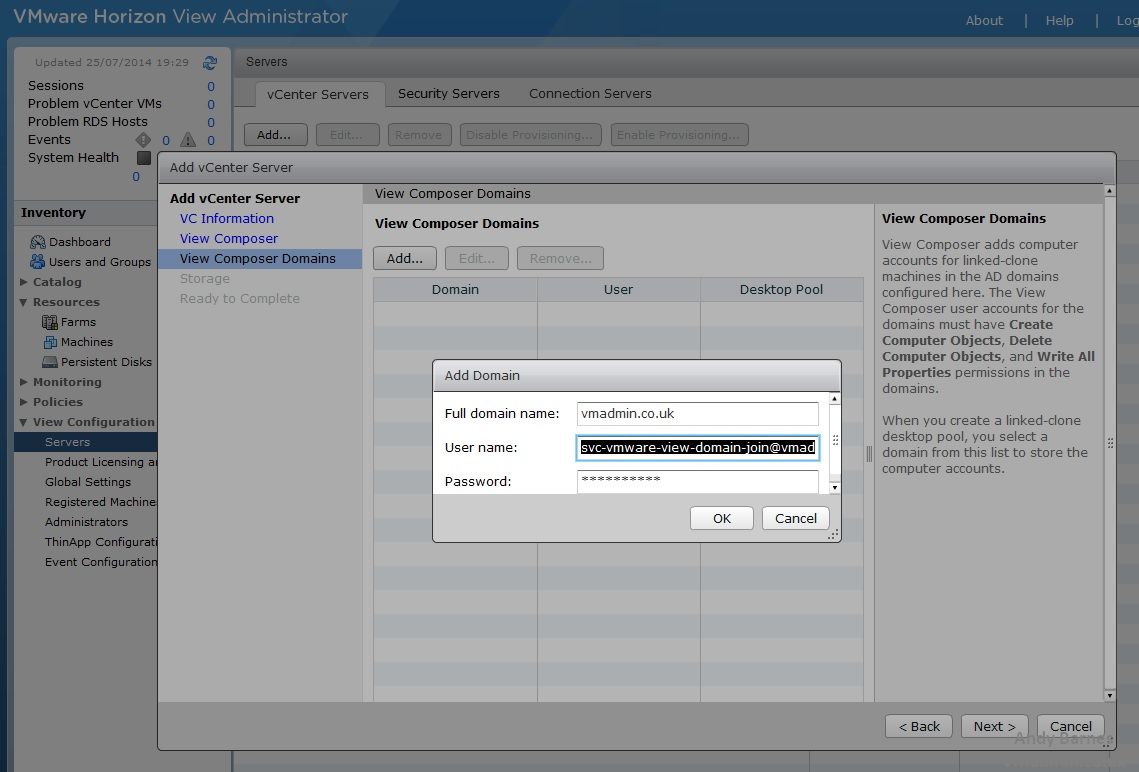
12. Add a domain which View composer will join desktops to.
Click Add.
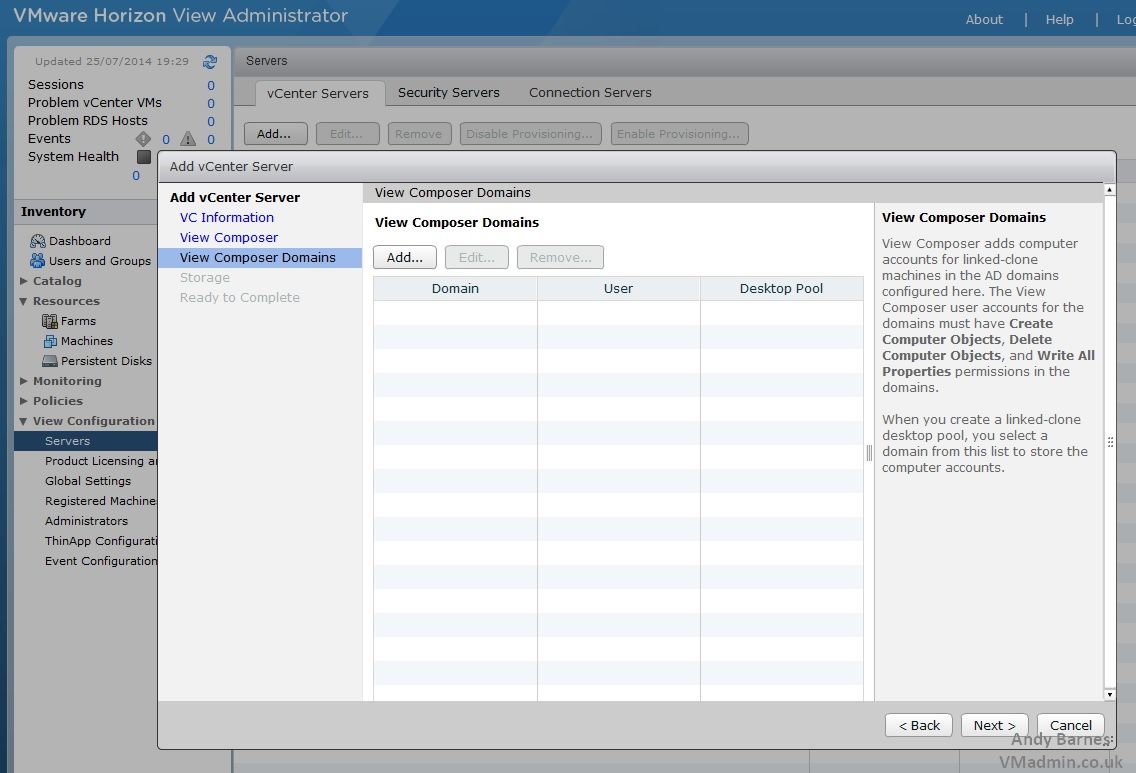
13. Enter the full domain name (i.e. not just the NETBIOS name)
Enter the user account details created earlier to join desktops to the domain.
Tip: Remember this user account must have appropriate permissions to create computer objects within the required OUs of the domain.
Note: I'm using the UPN format for the username because the account name I made is quite long and cut short based on the older Windows 2000 format
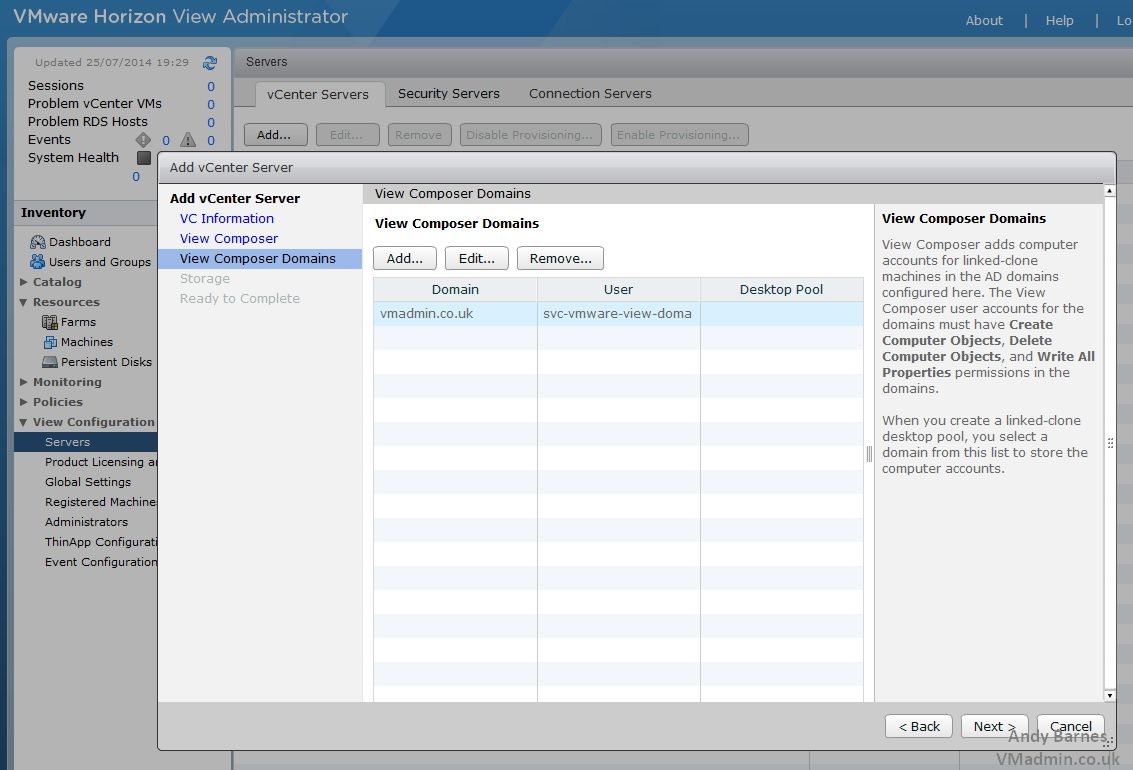
14. Once added the domain will be listed within the View Composer domain below.
You can repeat this for any additional domains (such as trusted domains) which you may need to join desktops to.
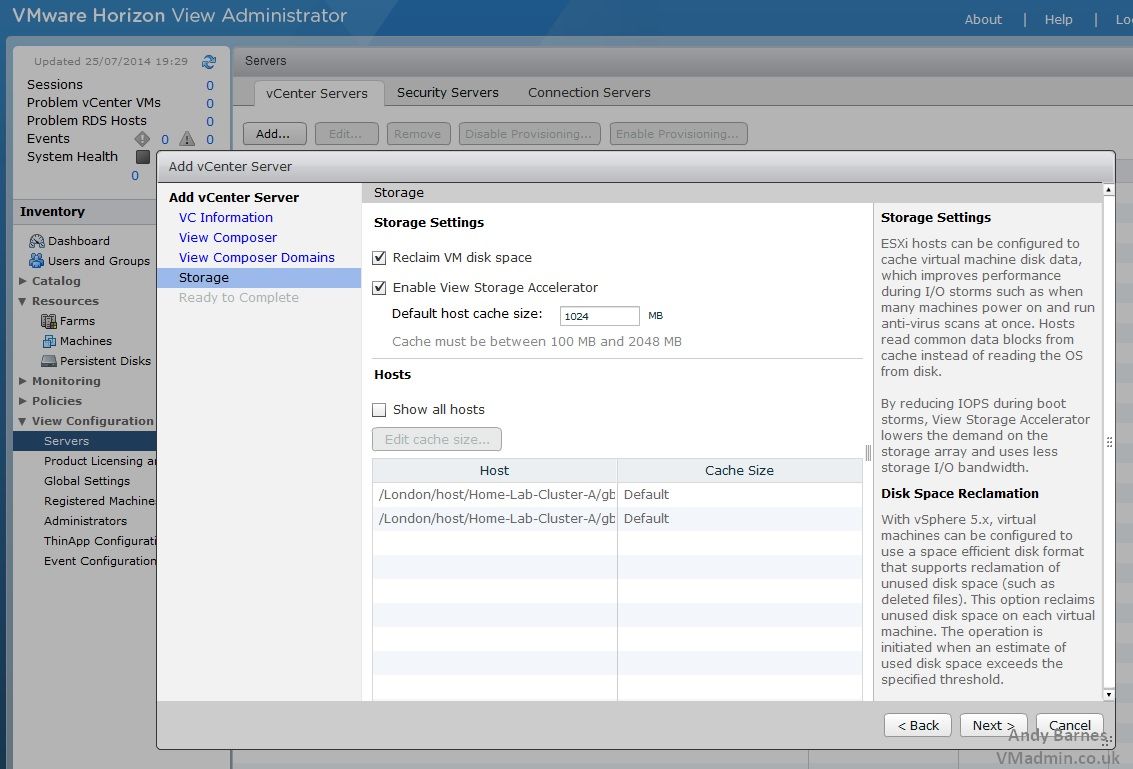
15. Enable View Storage Accelerator and Reclaim VM disk space
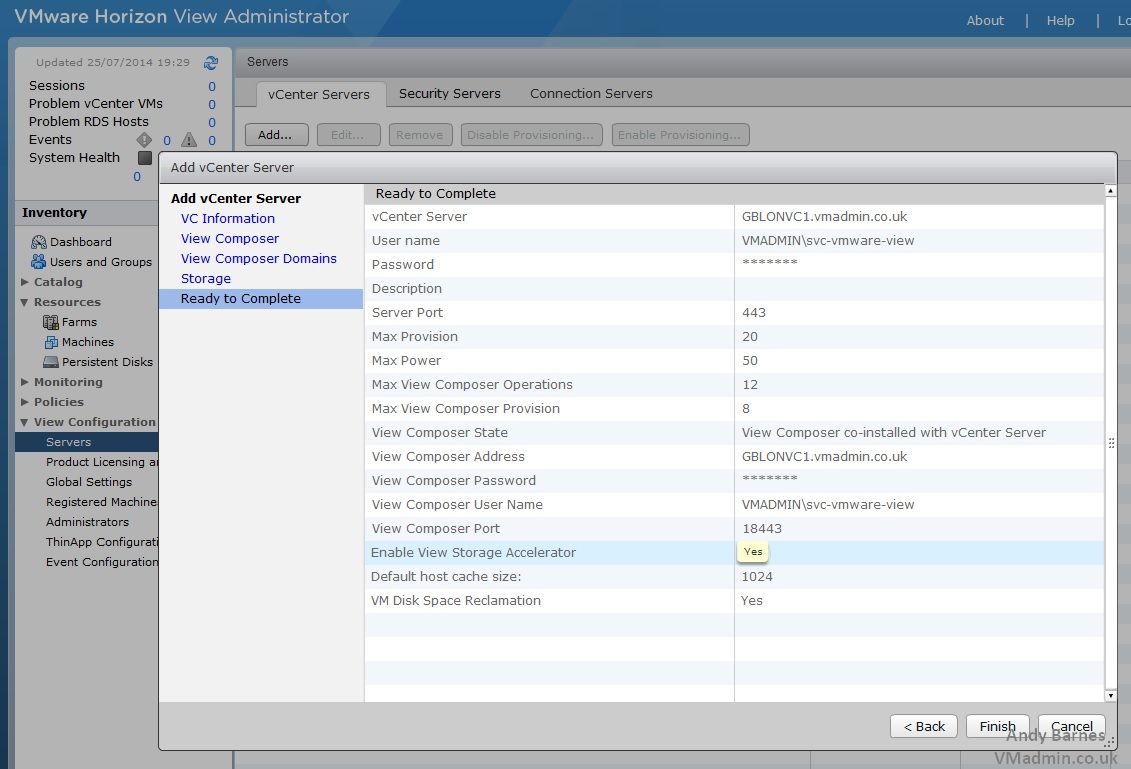
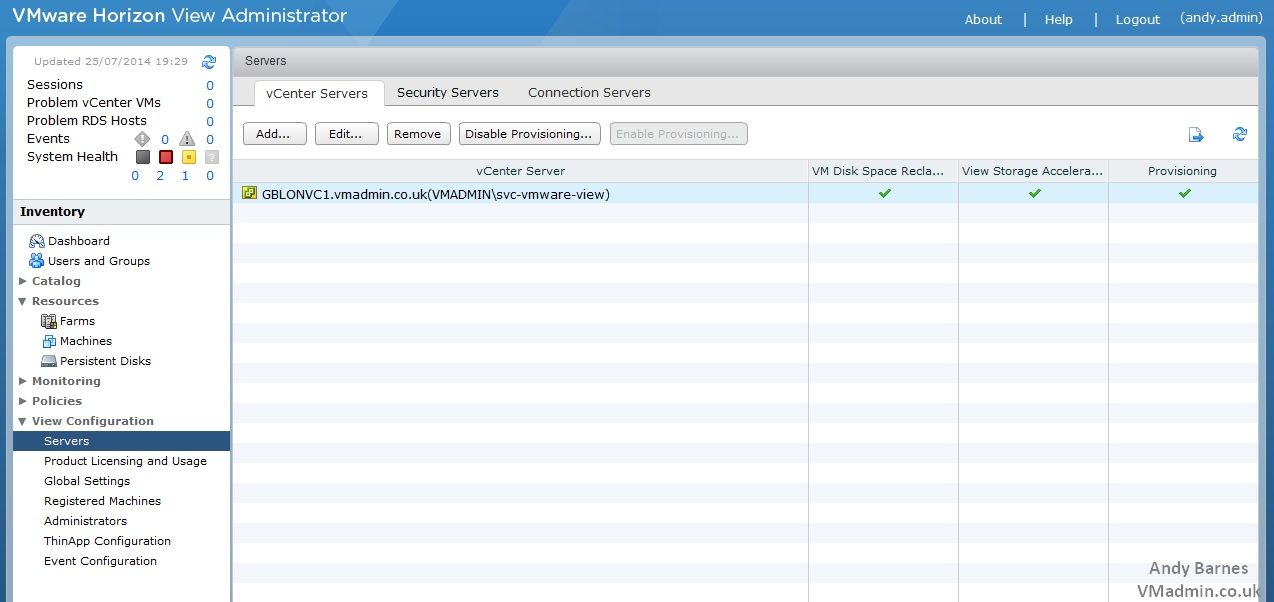
16. Review the settings and Click Finish to add the vCenter server to View Administrator
17. Confirm the vCenter is listed within View.
18. Click on the Security Servers tab.
If View Security servers are added later this is where they will appear.

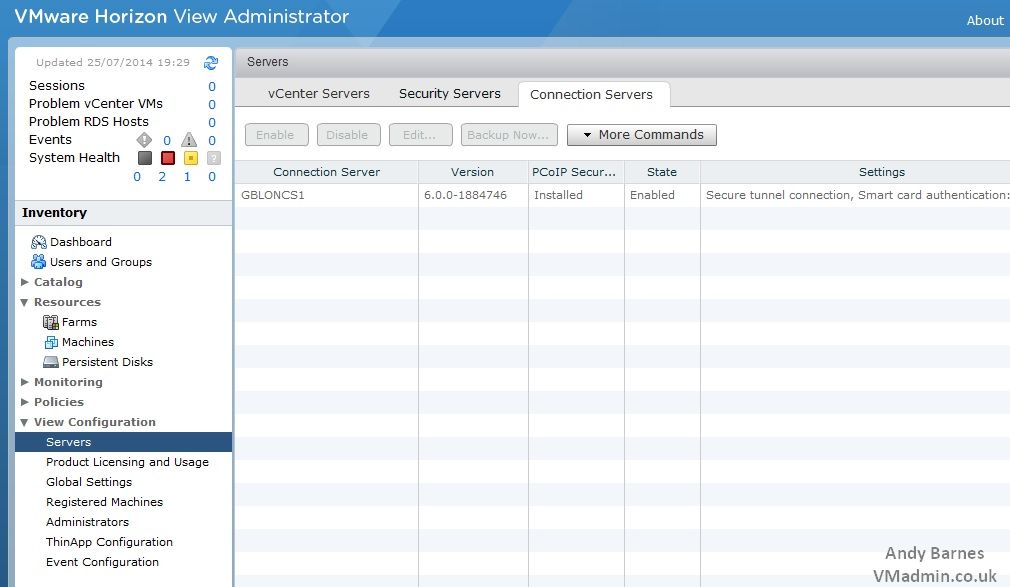
19. Click on the Connection servers tab.
You will see the single View Connection server we have installed listed.
Any additional View connection servers will appear here as they are installed and added to the View Pod.
From here the individual connection servers are configured.
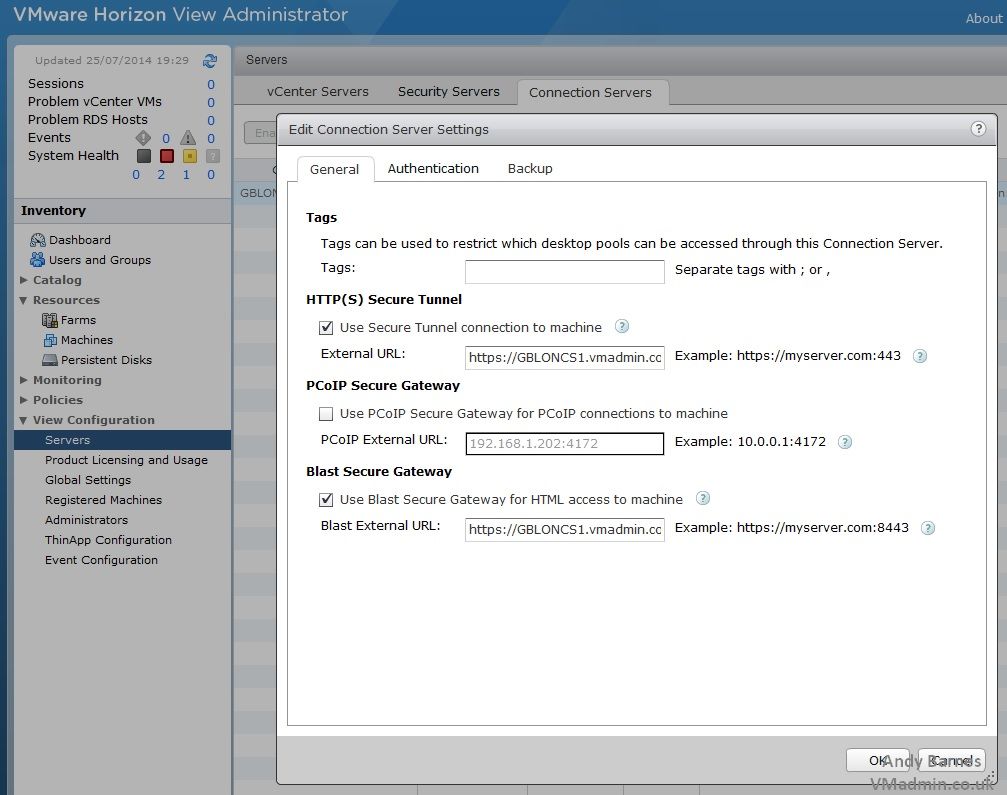
20. Click Edit and review the Connection server settings.
By default the HTTP(S) and Blast secure tunnels are enabled and the PCoIP secure gateway is disabled.
If the secure tunnel is enabled, connections from clients to virtual desktops are tunnelled via the View connection server.
When disabled, connections from clients are direct to the virtual desktops. By having the secure tunnels disabled this reduces the load on the connection server but another benefit is that if the View connection server fails or is updated/rebooted clients are not disconnected from their desktop.
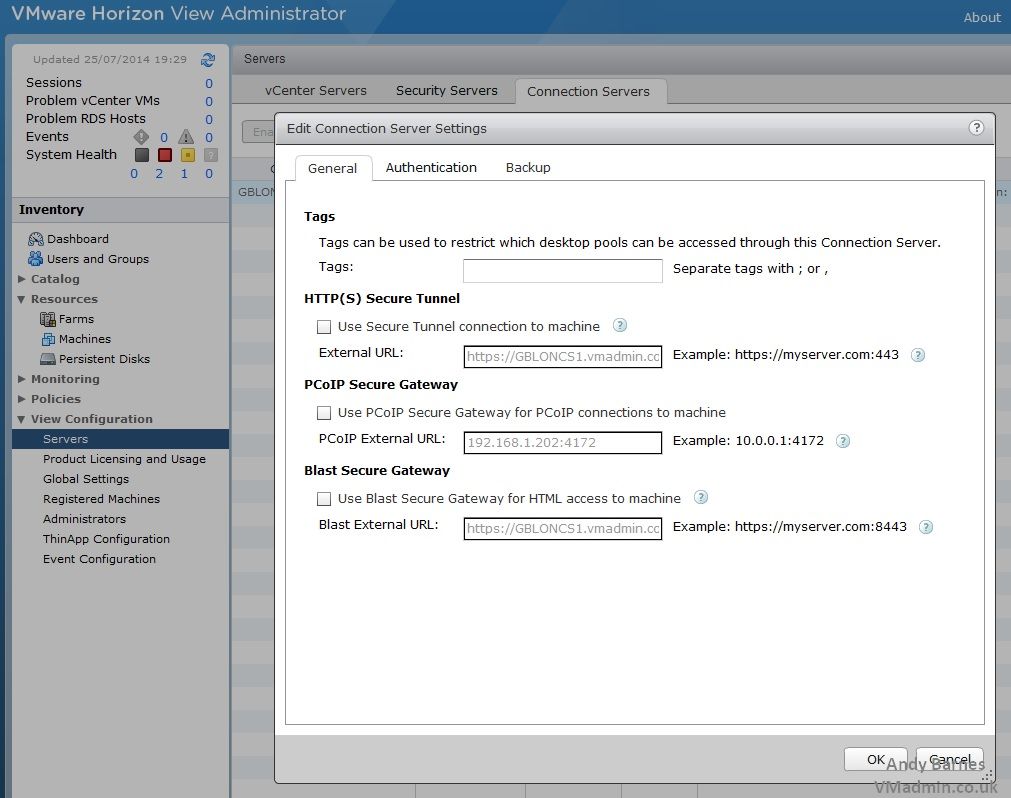
21. Disable all the secure/gateway tunnels so that clients connect direct to their virtual desktop.
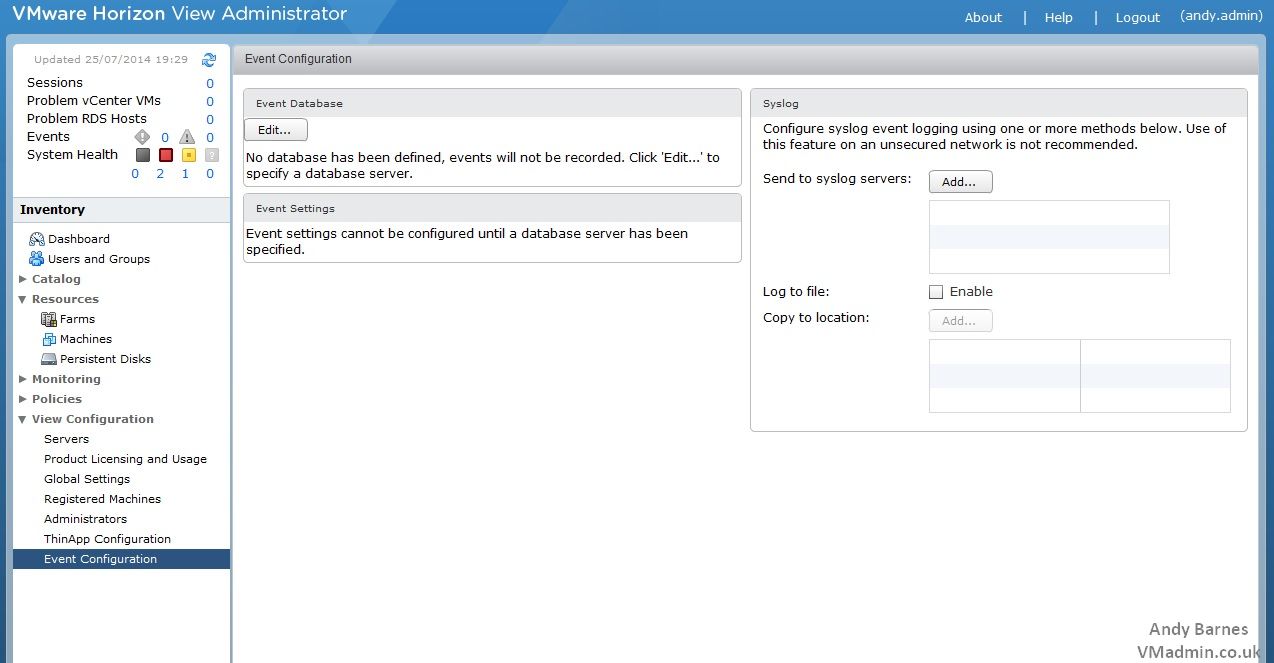
22. Configure the View events database.
The View events database is a SQL database which stores information for events such as auditing of administration changes within View administrator, problems connecting to components and services such as Composer or vCenter and also user events such as connecting to a desktop.
The View events database makes it possible to troubleshoot problems which otherwise would require looking at the verbose log files.
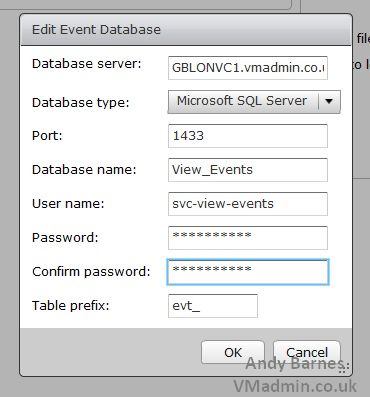
23. Enter the FQDN and port of the SQL server
Enter the Database name followed by the username/password for the events database
Note: It is recommended this is a dedicated database, however you could use an existing database such as the vCenter database in a POC due to the events database using a table prefix.
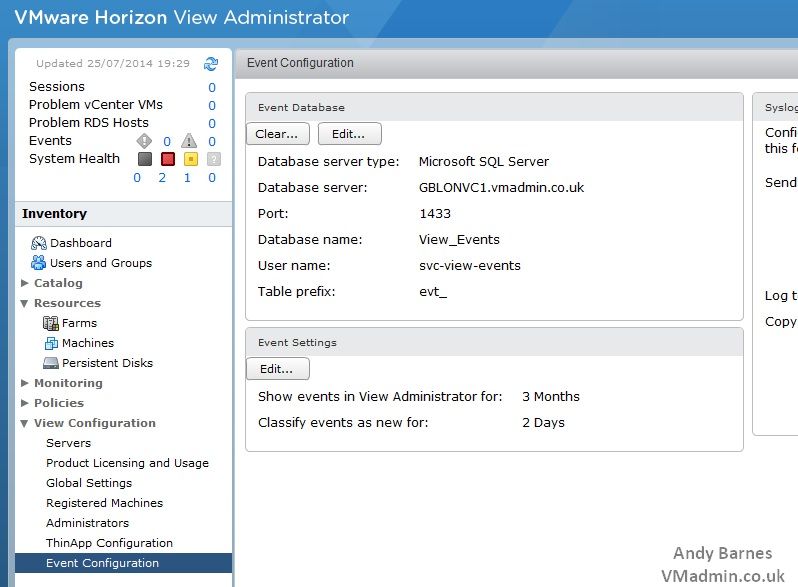
24. Confirm the event database settings have been applied.
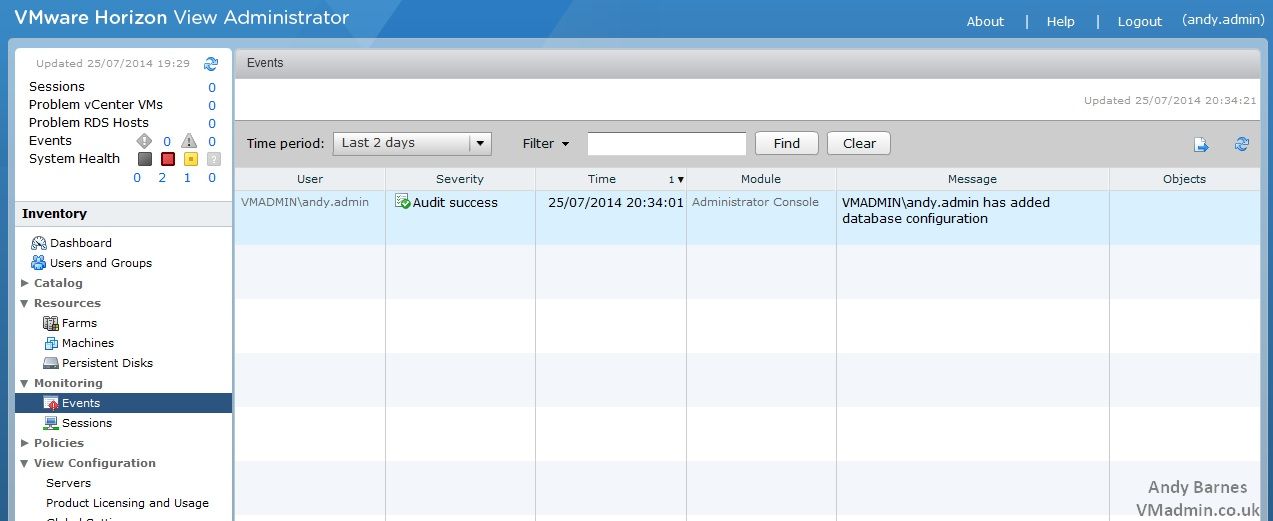
25. Go to Monitoring --> Events
All events are available from here and it is possible to filter results based on any string
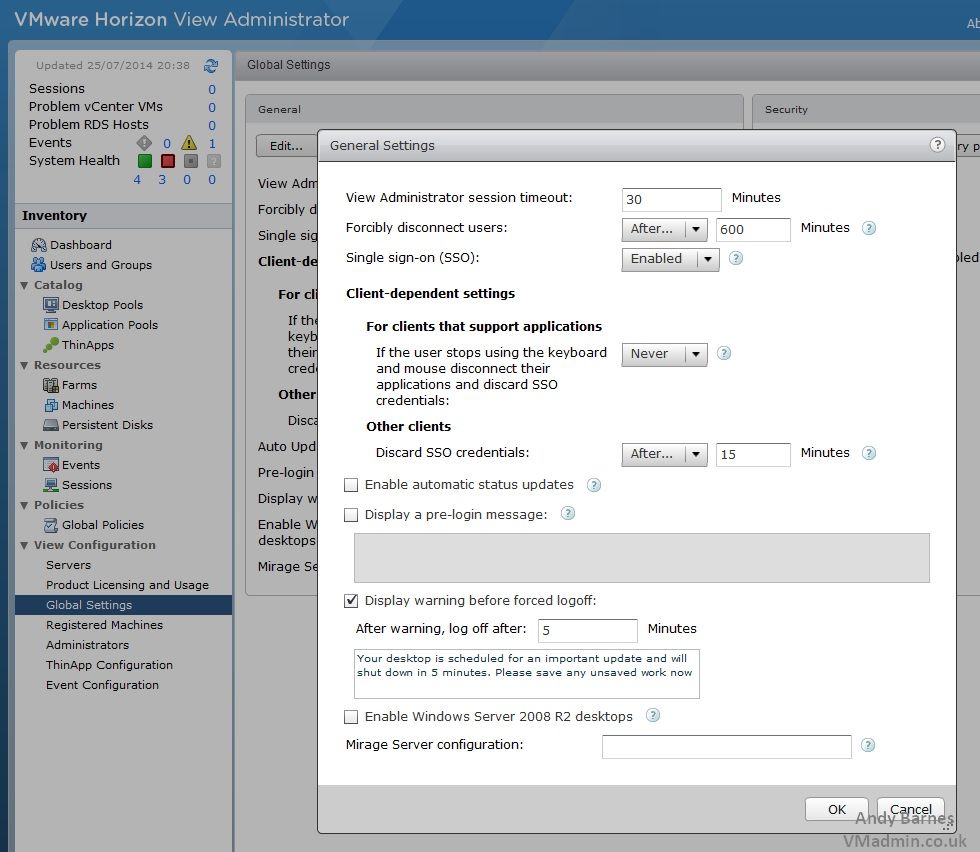
26. Go to View Configuration --> Global Settings
Click Edit under General
You may wish to increase the View Administration session timeout value to save having to re-login during longer periods of work such as when deploying new desktop pools.
Note: Here is where you can enable the use of Window Server 2008 R2 as a desktop source
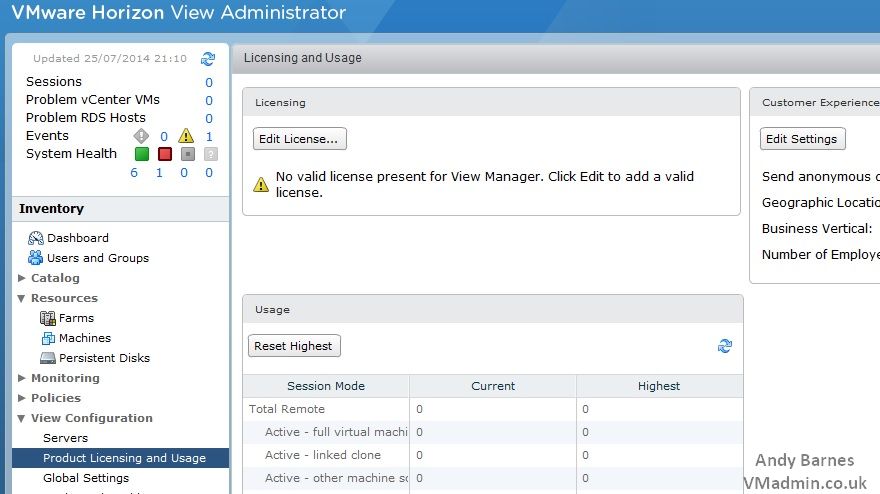
27. Go to View Configuration --> Product Licensing and Usage and enter you're Horizon View license key.
If you do not enter a license key you will be unable to connect to desktops.
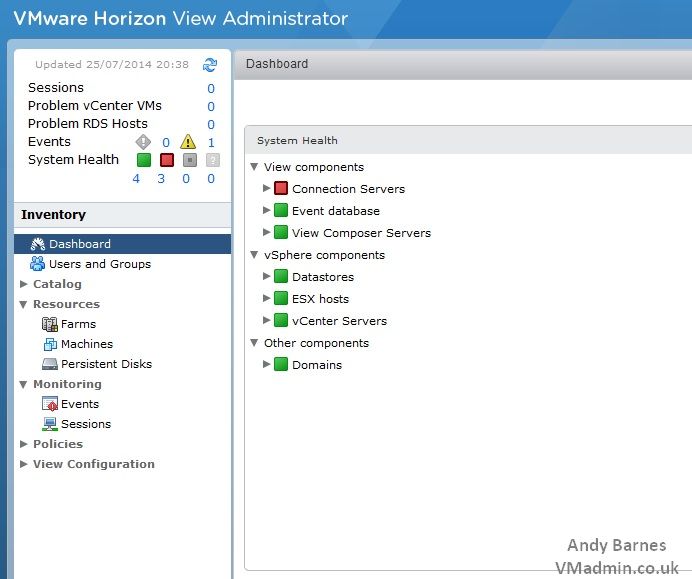
28. Looking at the dashboard view you will now see additional components under system health.
All objects should have a green status, however note our connection server will still show as red simply due to we are still using a self-signed certificate at this point.
We will change this later but it does not affect the operation of View other than displaying a warning in the system health and when connecting to the desktop (which can be disabled).
If you missed any of the previous parts of the series or want go back/forward here is the jump list:
- Horizon View 6.0 - Part 1 - Installing Horizon View Connection Server
- Horizon View 6.0 - Part 2 - Installing Horizon View Composer
- Horizon View 6.0 - Part 3 - Configuring Horizon View Administrator, Events DB, vCenter and Active Directory
- Horizon View 6.0 - Part 4 - Creating a Windows 8.1 Golden/Master/Template Image
- Horizon View 6.0 - Part 5 - Creating an Automated Desktop Pool with Linked Clones
- Horizon View 6.0 - Part 6 - Creating an RDS Host Farm and Application Pool
- Horizon View 6.0 - Part 7 - Creating an RDS Desktop Pool
Share this blog post on social media:
Tweet


Latest Blog Posts
- vSphere 7 U1 - Part 3 - Creating a Datacenter, HA/DRS Cluster and Adding a Host
- vSphere 7 U1 - Part 2 - Deploying vCenter 7.0 U1 VCSA
- vSphere 7 U1 - Part 1 - Installing ESXi 7.0 U1
- Veeam CBT Data is Invalid - Reset CBT Without Powering Off VM
- View Administrator Blank Error Dialog/Window After Upgrade