If you missed any of the previous parts of the series or want go back/forward here is the jump list:
- Horizon View 6.0 - Part 1 - Installing Horizon View Connection Server
- Horizon View 6.0 - Part 2 - Installing Horizon View Composer
- Horizon View 6.0 - Part 3 - Configuring Horizon View Administrator, Events DB, vCenter and Active Directory
- Horizon View 6.0 - Part 4 - Creating a Windows 8.1 Golden/Master/Template Image
- Horizon View 6.0 - Part 5 - Creating an Automated Desktop Pool with Linked Clones
- Horizon View 6.0 - Part 6 - Creating an RDS Host Farm and Application Pool
- Horizon View 6.0 - Part 7 - Creating an RDS Desktop Pool
1. Login to View Administrator
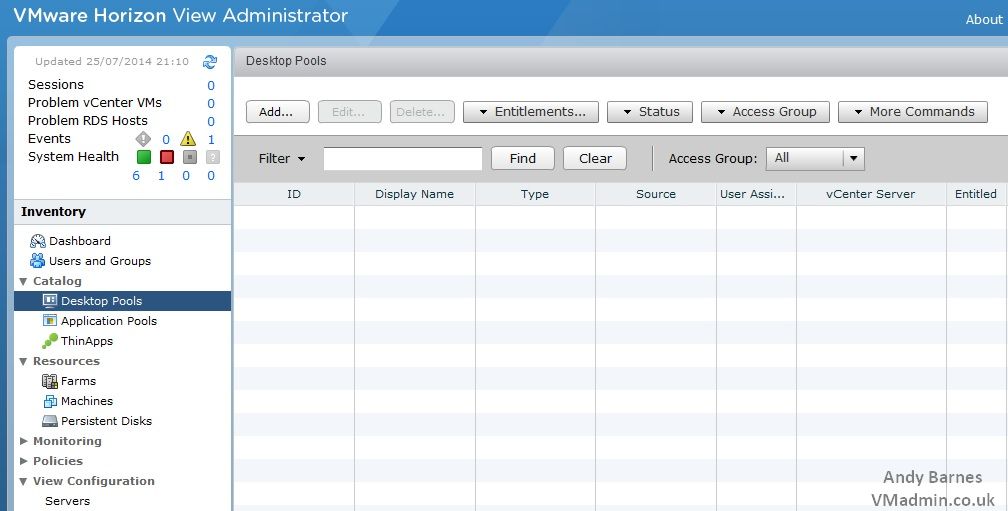
2. Go to Catalog --> Desktop Pools
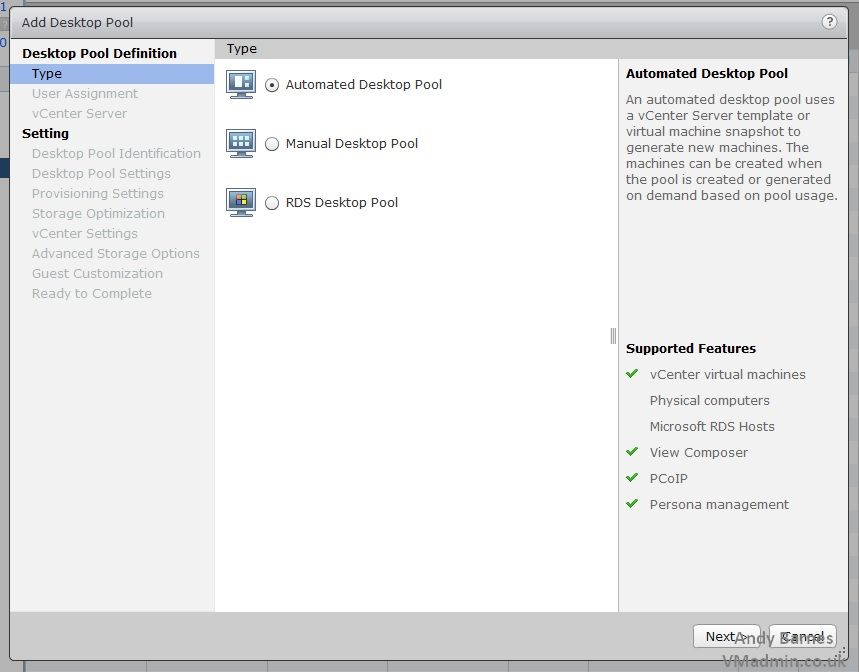
3. Click Add..
4. Select Automated Desktop Pool
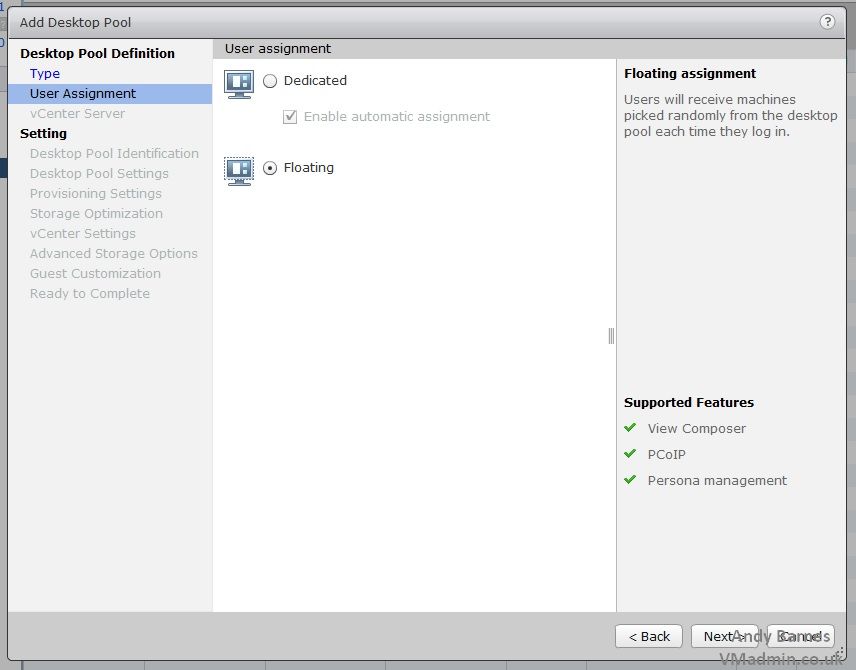
5. Select Floating user assignment
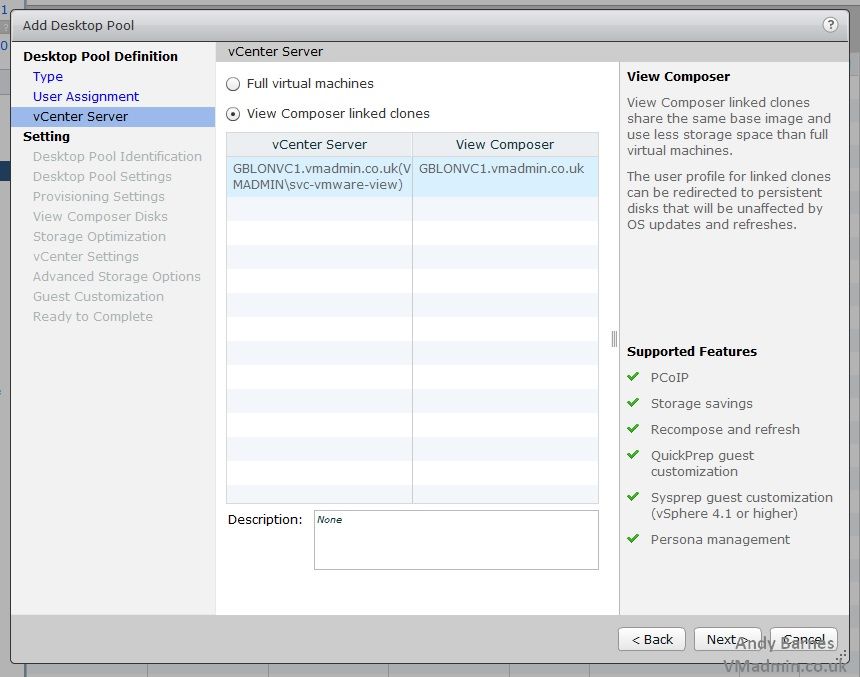
6. Select View Composer Linked Clones
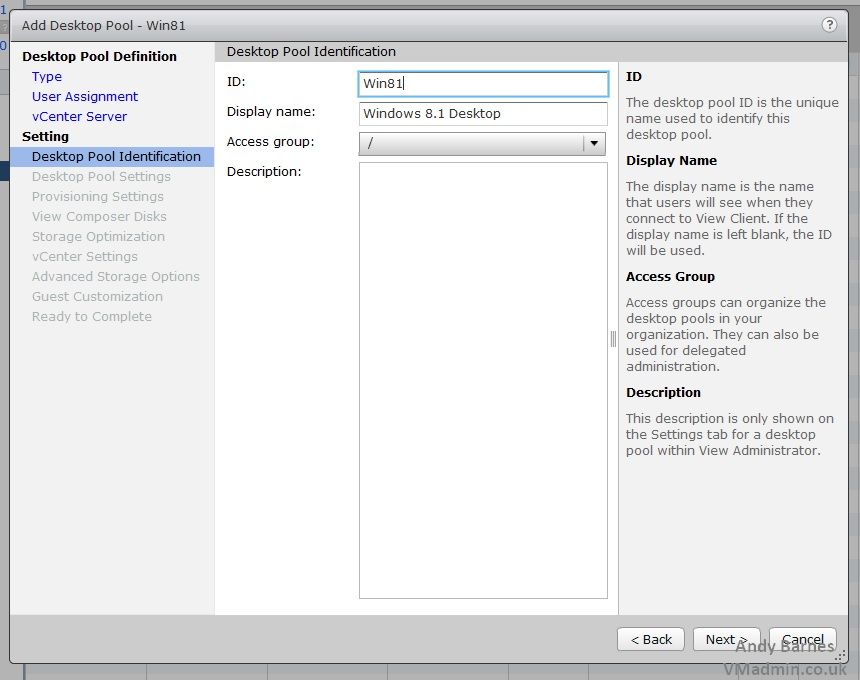
7. Enter an ID for the pool (this cannot be changed once set)
Enter a useful display name for the pool (which users will see)
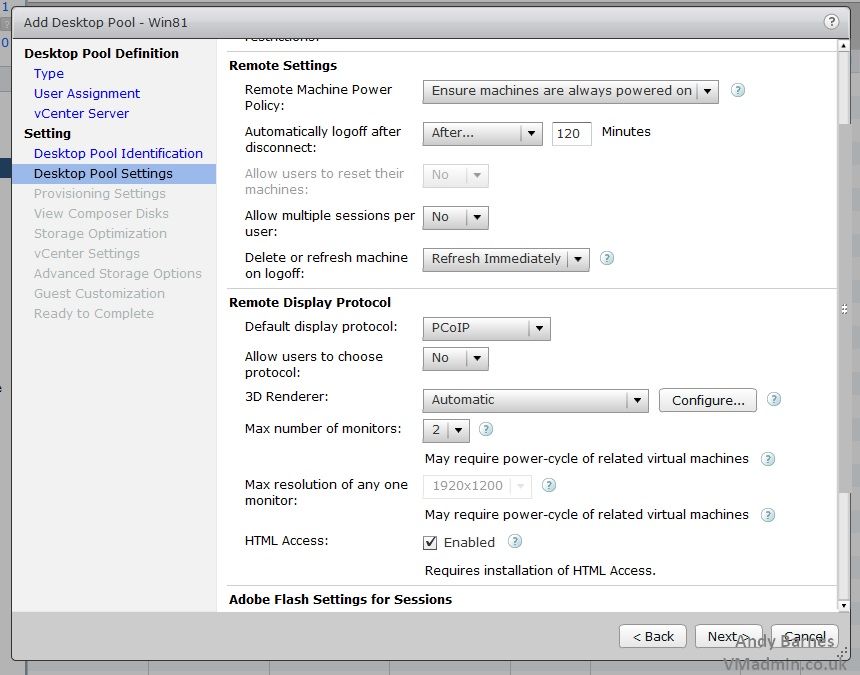
8. Configure the pool settings
Set the remote machine power policy to "Ensure machines are always powered on"
Set automatically logoff after disconnect to "After 120 minutes"
Set Delete ore refresh to "Refresh immediately"
Set Allow users to choose the protocol to "No"
Set 3D renderer to "Automatic"
Set HTML Access to "Enabled"
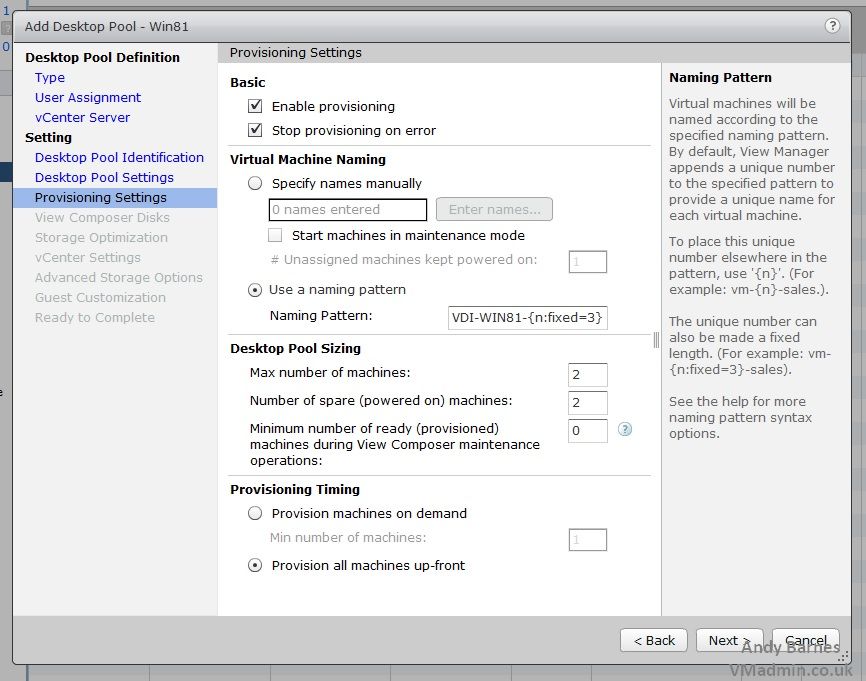
9. Set a naming pattern for the virtual desktops provisioned in the pool
Select "Use a naming pattern"
Enter the required desktop naming pattern (e.g. VDI-WIN81-{n:fixed=3}
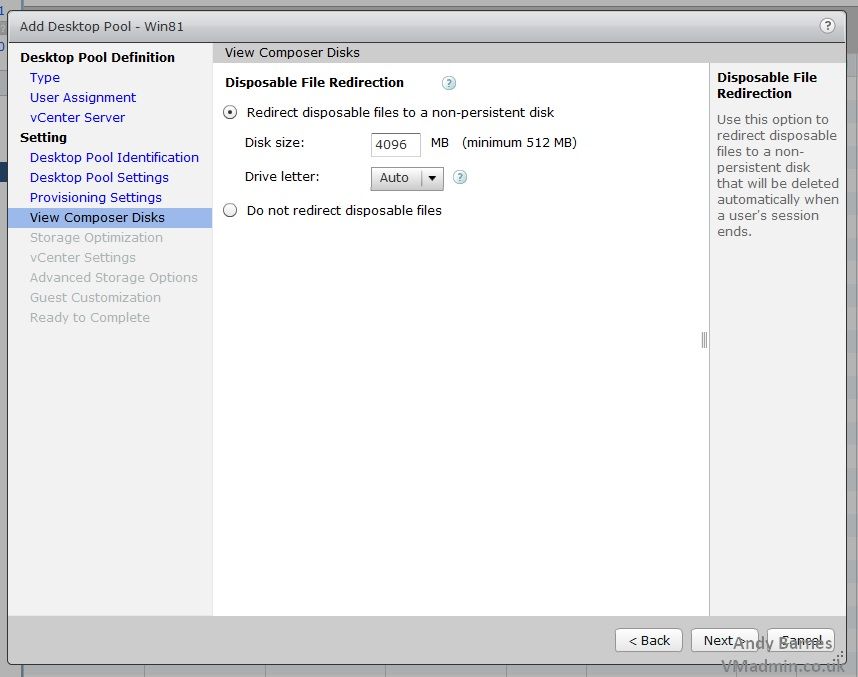
10. Enable disposable file redirection
Keep the defaults
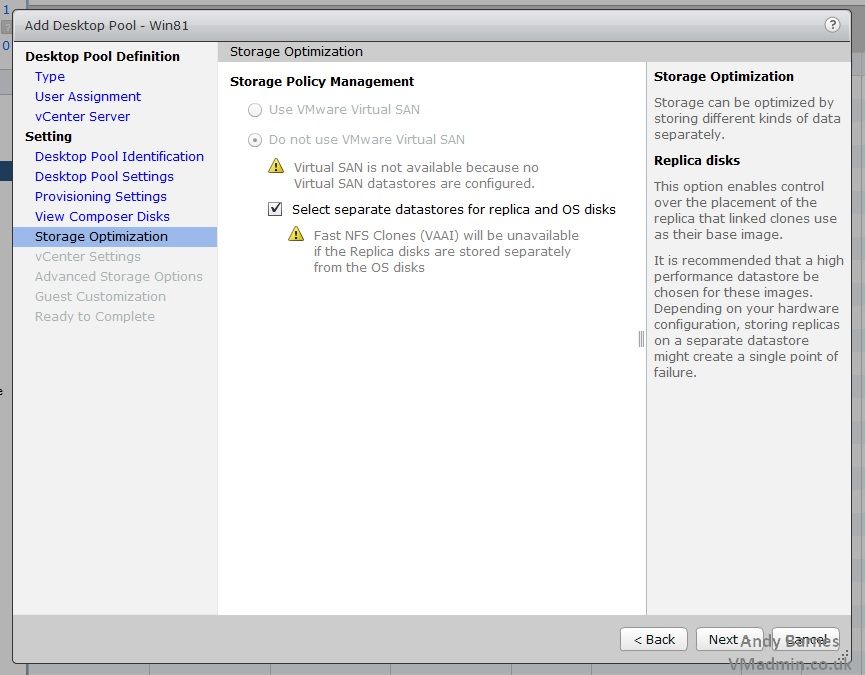
11. Tick "Select separate datastores for replica and OS disks"
This will allow the replica disk which is read from by all linked clones to be placed on a VMFS datastore which is on SSD storage (if required - this can improve desktop performance).
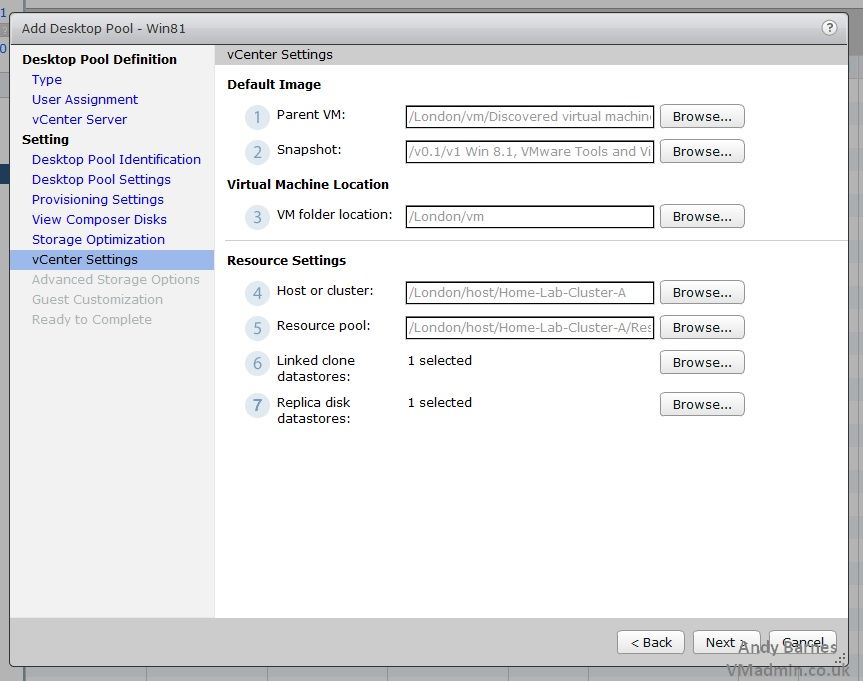
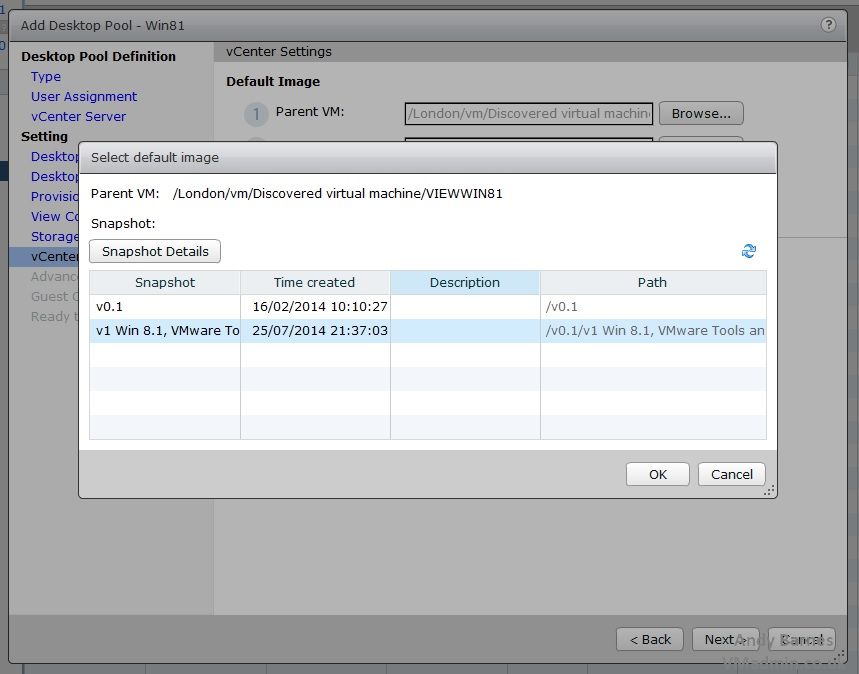
12. Select the parent VM (the master image we created previously)
Select a snapshot (the VM must have been powered off when the snapshot was created)
Select the folder the VMs should be created within
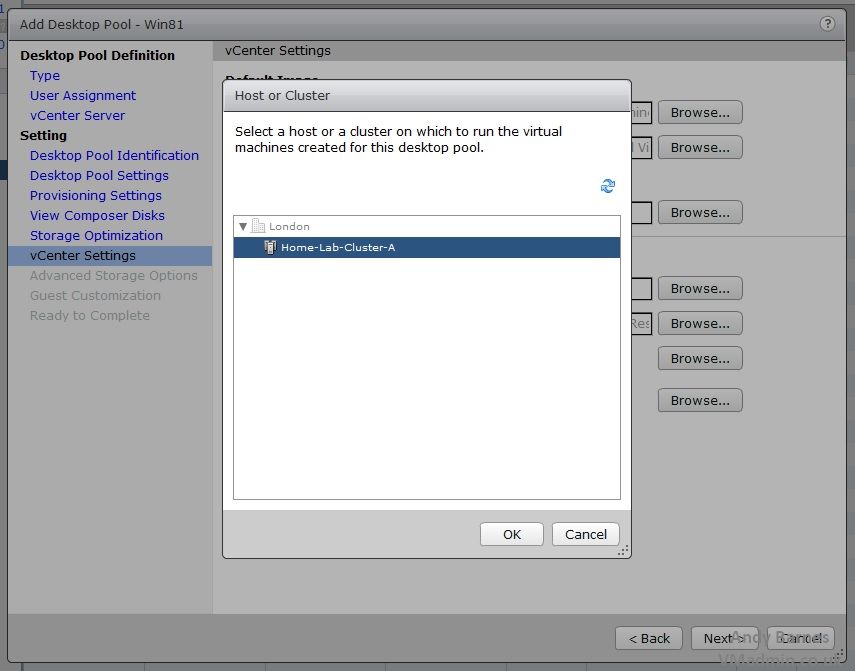
Select the cluster and resource pool the desktops within the pool should be provisioned within
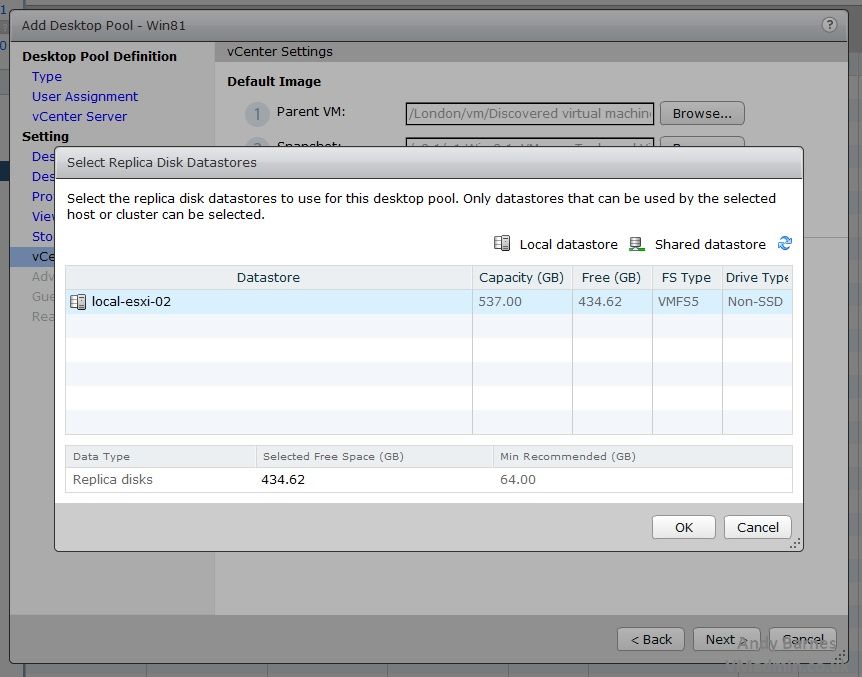
Select the datastore(s) for the linked clone disks and the datastore for the replica disk
13. Select the snapshot
14. Select the cluster to provision the desktop within
15. Select the replica datastore
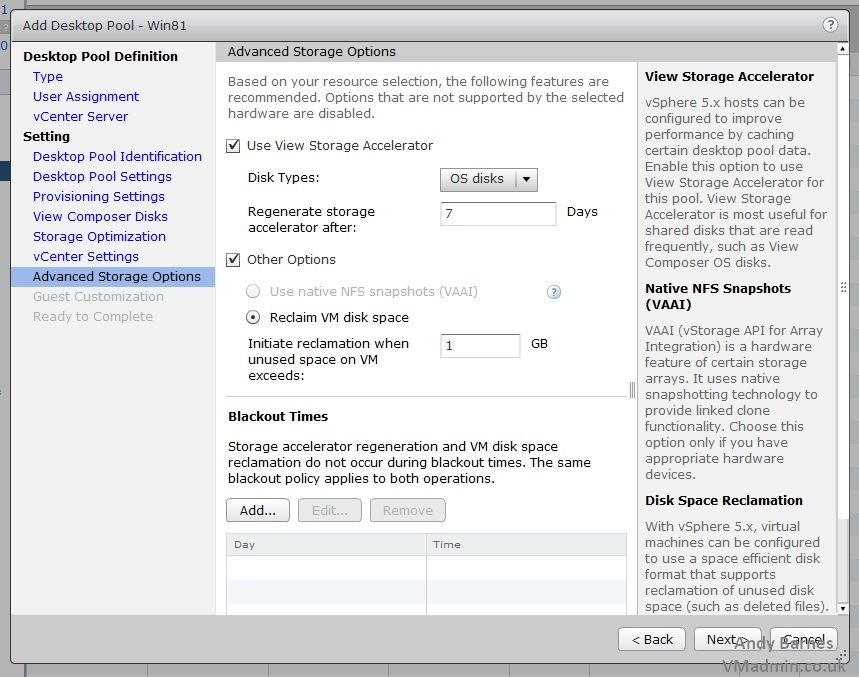
16. Enable View Storage Accelerator and VM disk space reclamation
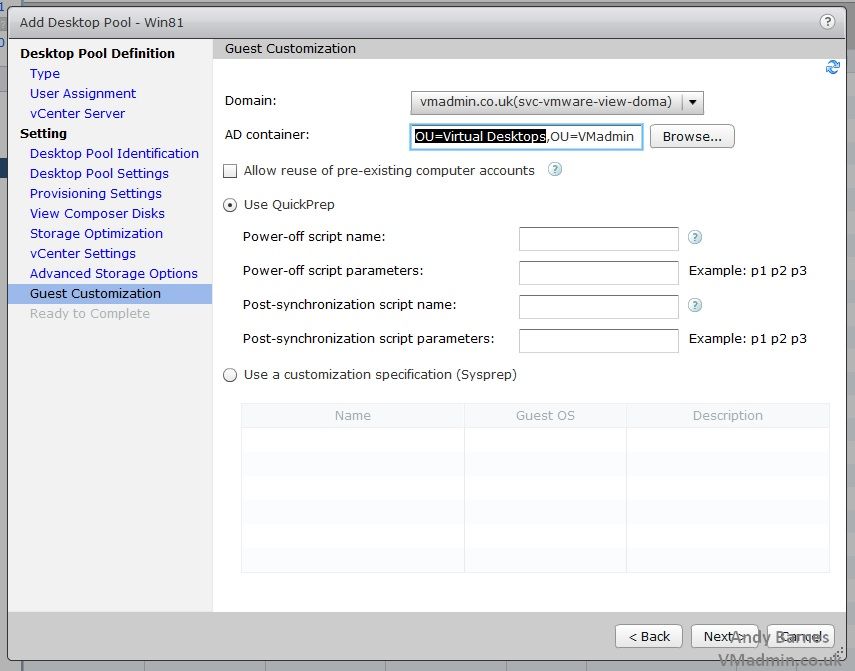
17. Select the domain and OU which the virtual desktops should be joined to and placed within
18. Tick "Allow reuse of pre-existing computer accounts"
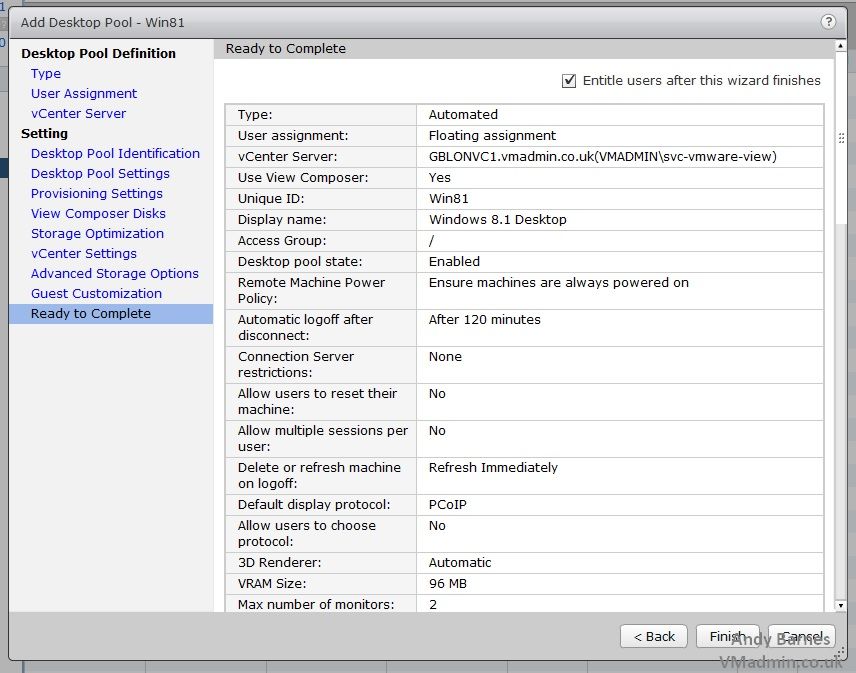
19. Review the desktop pool settings and Tick "Entitle users after this wizard finishes" Click finish.
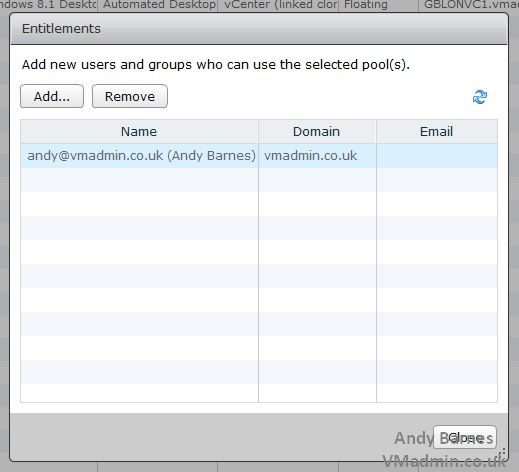
20. Entitle the require users to the desktop pool by adding the AD users or groups when the entitlement dialog is displayed after the wizard closes.
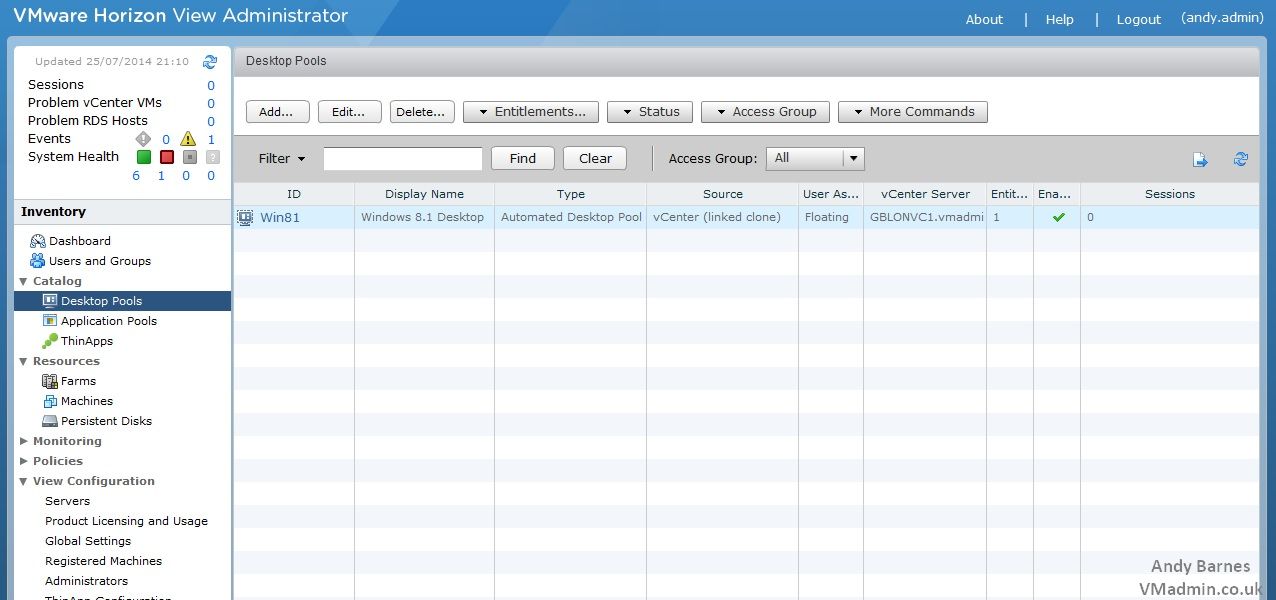
21. The new desktop pool will be listed under Catalogs and Desktop Pools.
Clicking on the pool will display further details about the pool.
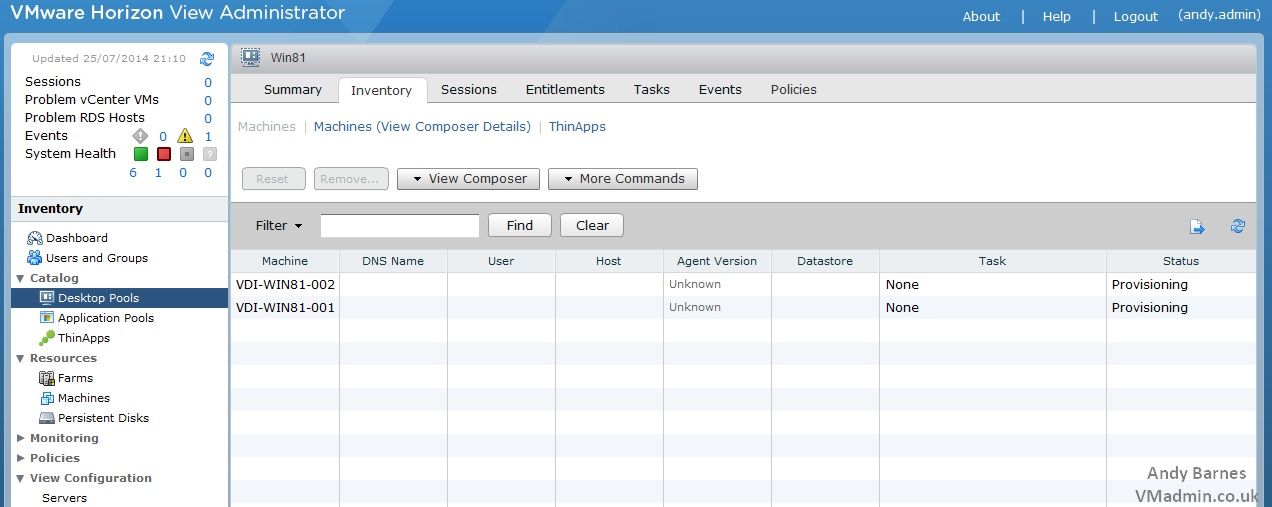
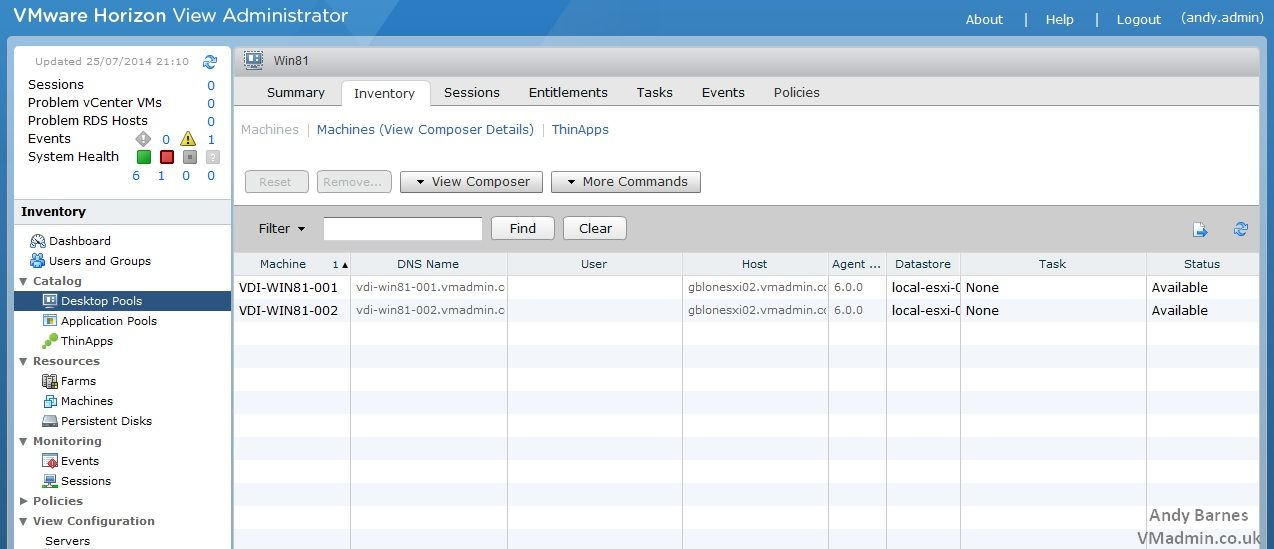
22. Under the "Inventory" tab the desktops within the pool will be shown along with their status.
Notice the desktops in the pool have a status of "Provisioning", this is because vCenter is currently creating the replica and linked clones.
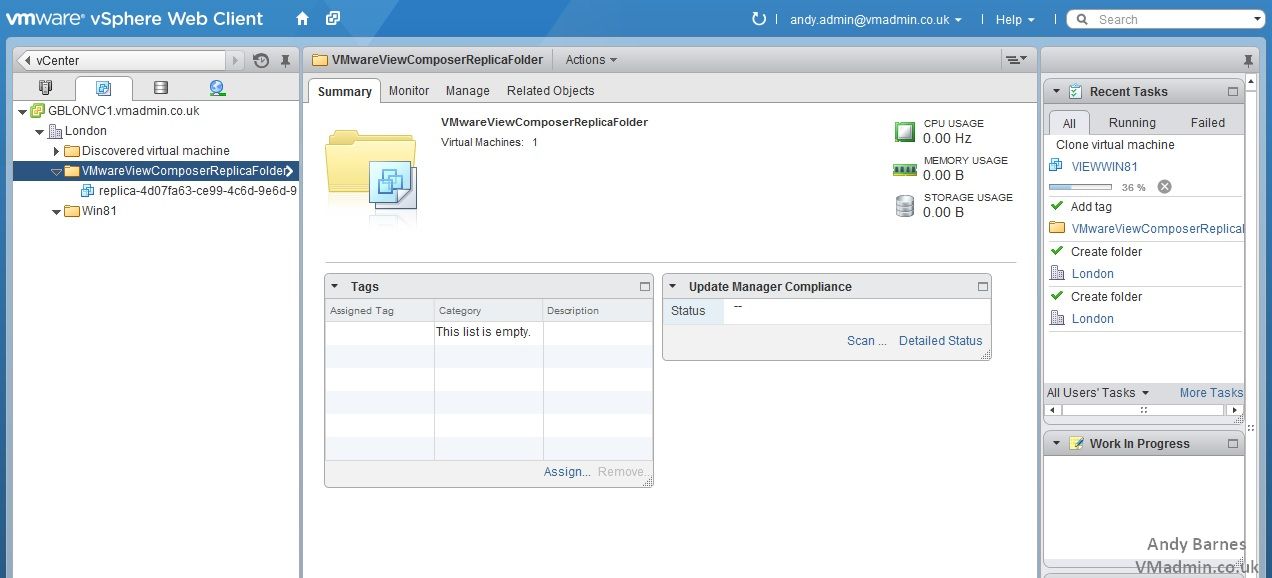
23. If you change to the vSphere Web client you will notice a number of tasks running.
The maser image will be cloned to a replica VM and a new folder will be created named "VMwareViewComposerReplicaFolder" which must NEVER be moved, renamed or deleted!
You will also notice a folder is created based on the pool ID (e.g. WIN81) and this must not be modified otherwise View will reports the VMs as missing.
24. Looking at the vCenter Hosts and Clusters View, the desktops will be created and powered on, going through a customisation stage and joined to the domain before the are available to use.
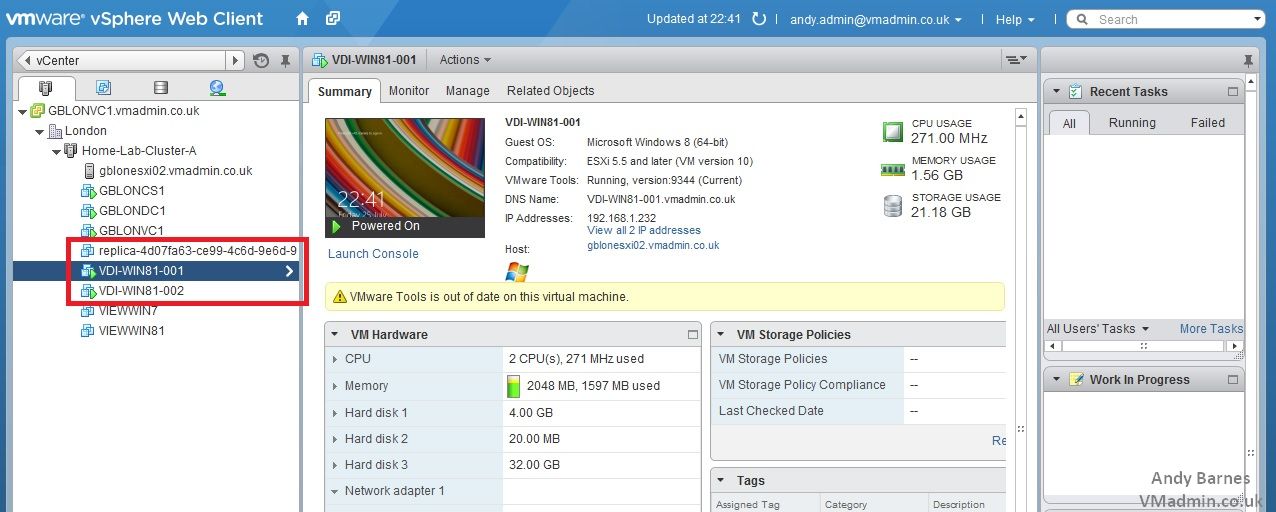
25. Once the provisioning and customisation stage has completed View Administrator will report the status as "Available".
At this point entitled users can now connect to desktops within the pool.
Notice also that the DNS name now shows the correct AD domain and the View agent version is reporting to View Administrator.
If you have a VM which status is "Error", logon to the desktop and check the network/DHCP settings are correct. Ensure you can resolve the name of the connection servers and telnet the required ports. Then check the desktop can get a license from the KMS server. In most cases DHCP settings are the common cause of desktops reporting an error.
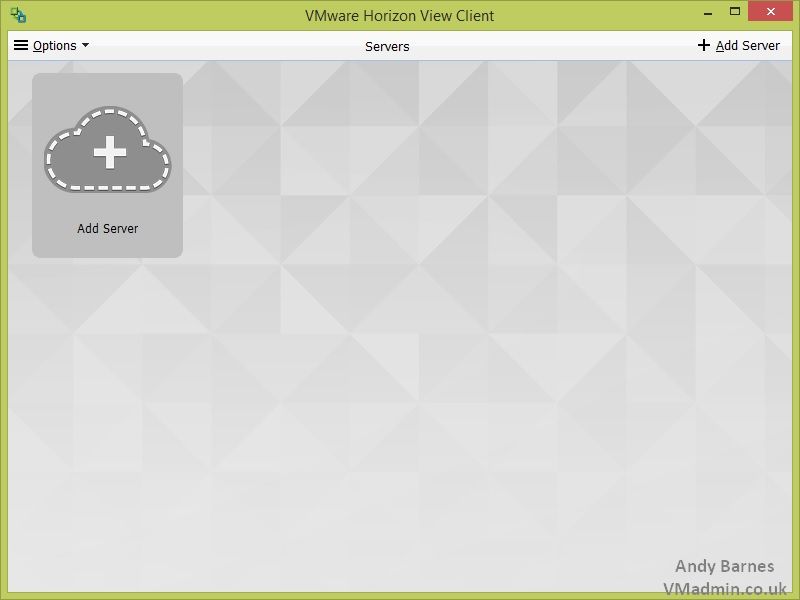
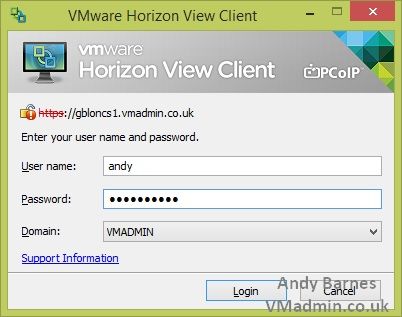
26. On a PC install the VMware Horizon View Client or use a thin/zero client to connect to the desktop.
Click Add server and enter the FQDN or IP of the View Connection server
27. Enter the authentication details of a user entitled to the desktop pool.
Note: You will get a warning about the certificate not being trusted (this is because it is a self signed cert at the moment).
28. Click the desktop pool to connect to it
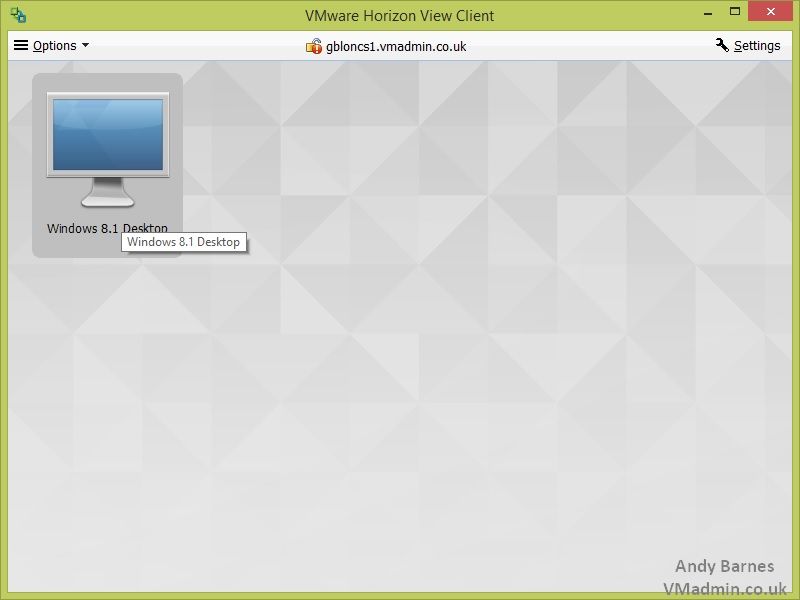
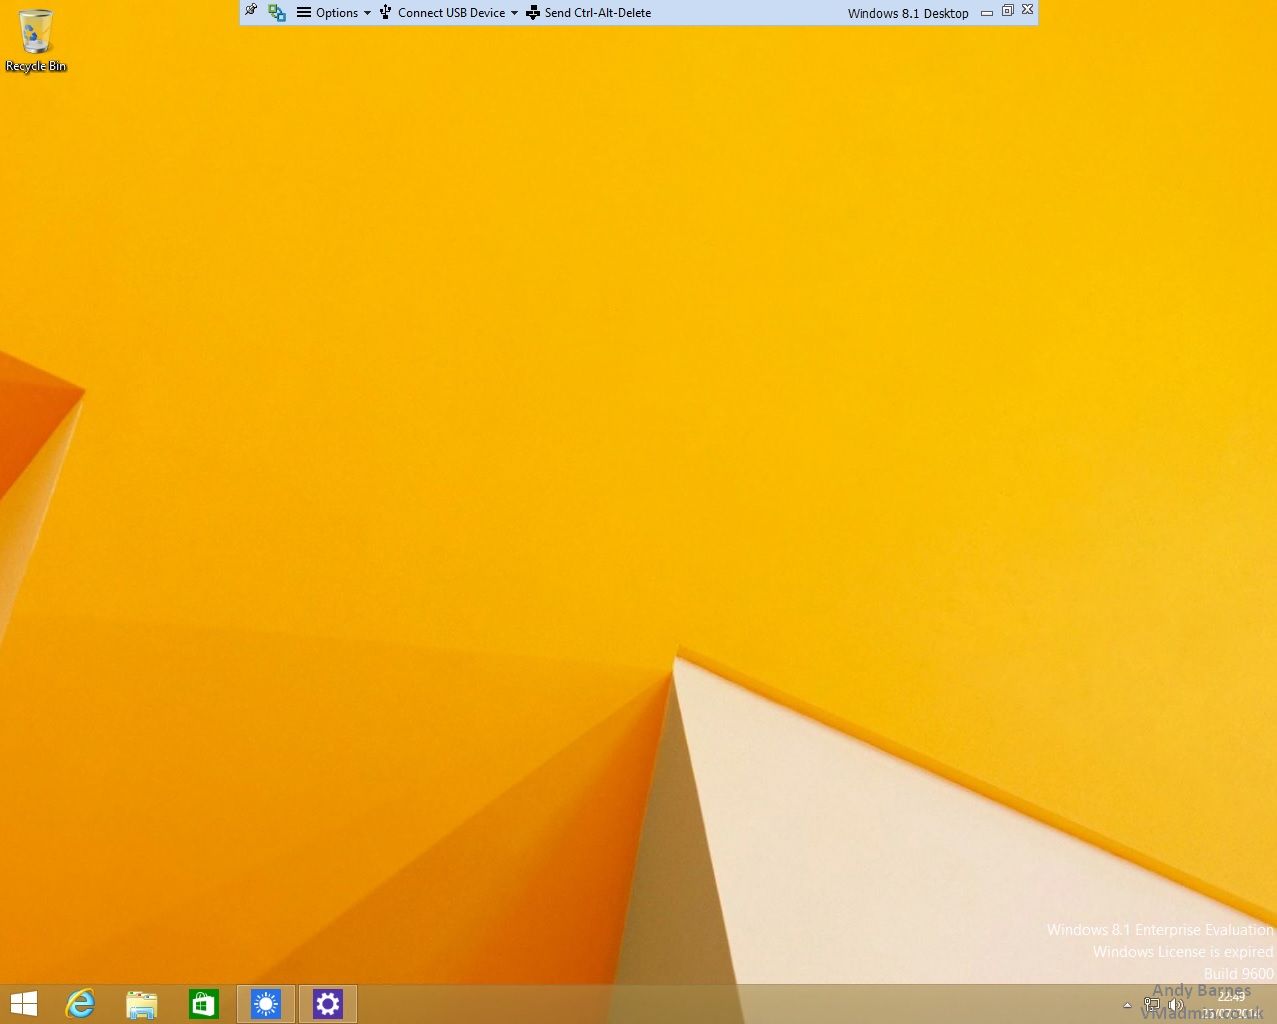
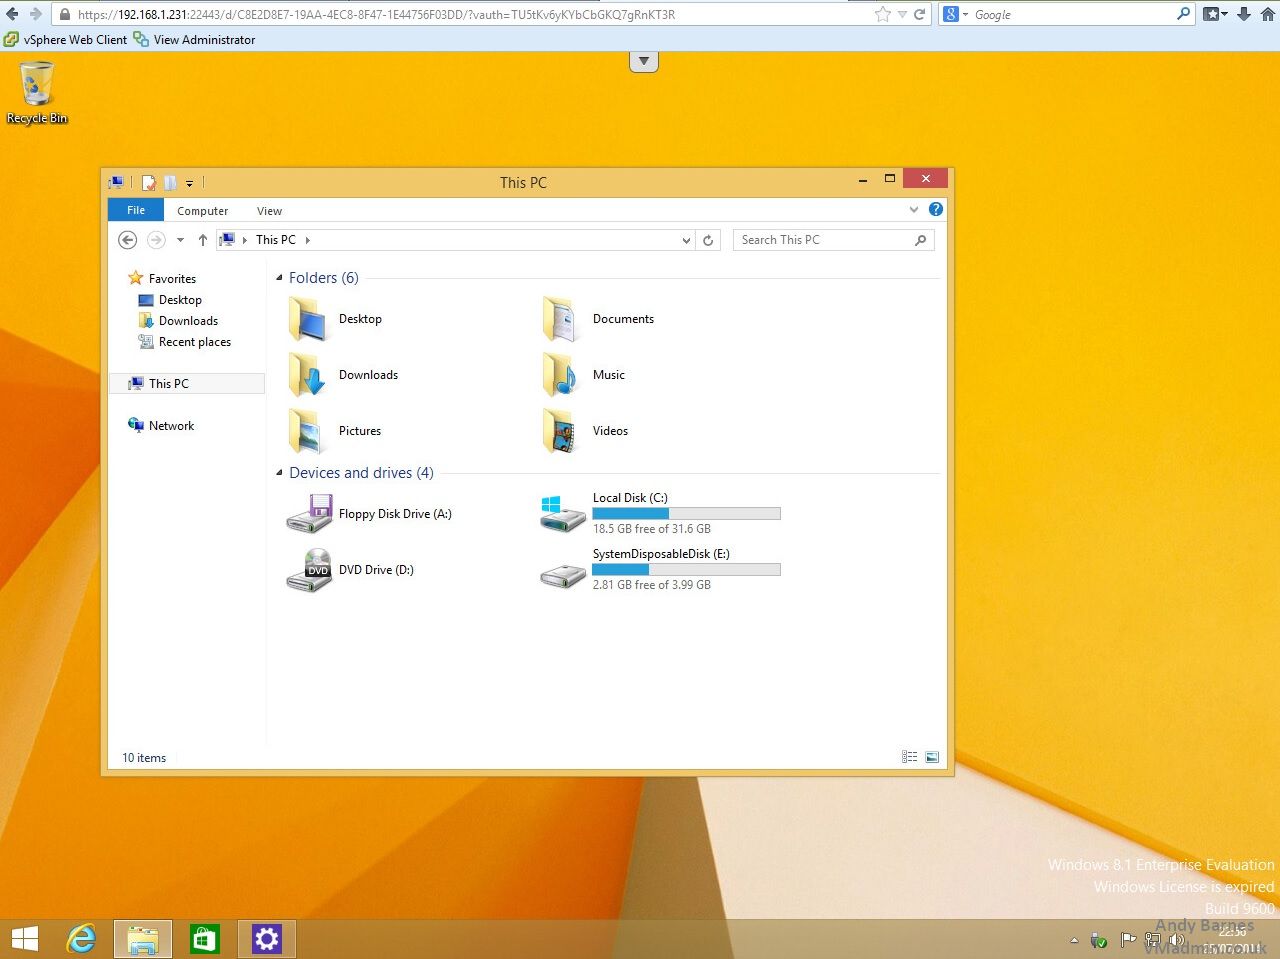
29. You will be connected to the desktop and automatically logged on
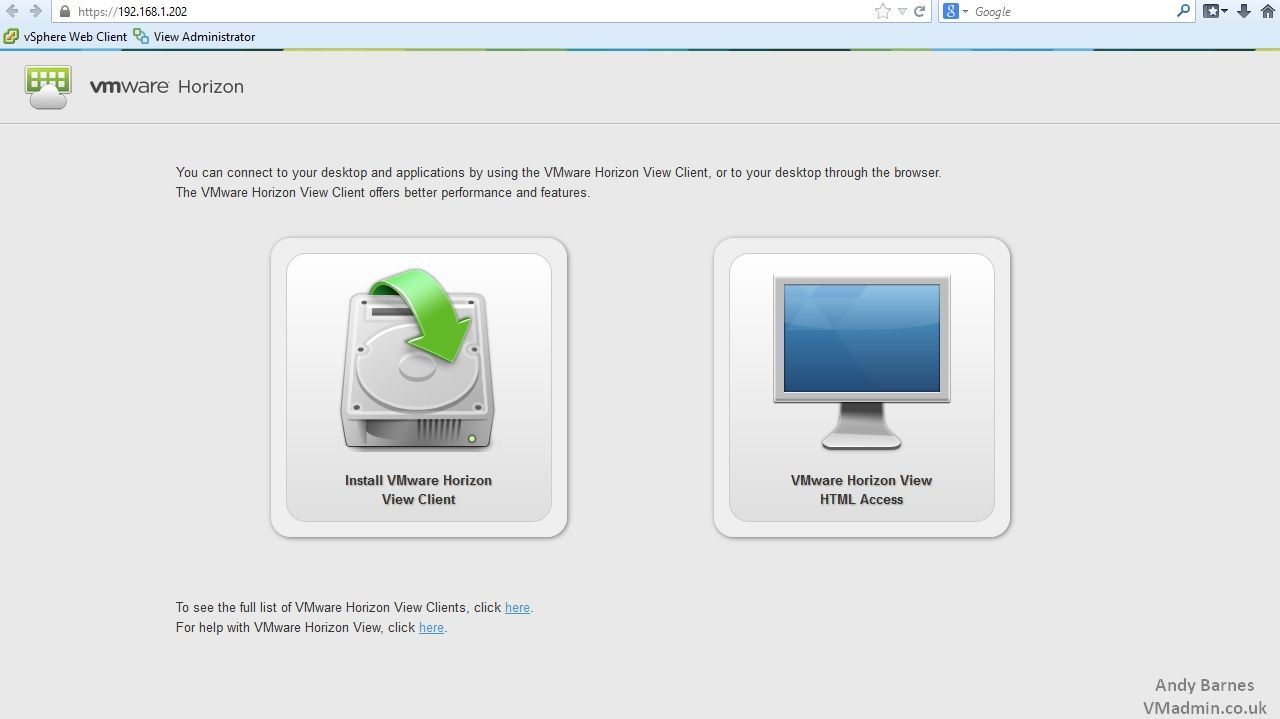
30. You can test HTML access by browsing to https://you.view.cs.ip/
Followed by clicking HTML Access
31. Enter the users authentication details
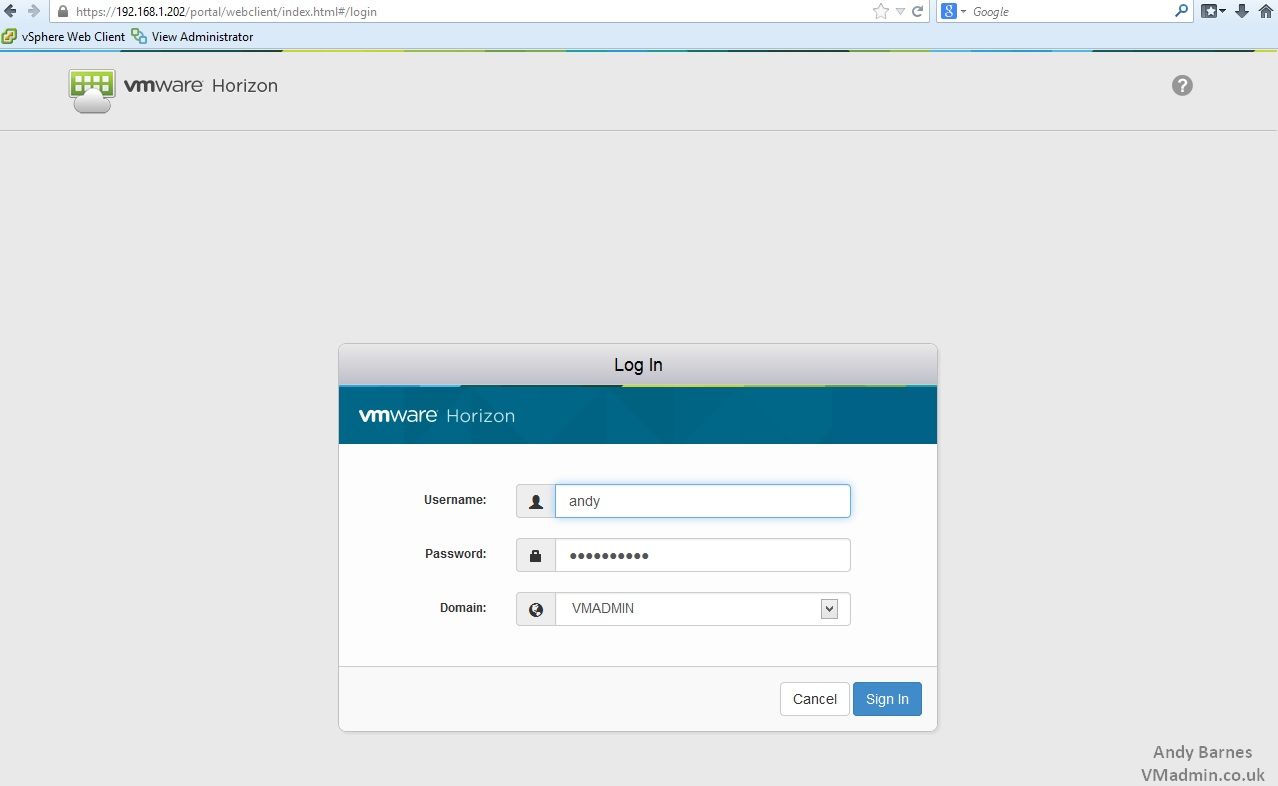
32. Click the desktop pool to connect
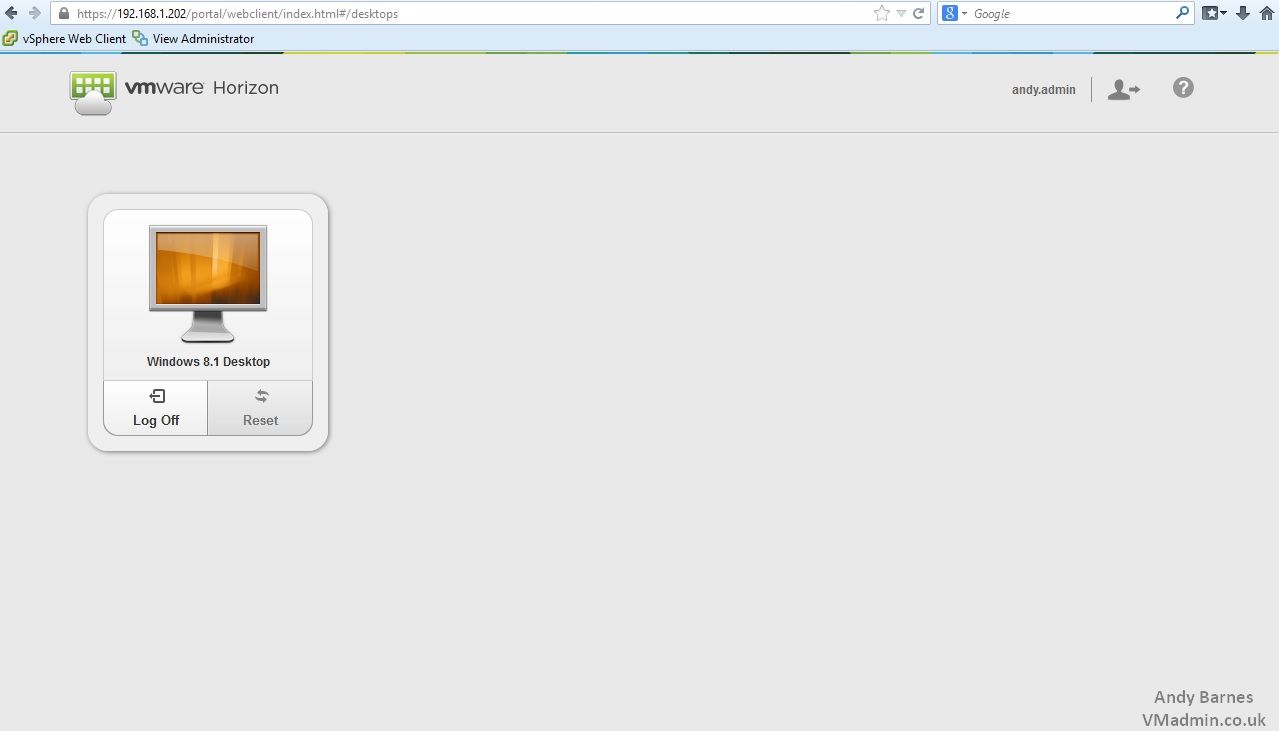
33. The user will be re-connected to their desktop (if you did not log off previously).
This provides access to a Windows 8.1 virtual desktop via a web browser using HTML 5 only
If you missed any of the previous parts of the series or want go back/forward here is the jump list:
- Horizon View 6.0 - Part 1 - Installing Horizon View Connection Server
- Horizon View 6.0 - Part 2 - Installing Horizon View Composer
- Horizon View 6.0 - Part 3 - Configuring Horizon View Administrator, Events DB, vCenter and Active Directory
- Horizon View 6.0 - Part 4 - Creating a Windows 8.1 Golden/Master/Template Image
- Horizon View 6.0 - Part 5 - Creating an Automated Desktop Pool with Linked Clones
- Horizon View 6.0 - Part 6 - Creating an RDS Host Farm and Application Pool
- Horizon View 6.0 - Part 7 - Creating an RDS Desktop Pool
Share this blog post on social media:
Tweet


Latest Blog Posts
- vSphere 7 U1 - Part 3 - Creating a Datacenter, HA/DRS Cluster and Adding a Host
- vSphere 7 U1 - Part 2 - Deploying vCenter 7.0 U1 VCSA
- vSphere 7 U1 - Part 1 - Installing ESXi 7.0 U1
- Veeam CBT Data is Invalid - Reset CBT Without Powering Off VM
- View Administrator Blank Error Dialog/Window After Upgrade