It is possible to run ESX 3.5 inside Workstation 6.5. However it depends on setting up the VM that will run ESX right and the hardware you are running Workstation on.
Ive found it works best on Intel processors (recent ones, pentium 4, core 2 duo and xeon), AMD tends to be impossibly slow to boot up after installing (athlon x2). Its all down to the processor supporting virtualization, and it may need turning on in your BIOS. Look for the AMD-V or INTEL-VT setting and turn it on.
Ok so why would you want to run ESX 3.5 on Workstation 6.5? Maybe you want to test ESX, maybe you want to do a demo on a laptop or maybe you just want to have a play around for the first time.
I will show you the steps of setting this up inside Workstation 6.5 and the correct settings. Bare in mind though you might be able to install ESX, but depending on your processor you might have speed problems when booting it.
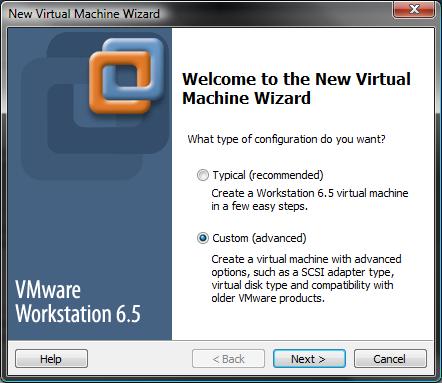
1. Open Workstation and create a new virtual machine. Choose the Custom (advanced) type. Next...
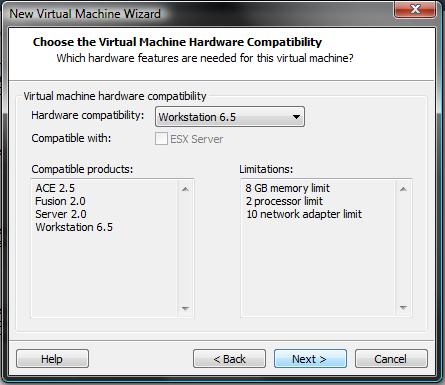
2. Choose Workstation 6.5 hardware compatability. Next...
3. Select install operating system later. Next...

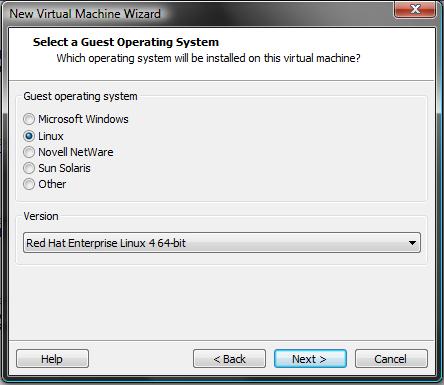
4. Select Linux - Red Hat Enterprise 4 64-bit as the guest operating system. Next...
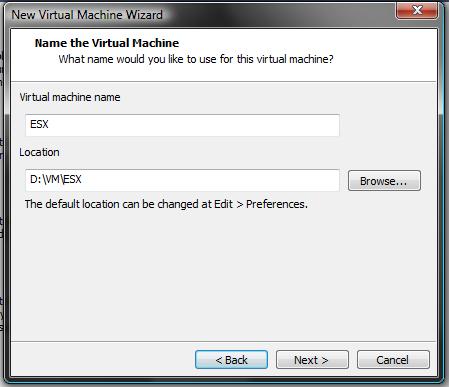
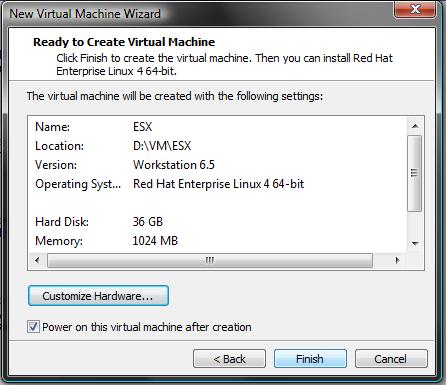
5. Name your ESX VM and specify a location. Next...
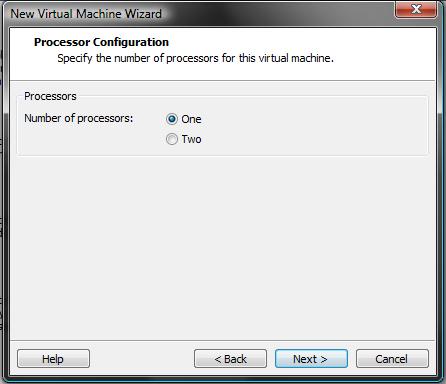
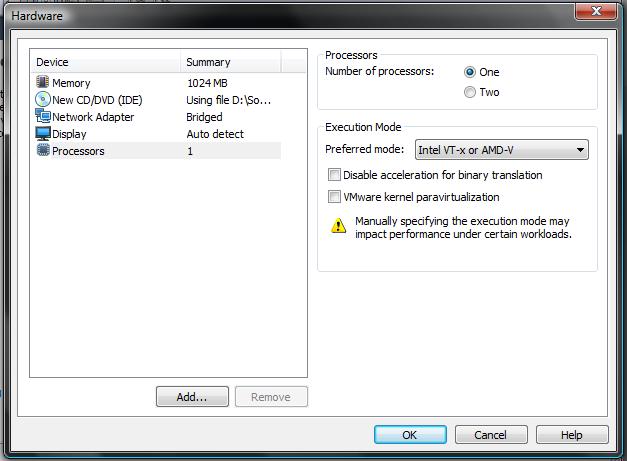
6. Select the number of processors (1 in this case). Next...
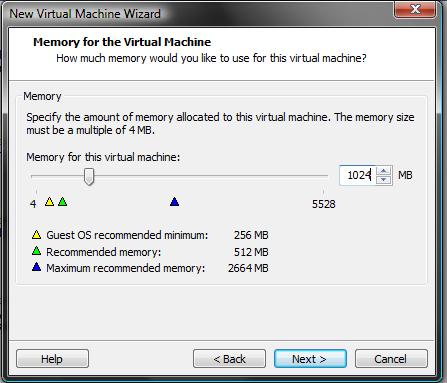
7. Allocate 1024mb of memory. Next...
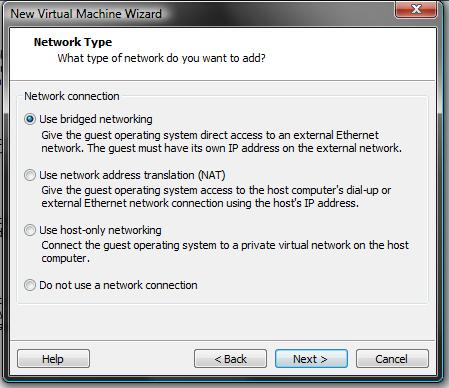
8. For networking select "Use bridged networking". Next...
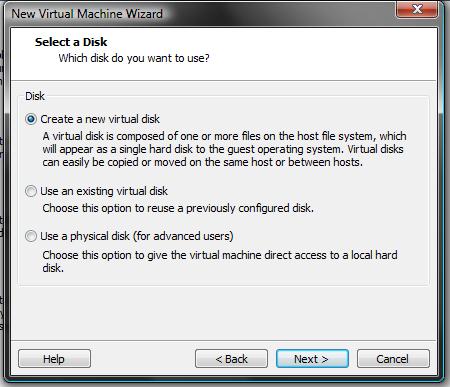
9. Create a new disk. Next...
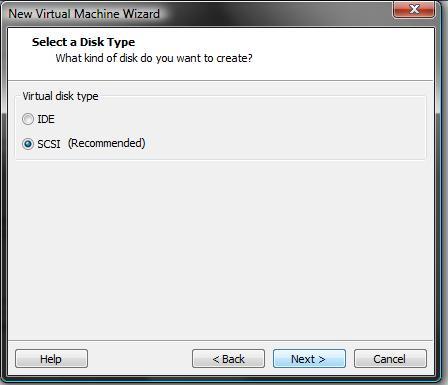
10. Make it a SCSI disk. Next...
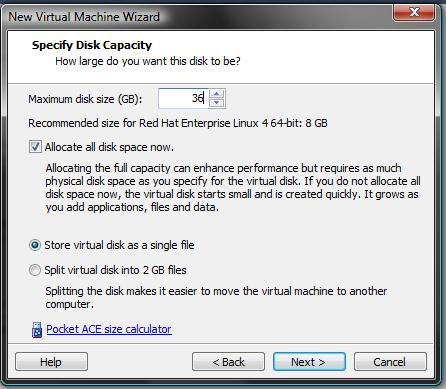
11. Choose the size of the disk, this can be what you want, at least ~8gb will be ok for installing and testing. Choose more if you want. Allocate the space now for improved performance. Next...
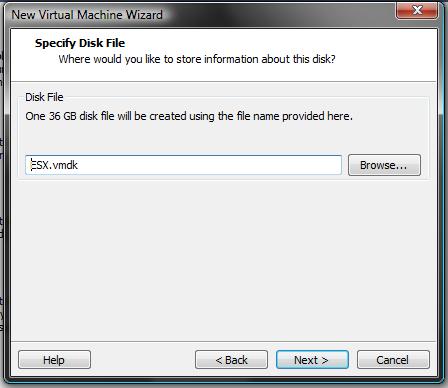
12. Change the name of the file if you wish. Next...
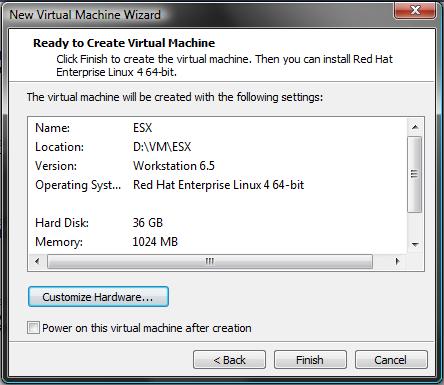
13. Choose to "Customize Hardware".
14. Remove the USB controller, floppy disk and sound card. Connect your ISO or insert your CD into your drive. Lastly set the processor preferred mode to "INTEL-VT-x or AMD-V". Ok...
15. Untick to power on after creation and click Finish...
16. Edit the .vmx file in the virtual machine directory adding the following line to the bottom:
monitor_control.restrict_backdoor = "true"
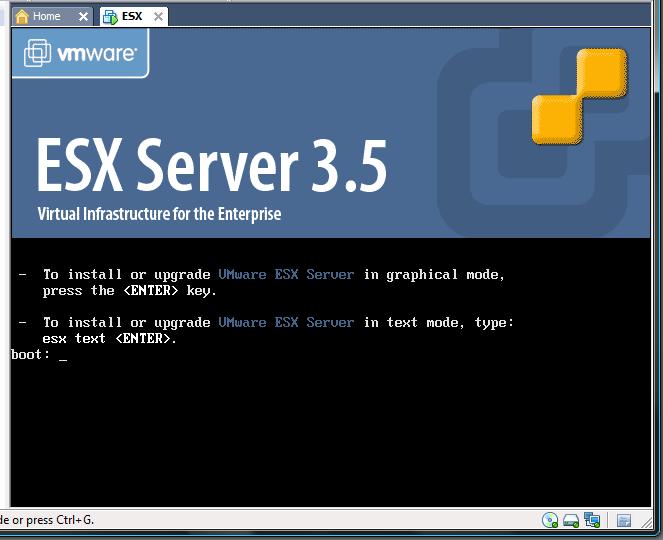
17. The VM will boot and the ESX installer will start. Your ready to go, continue the standard install process and your done.
Share this blog post on social media:
Tweet


Latest Blog Posts
- vSphere 7 U1 - Part 3 - Creating a Datacenter, HA/DRS Cluster and Adding a Host
- vSphere 7 U1 - Part 2 - Deploying vCenter 7.0 U1 VCSA
- vSphere 7 U1 - Part 1 - Installing ESXi 7.0 U1
- Veeam CBT Data is Invalid - Reset CBT Without Powering Off VM
- View Administrator Blank Error Dialog/Window After Upgrade