The vCenter Server Appliance (VCSA) is virtual appliance based on the VMware Photon OS, optimized for running vCenter Server and the associated services.
vCenter Server provides a centralized platform for management, operation and provisioning of virtual machines, storage and virtual networks.
The VCSA includes an embedded PostgreSQL database instance, which is fully supported for the vCenter and vSphere configuration maximums and is the database solution to utilize going forward.
The vCenter Server contains vCenter Server, vSphere Client, vSphere Auto Deploy, and vSphere ESXi Dump Collector. The vCenter Server appliance also contains the VMware vSphere Lifecycle Manager Extension service and the VMware vCenter Lifecycle Manager, previously named Update Manager.
It is also worth noting that with 7.x VMware no longer support external platform services controllers (PSCs) and an embedded PSC will be deployed as part of this VCSA install.
If you missed any of the previous parts of the series or want go back/forward here is the jump list:
vSphere 7 U1 - Part 1 - Installing ESXi 7.0 U1
vSphere 7 U1 - Part 2 - Deploying vCenter 7.0 U1 VCSA
vSphere 7 U1 - Part 3 - Creating a Datacenter, HA/DRS Cluster and Adding a Host
1. Login to the VMware license portal to check/upgrade/buy your vSphere licenses.
2. Read the vCenter Server 7.0 U1 Installation and Setup Guide to ensure you understand the pre-requisites.
3. Download the VMware ESXi 7.0 U1 ISO file from the VMware download area, "VMware-VCSA-all-7.0.1-16860138.iso".
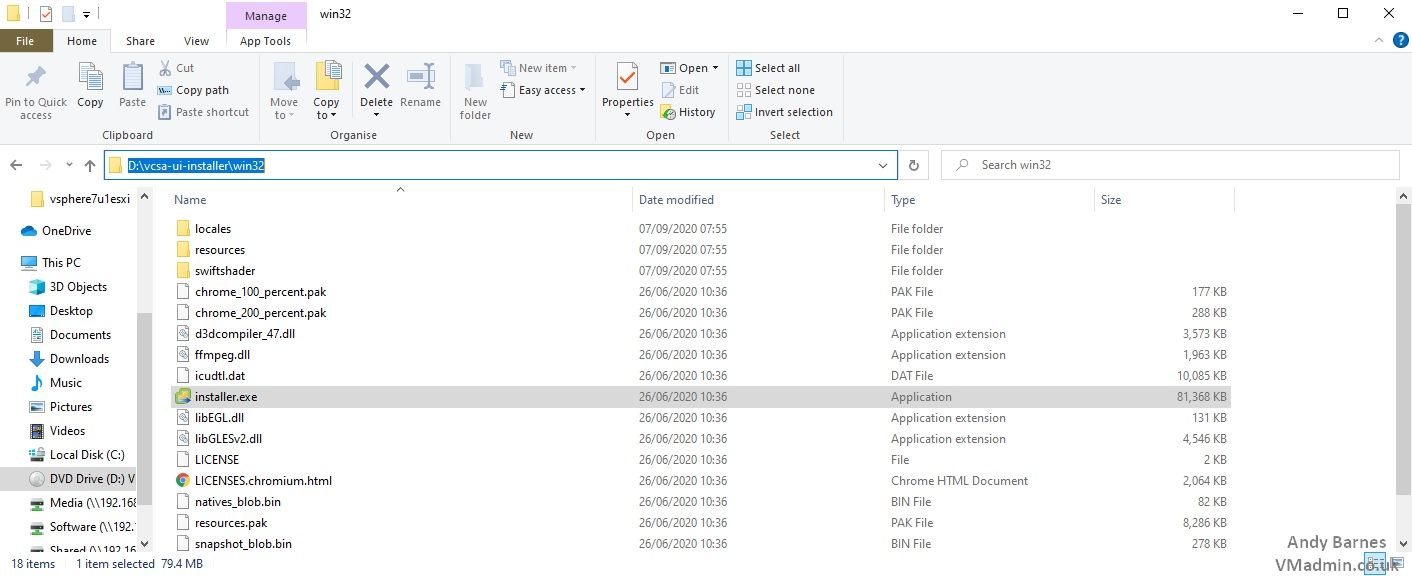
4. Once the ISO has downloaded (assuming your using Windows) double click the ISO to mount it and browse the contents in Explorer as shown below.
5. Navigate to vcsa-ui-installer\win32
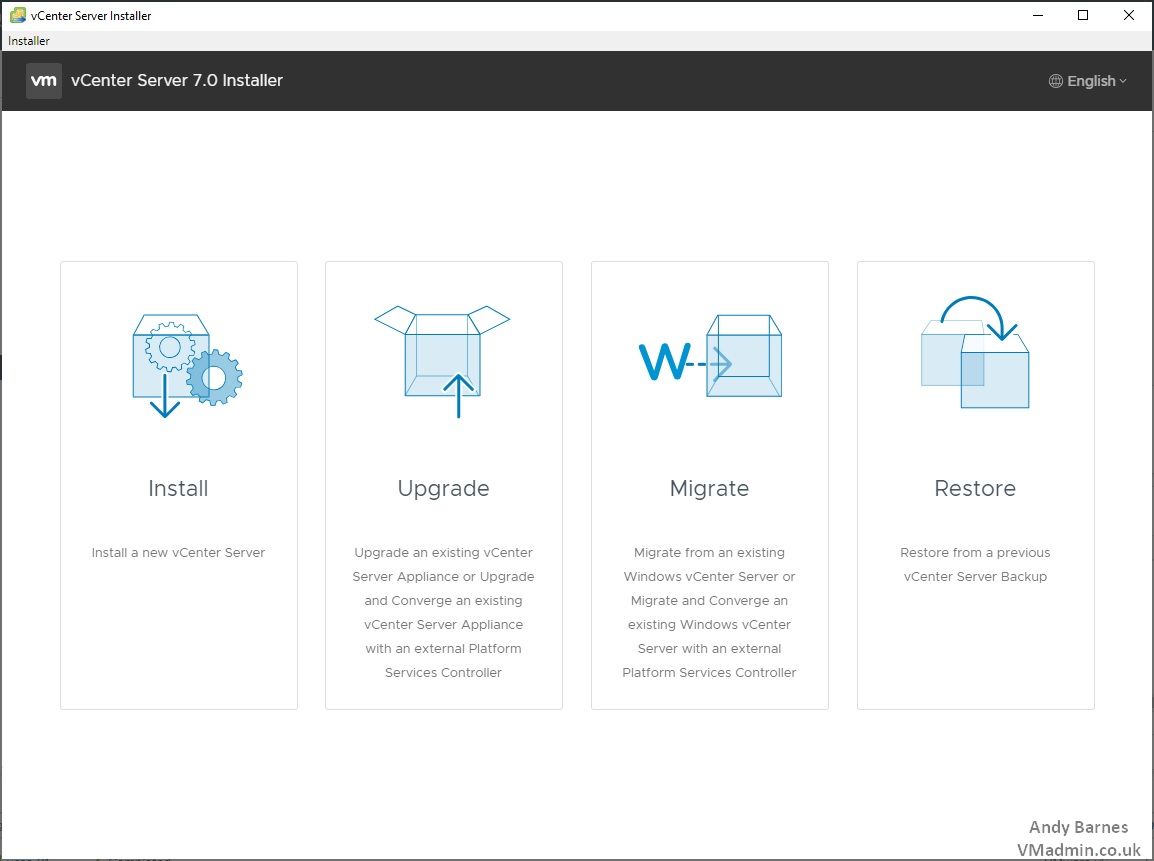
6. Run "installer.exe"
7. Choose "Install", note there are other options to perform an upgrade, migration and restore from a VCSA backup.
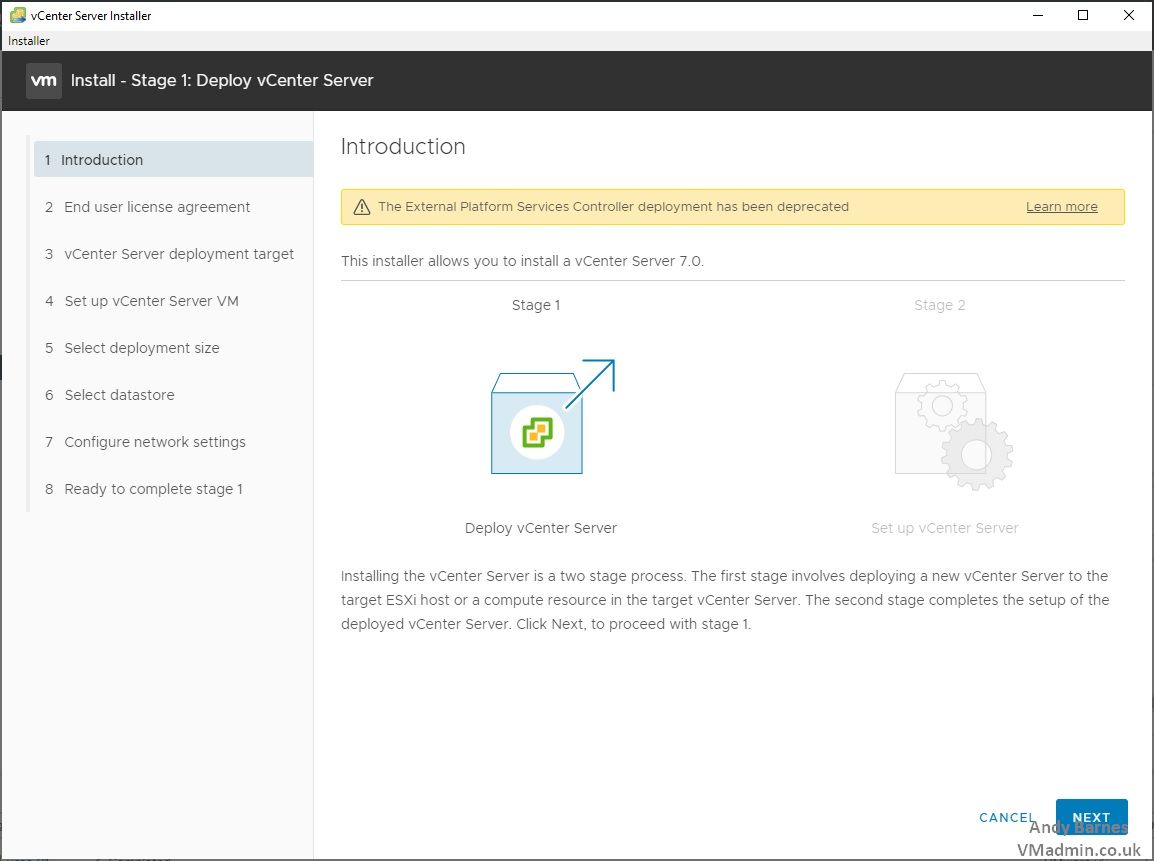
8. There are two stages to the VCSA installation process, stage one deploys the VCSA VM, stage two configures the VCSA and starts the services. Click Next.
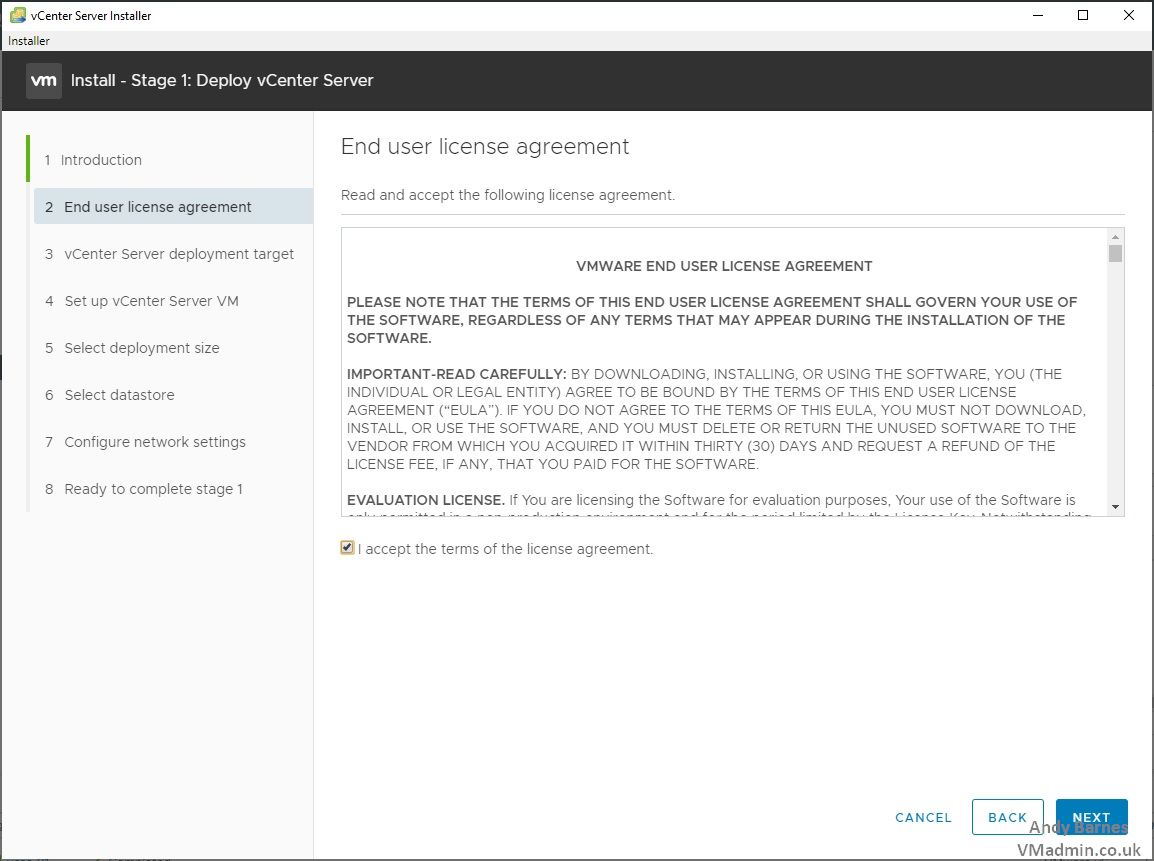
9. Accept the EULA and press Next.
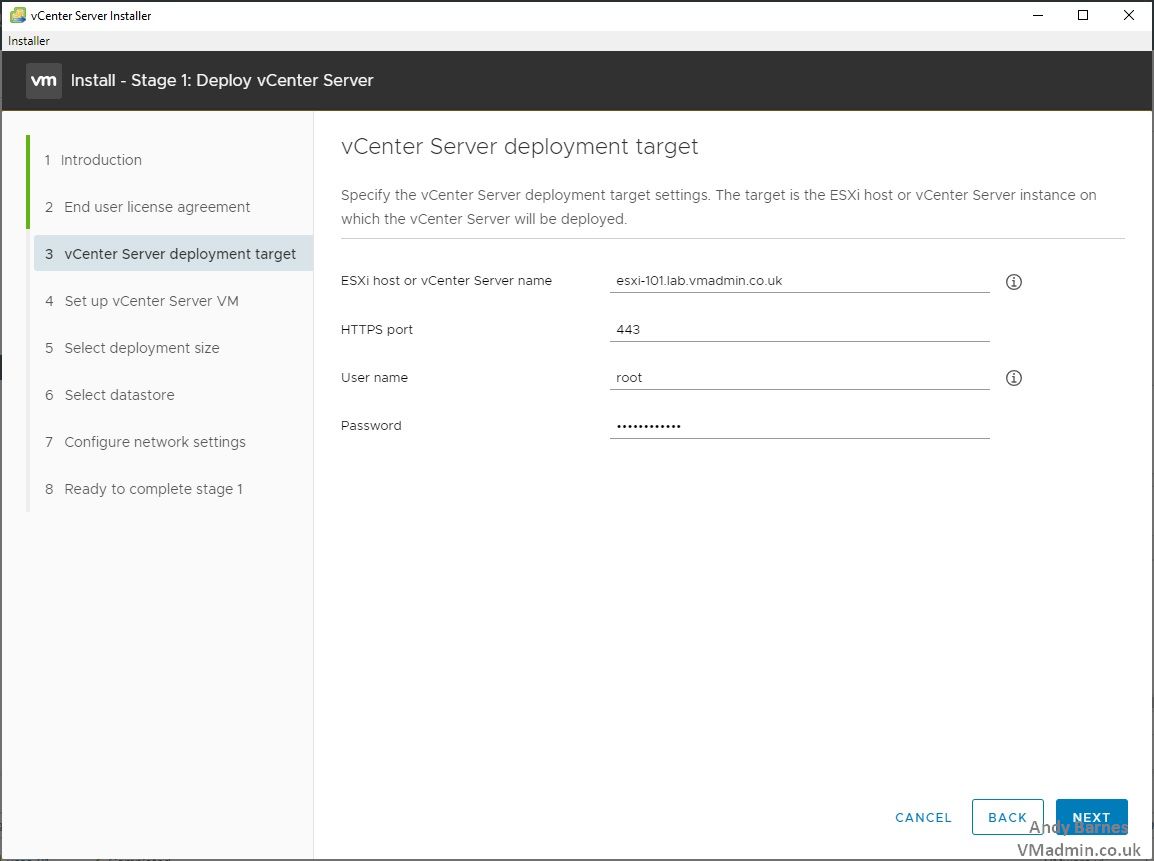
10. Enter the ESXi server IP address or DNS name which we deployed in the previous part of this series. Enter the root user and password, then press Next.
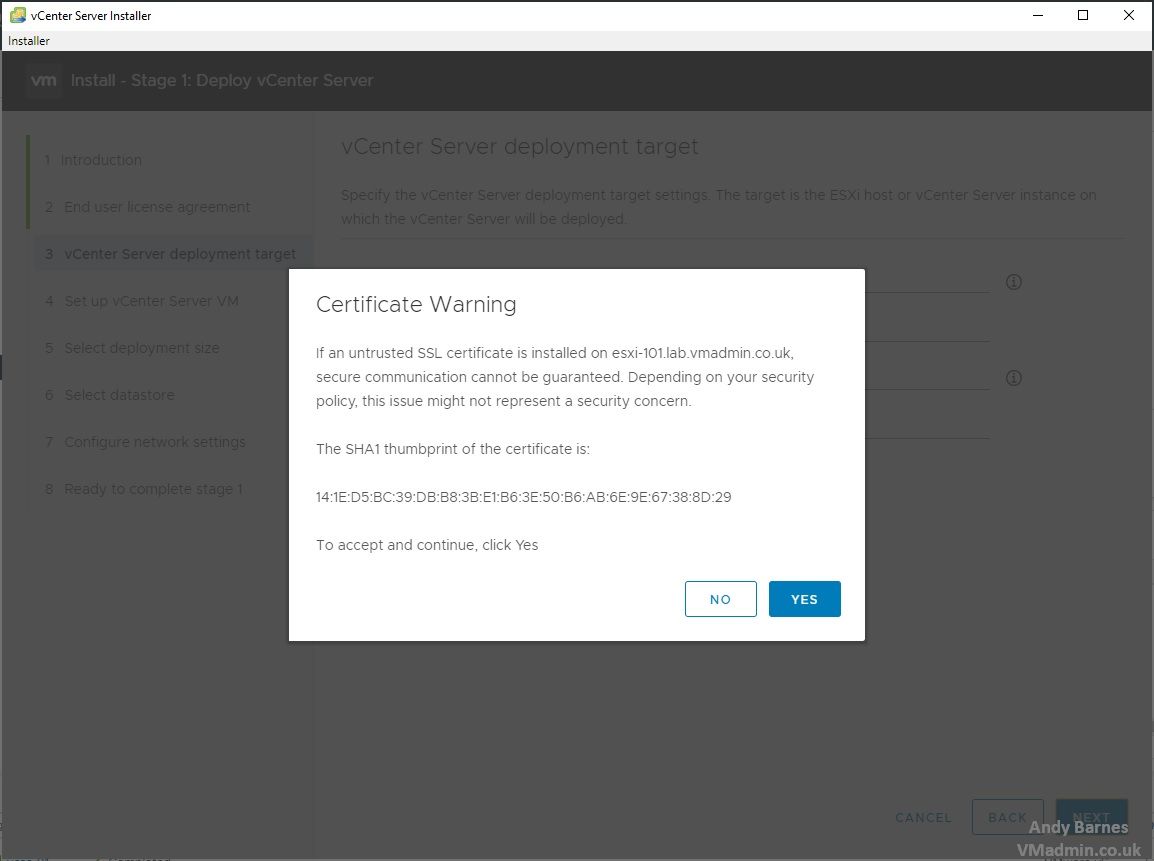
11. Accept the certificate warning.
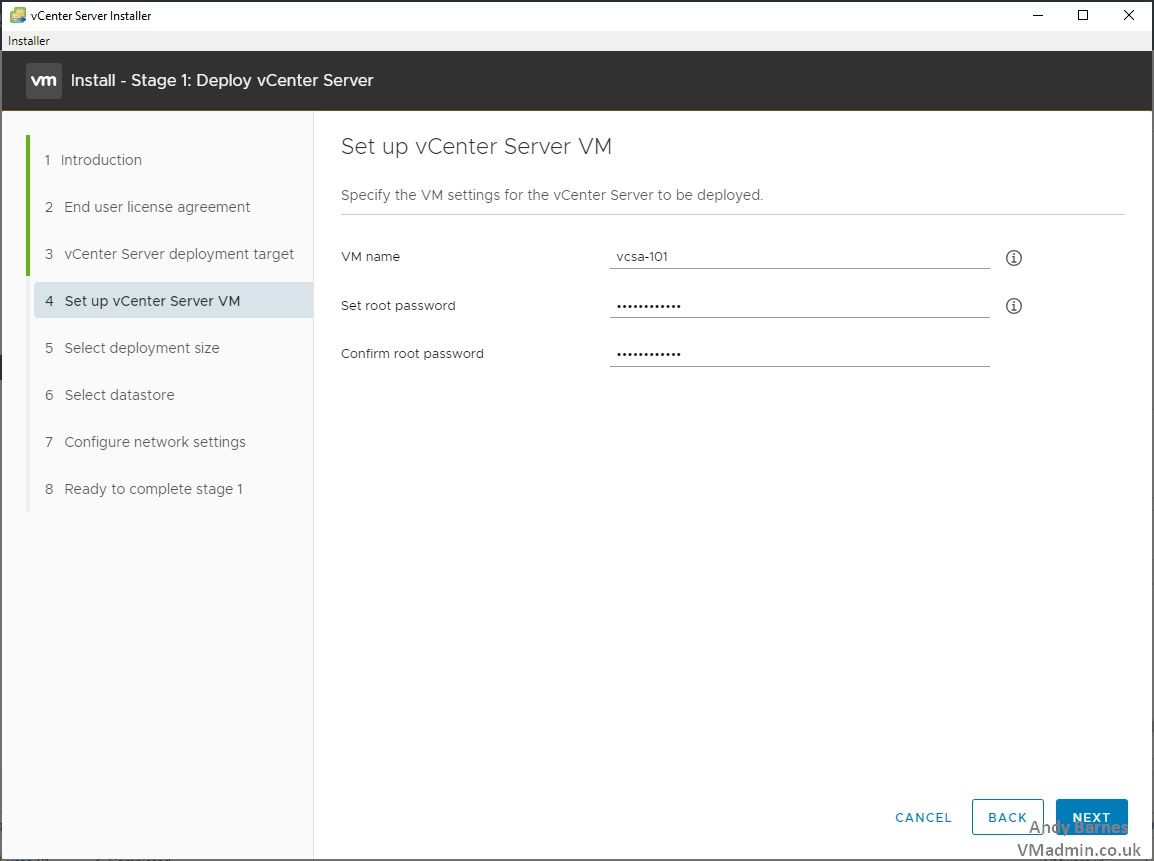
12. Provide a name for the VCSA VM e.g. vcsa-101, and set a root password for the appliance (this is if you need to logon to the management UI or SSH to the appliance).
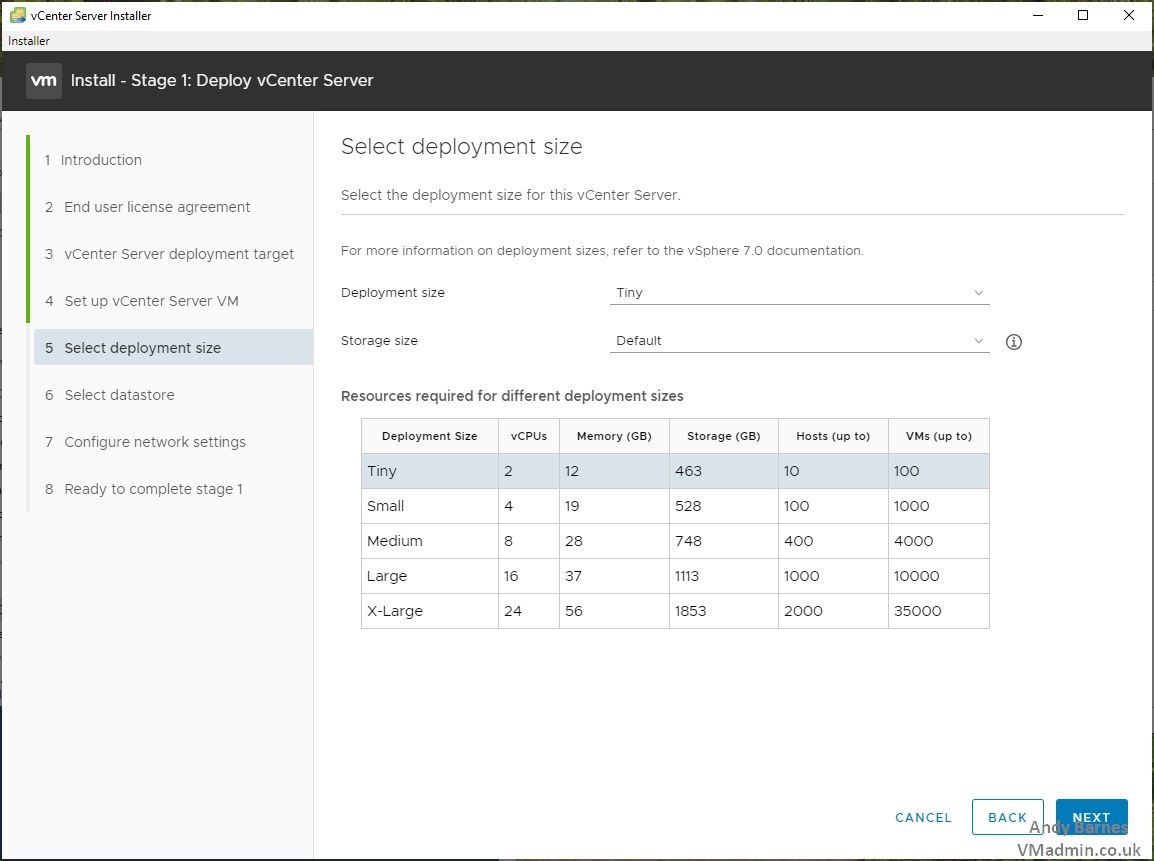
13. Select the required deployment size. Here I'm selecting "Tiny" because this is a small lab environment. Tiny supports upto 100 VMs and requires 2 vCPU and 12 GB of vRAM.
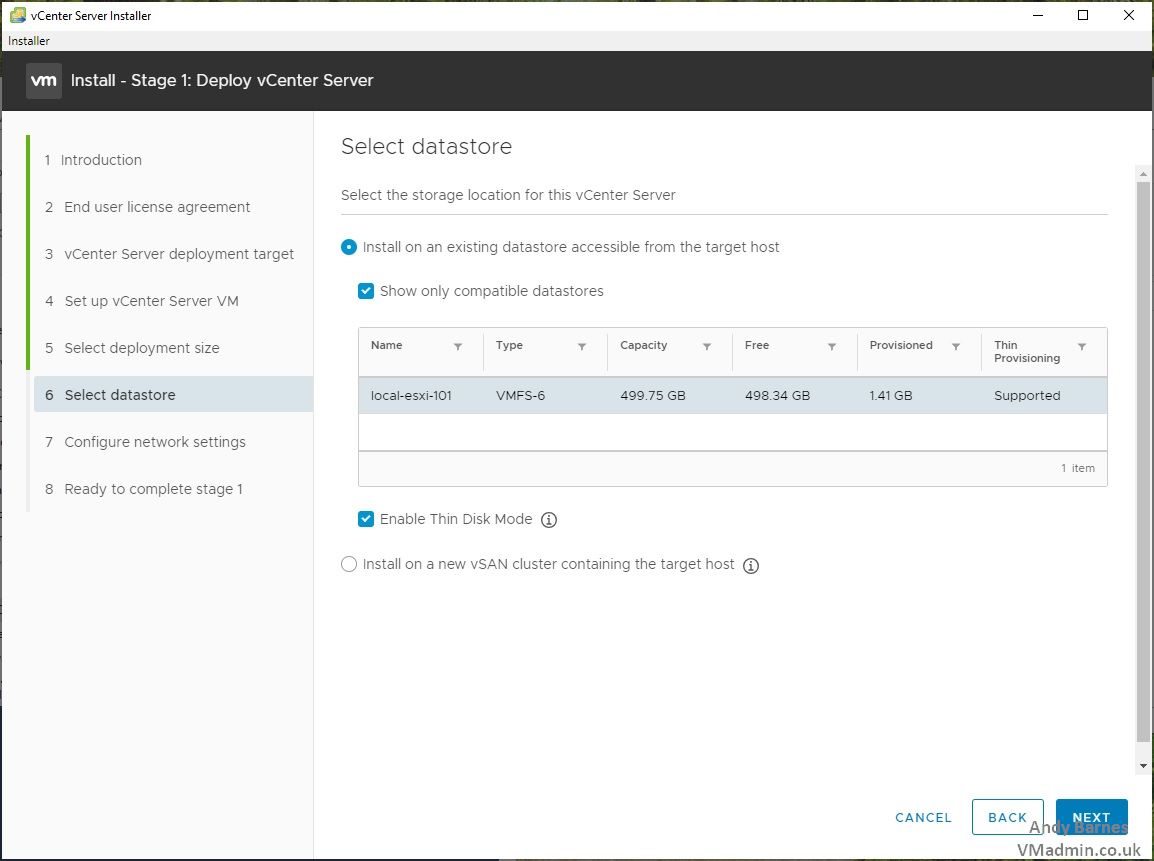
14. Select the VMFS datastore on the ESXi host which the VCSA VM should be deployed to. Tick "Enable Thin Disk Mode" if you wish to save space in a lab environment of depending on your storage allocation strategy in a production environment.
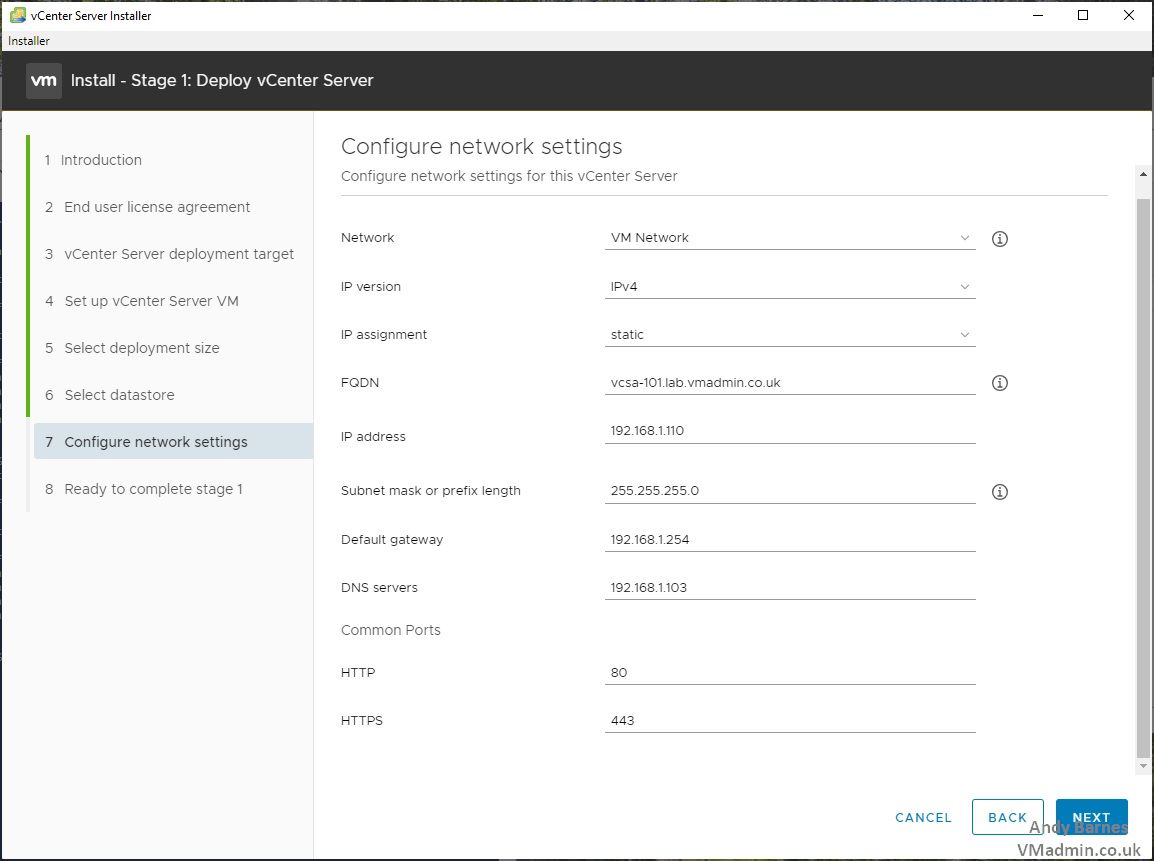
15. Configure the network settings for the VCSA, enter the following:
Network: e.g. VM Network (default after ESXi install)
FQDN: e.g. vcsa-101.lab.vmadmin.co.uk
IP Address: e.g. 192.168.1.110
Network Mask: e.g. 255.255.255.0
Gateway: e.g. 192.168.1.254
DNS Server(s): e.g. 192.168.1.103
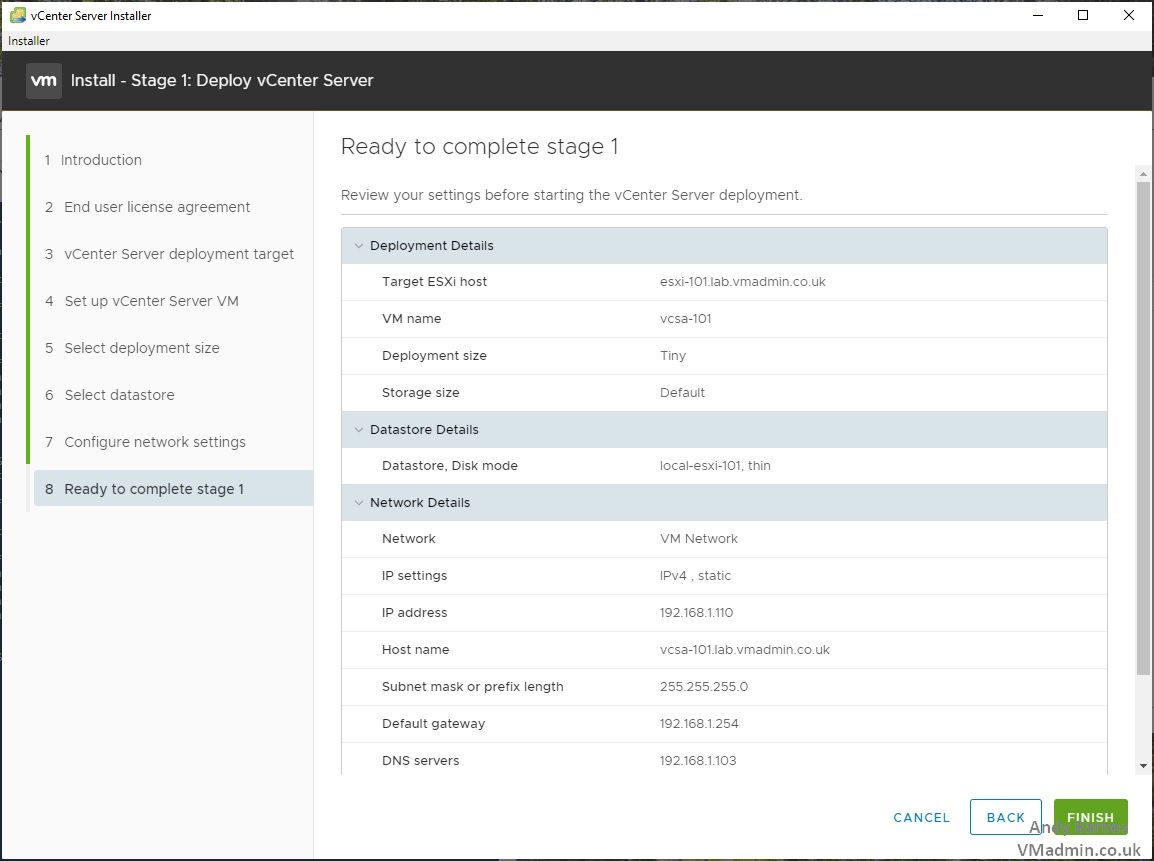
16. Review the VCSA settings and click Finish to start the deployment.
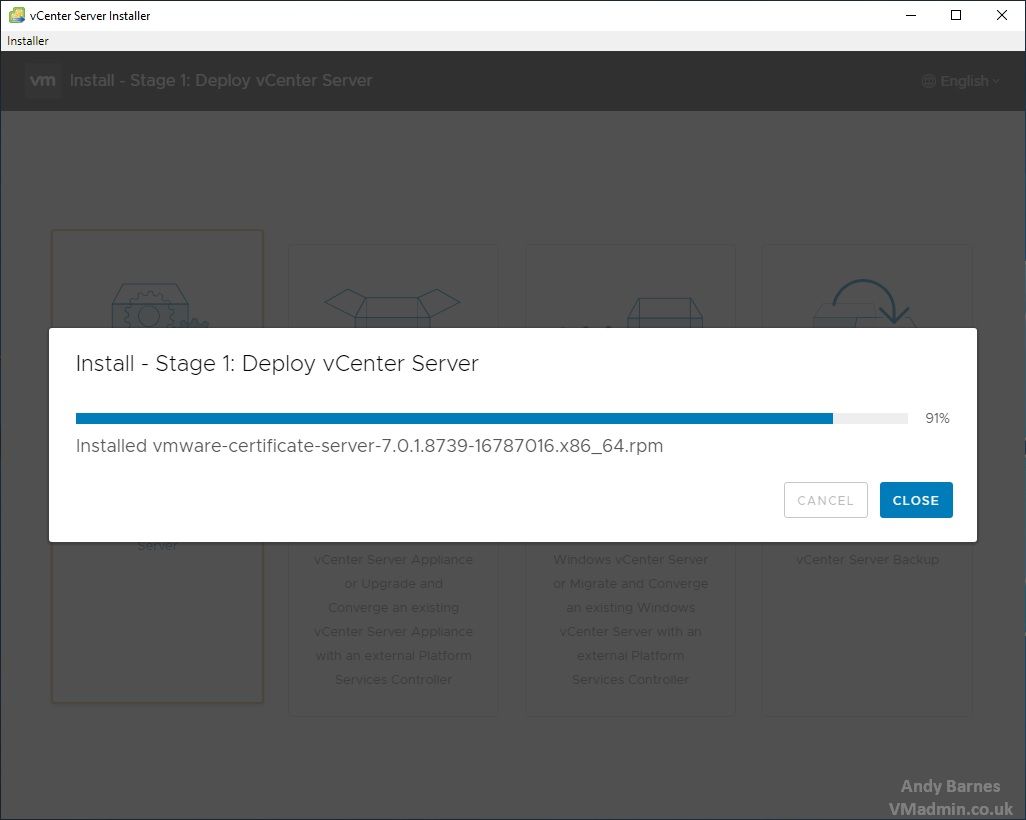
17. Stage 1 of the VCSA deployment will start by importing the OVA to the ESXi host and installing the required RPMs from the installation package. This time will vary depending on the target storage performance and network speed between the client running the installer and the ESXi host.
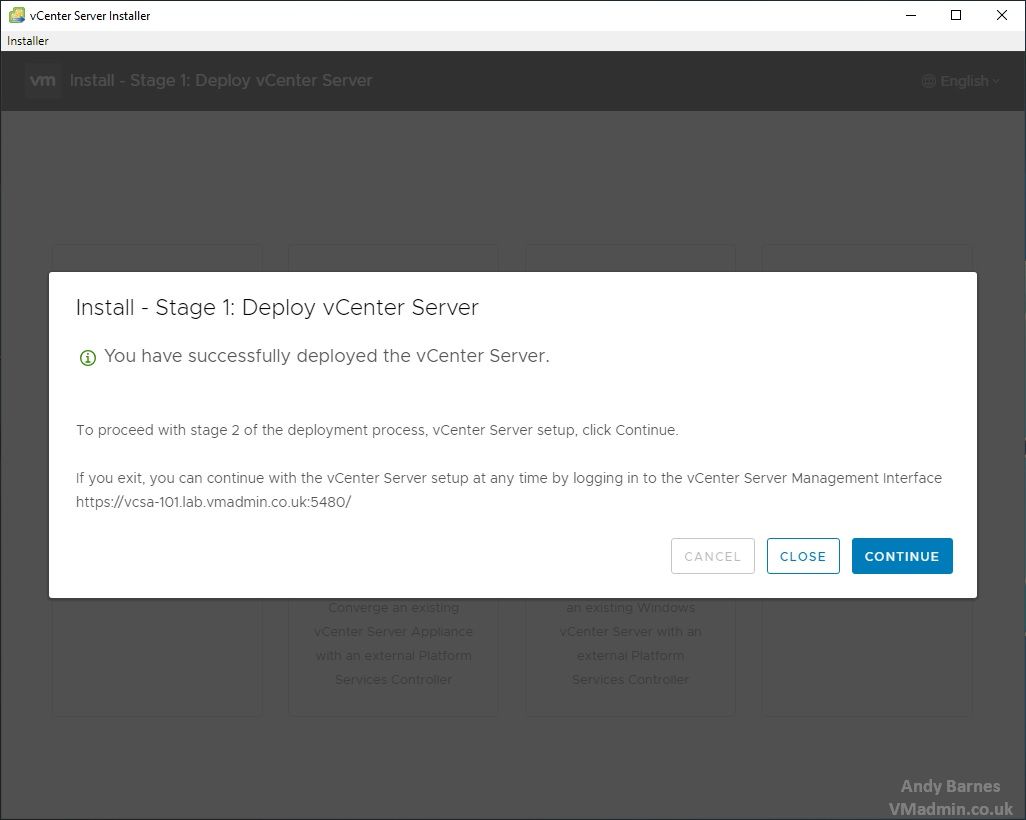
18. One the Stage 1 deployment has completed, the following dialog will be shown confirming this. Press Continue to start the Stage 2 configuration.
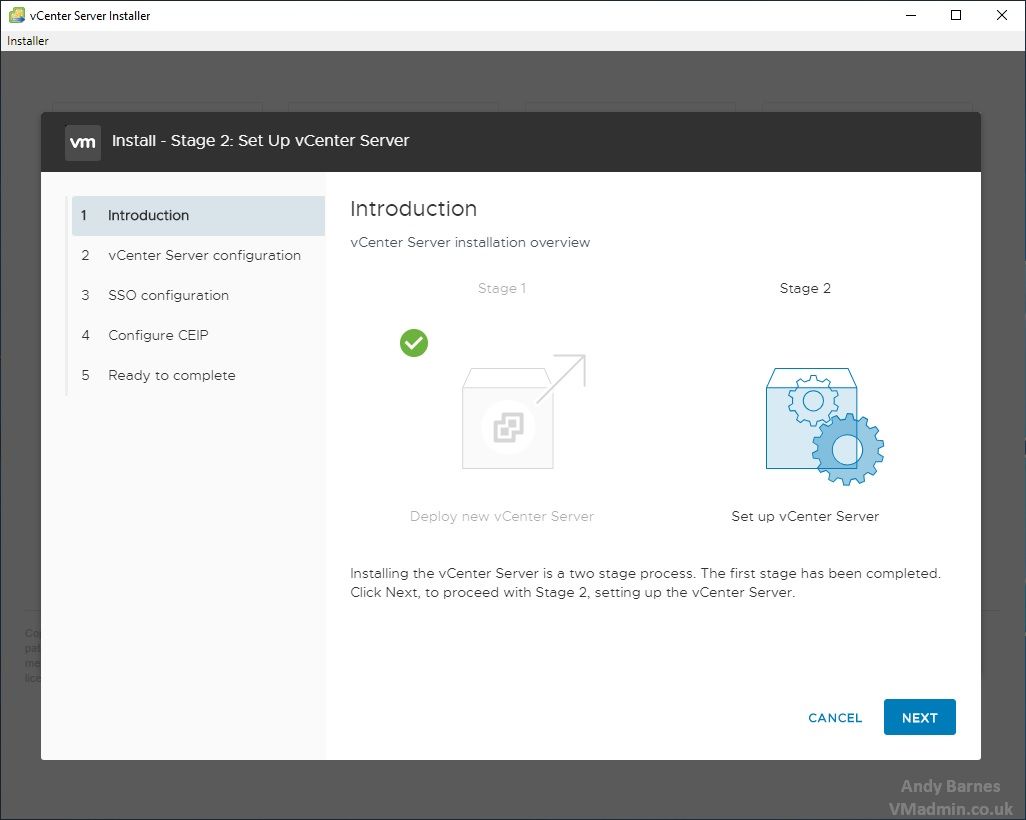
19. Stage 2 will prompt for the root password if the deployment has taken a while to complete and a timeout was reached. Click next.
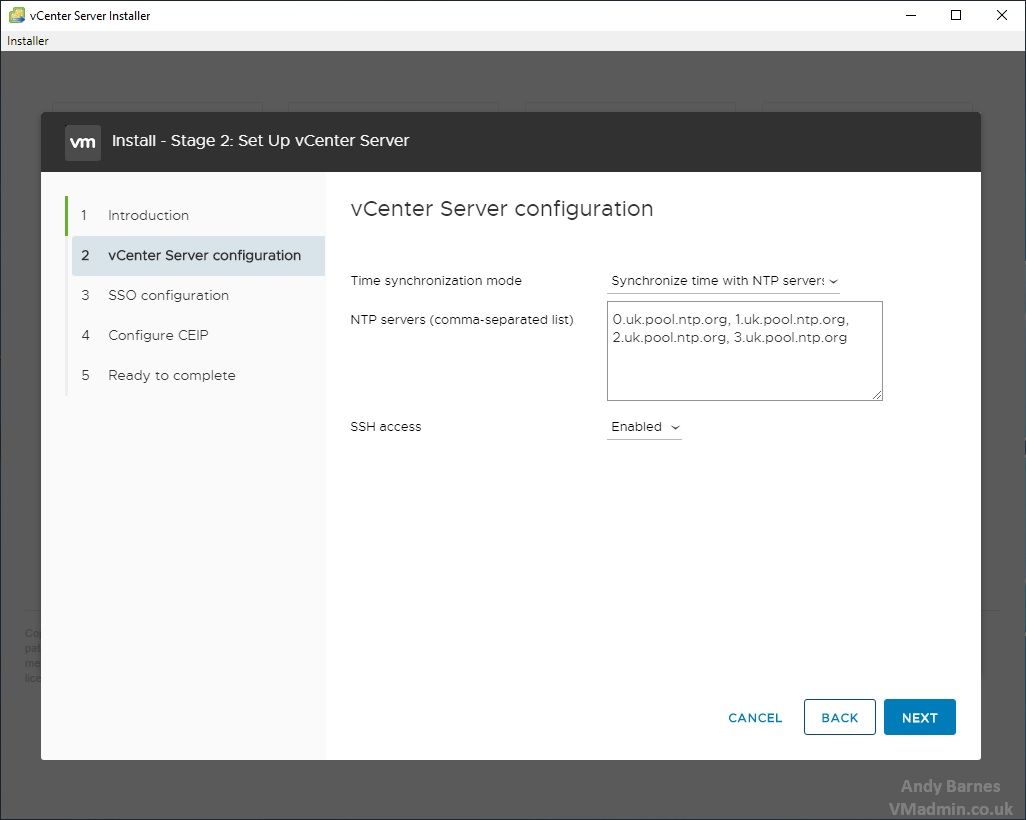
20. Choose to get the time from the ESXi host or an NTP server as shown below. optionally enabled SSH access.
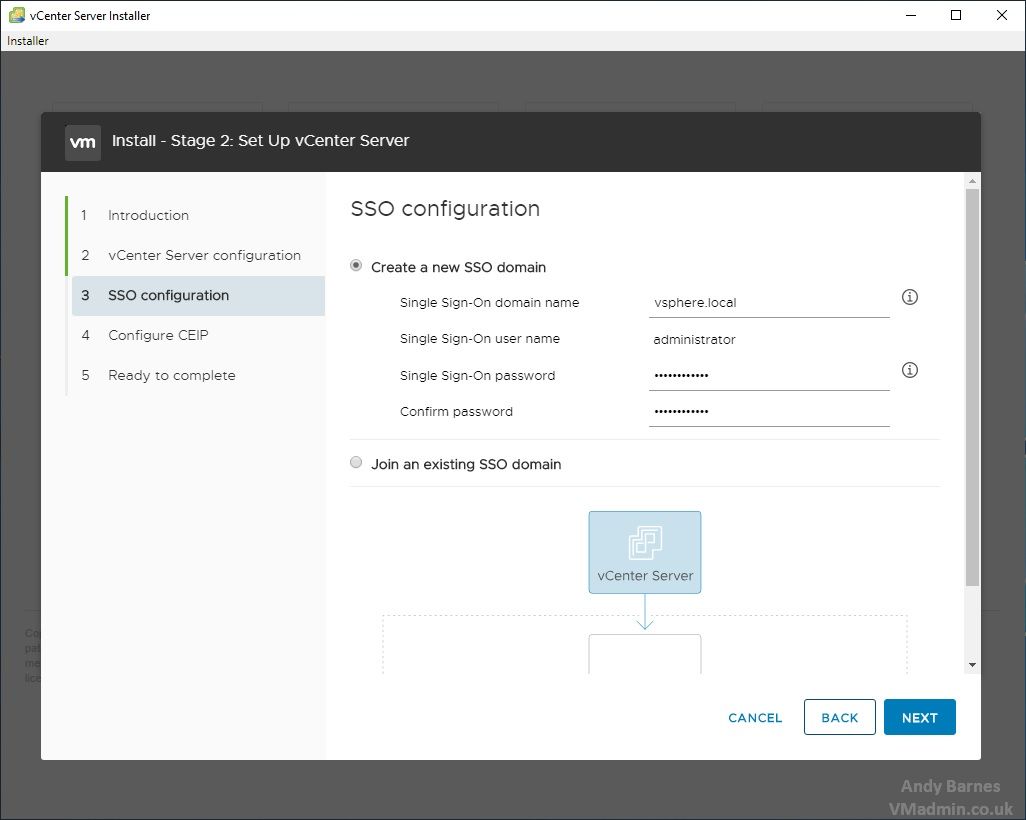
21. Next is the SSO configration. Enter vsphere.local for the domain name and a password.
This will become you This email address is being protected from spambots. You need JavaScript enabled to view it. login credentials.
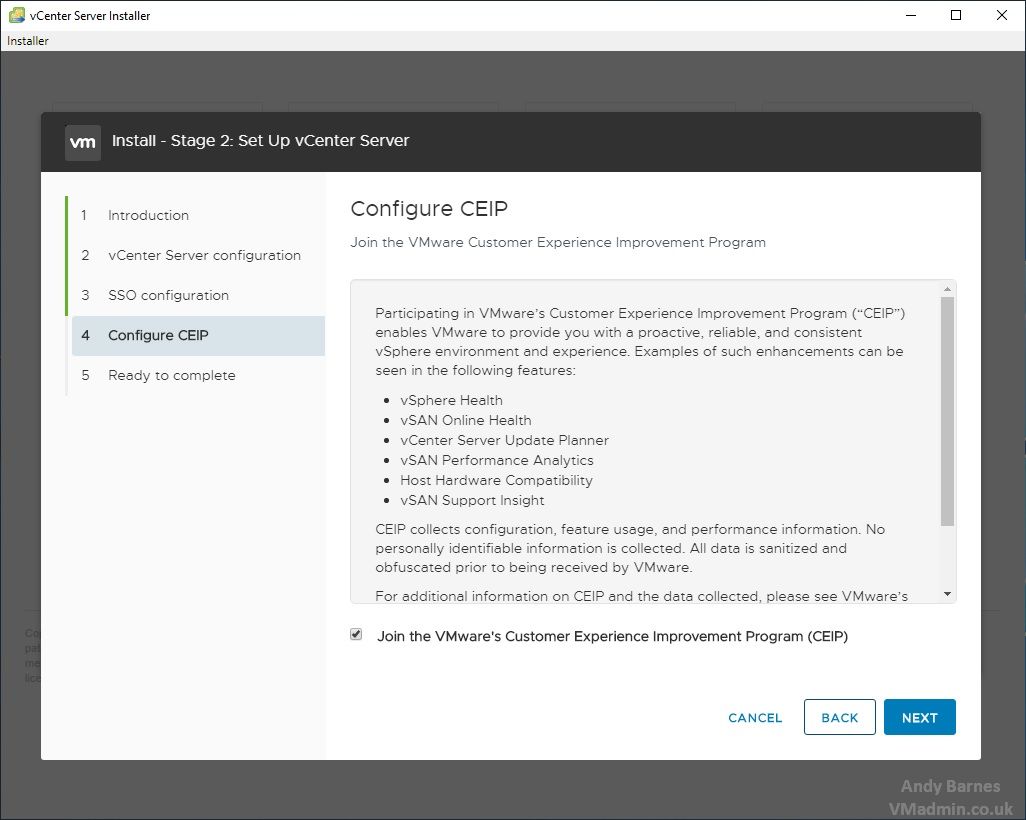
22. Optionally choose to join the customer experience improvement program.
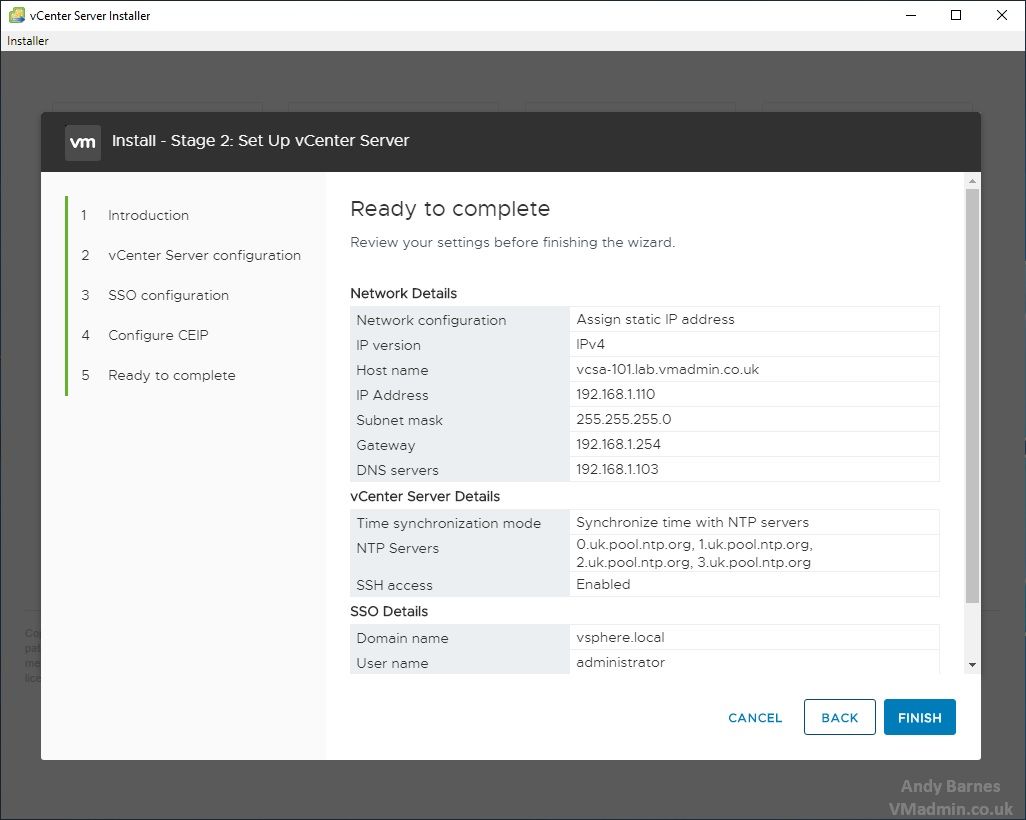
23. Review the configuration and click Finish to start the final configuration stage and start the services.
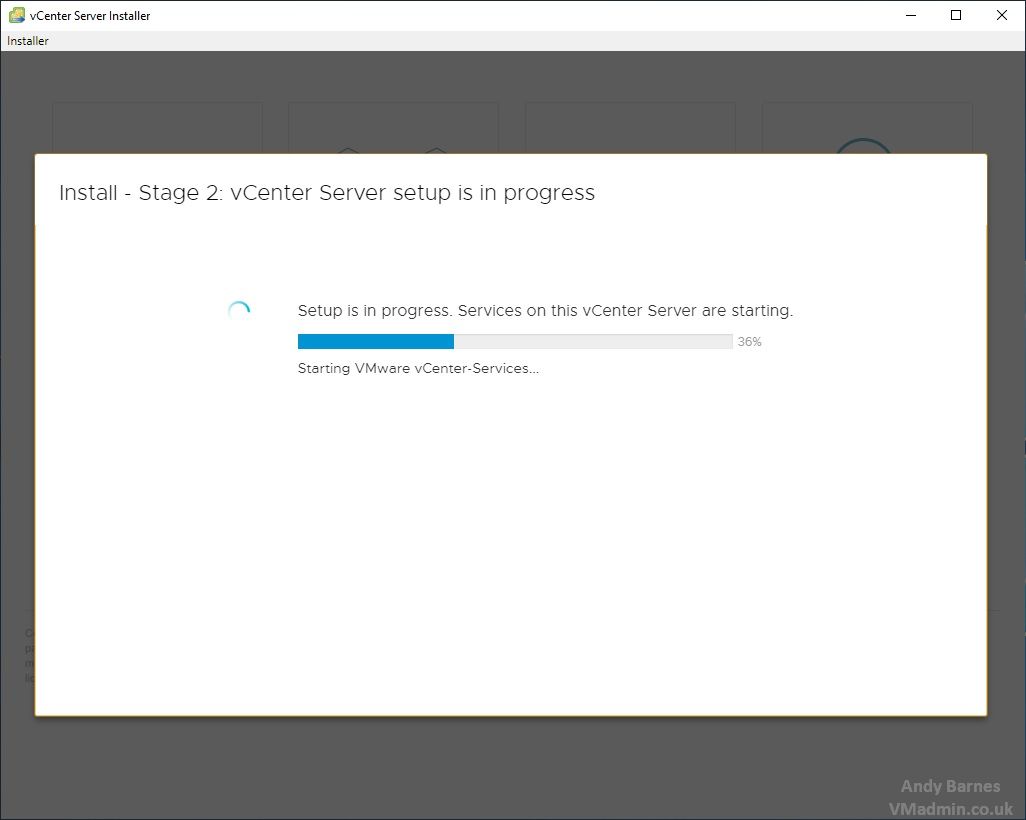
24. The services will begin to start on the VCSA.
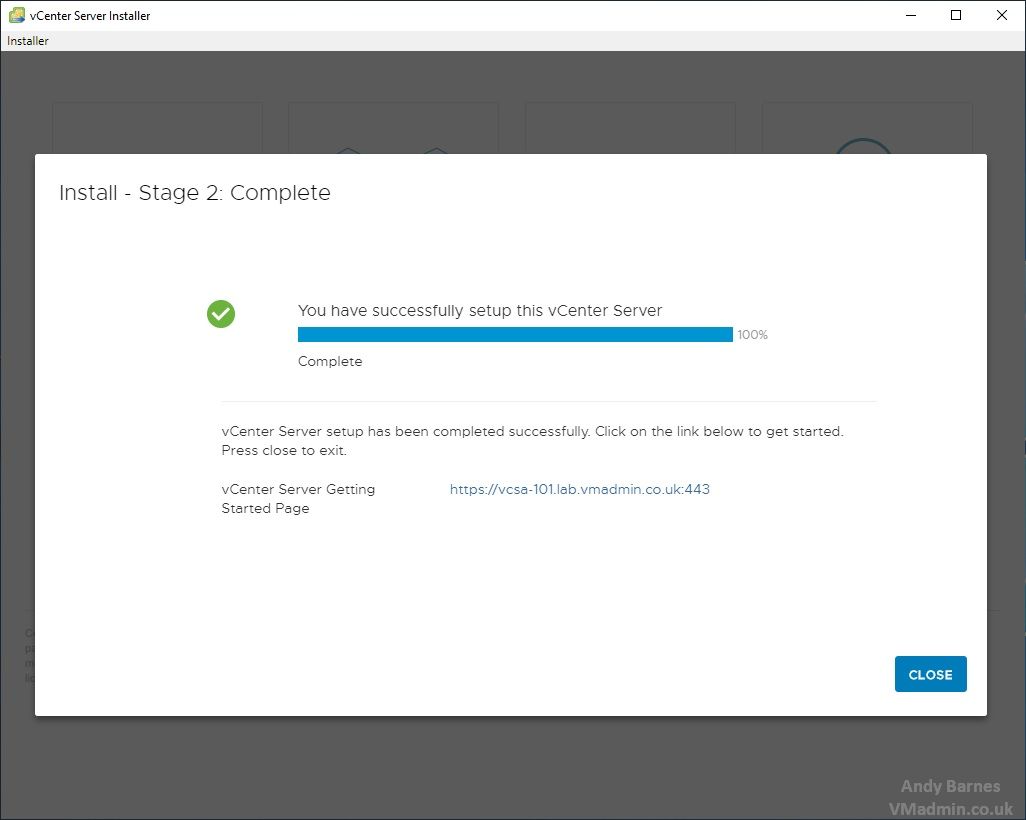
25. One stage 2 completes, the VCSA is fully deployed and configured ready for use. Click on the link to browse to https://yourservername:443 to login to the vSphere Client.
26. The vSphere Client login page will be displayed. Login with the "This email address is being protected from spambots. You need JavaScript enabled to view it." user account and password specified at installation time.
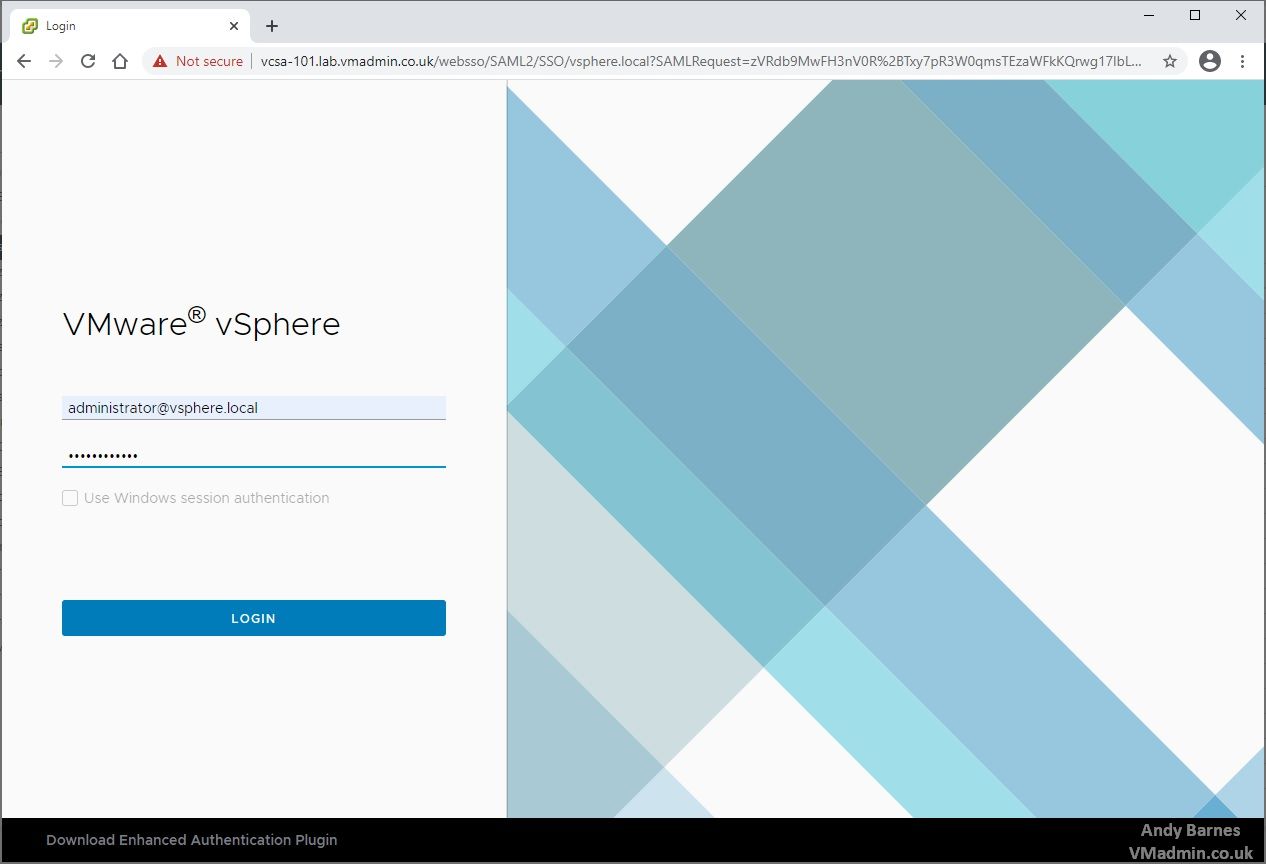
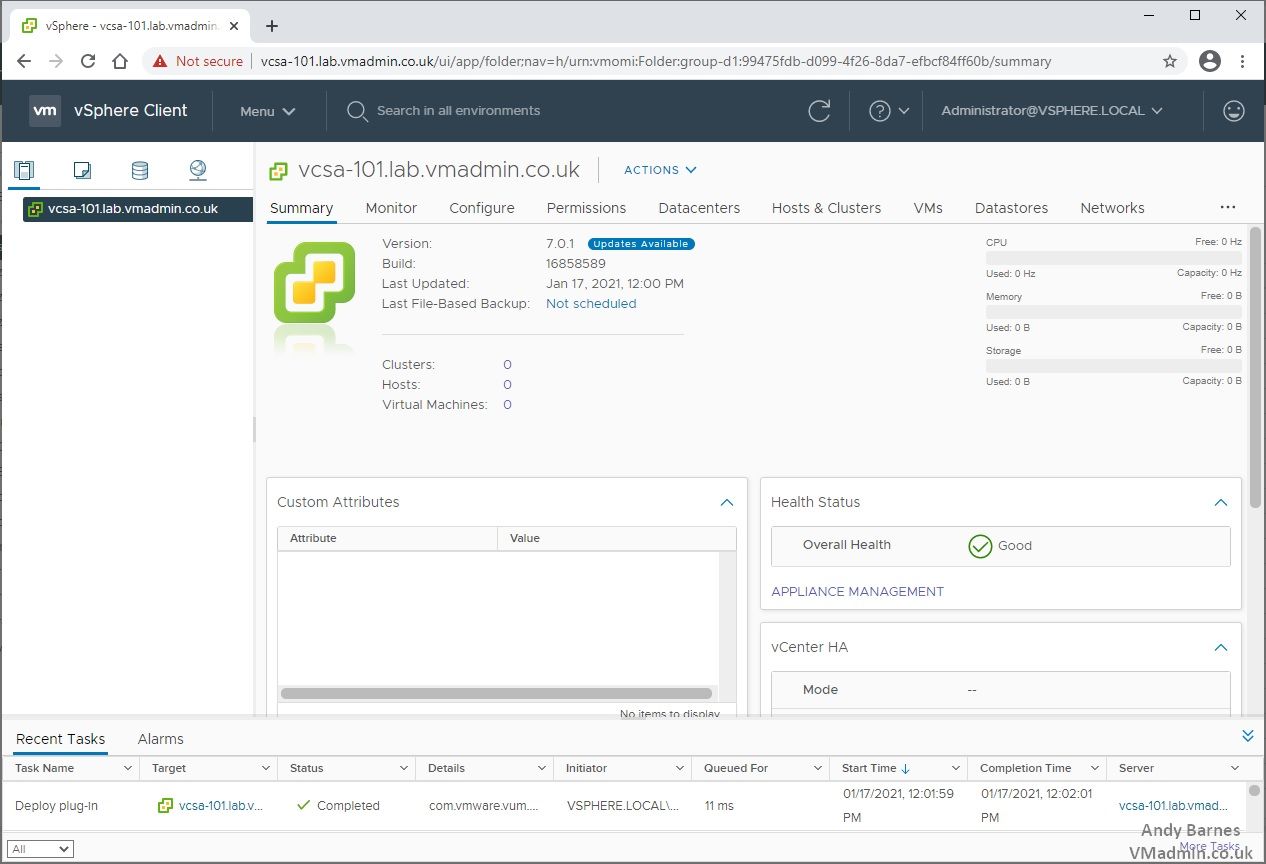
27. And thats it, your vCenter Server Appliance is deployed and ready to use!
The next step is to create a datacenter object, cluster and add your hosts, this is detailed in the next post..
Continued in the next part..
vSphere 7 U1 - Part 3 - Creating a Datacenter, HA/DRS Cluster and Adding a Host
Share this blog post on social media:
Tweet


Latest Blog Posts
- vSphere 7 U1 - Part 3 - Creating a Datacenter, HA/DRS Cluster and Adding a Host
- vSphere 7 U1 - Part 2 - Deploying vCenter 7.0 U1 VCSA
- vSphere 7 U1 - Part 1 - Installing ESXi 7.0 U1
- Veeam CBT Data is Invalid - Reset CBT Without Powering Off VM
- View Administrator Blank Error Dialog/Window After Upgrade