Templates can be very useful in reducing time to deploy a virtual machine and ensuring that it is built to a certain standard.
Say you have a test server that you are constantly deploying to test various senarios.
Installing the OS, applications and configuring it can be very time consuming. After a while even though you have done it a thousand times you forget to do something in the right order and have to start over.
This is where templates will make you sane again.
What you would do is create the perfect virtual machine:
Install the OS
Fully patch the system
Install applications/configure etc
Now convert this VM to a template.
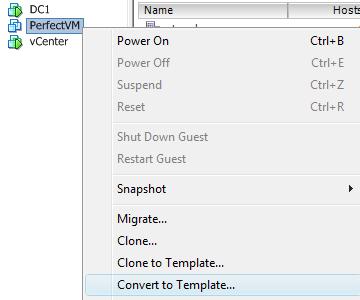
A task will show when this is complete (it only takes a few seconds for this change).

Switch to the "Virtual Machines And Templates" view so you can now see your template.
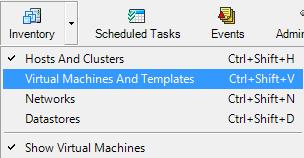
You will see the template has a different icon to a virtual machine.
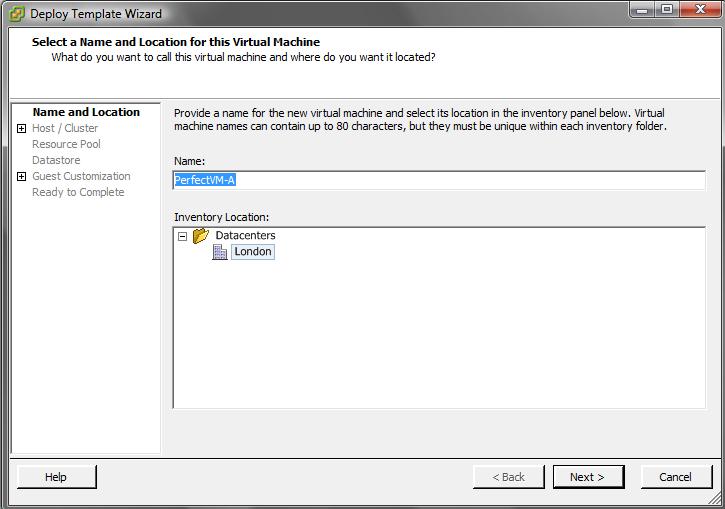
Now right click the template and select "Deploy Virtual Machine form this Template".

The Deploy Template Wizard will appear.
Give the VM a suitable name and location. Click Next.
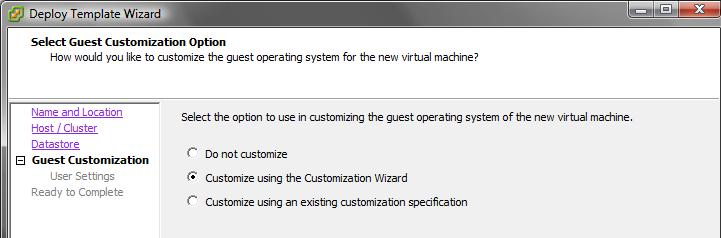
Now you could either not customize the template or customize it.
If you choose not to customize the VM it will have the same SID and other settings as the original VM. If you deploy several VMs from this template they will conflict with each other, but the option is there.
We want to customize the VM deployed from this template so choose "Customize using the Customization Wizard". Click Next.
Now the Guest Customization Wizard appears. This will look familiar if you have used sysprep or infact install windows before.
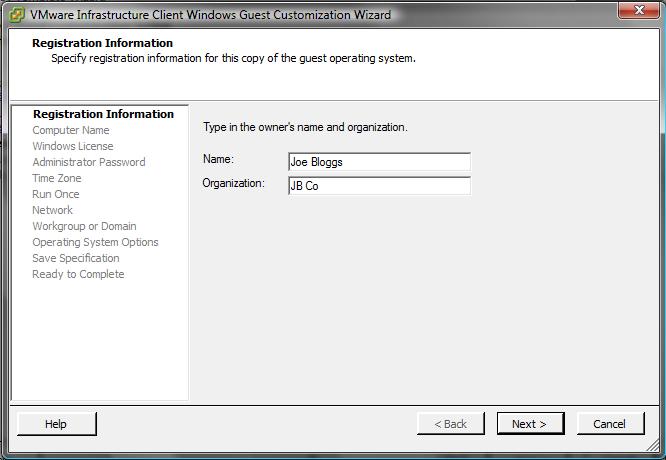
Enter the Name and Organization. Click Next.
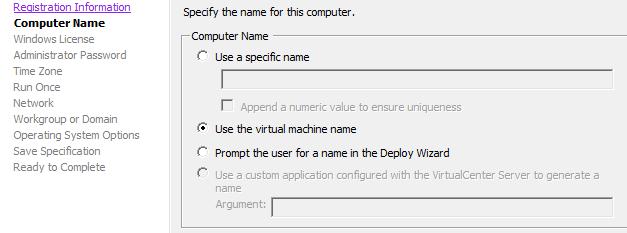
If you prefer to have VM and OS computer names the same, choose "Use the virtual machine name". Otherwise give another name for the computer. Click Next.
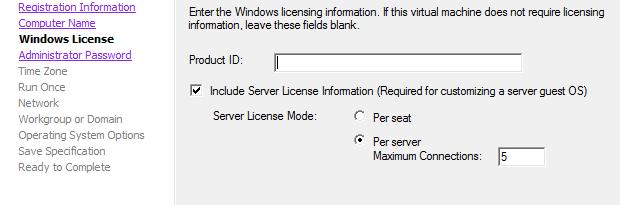
Enter licensing details, for servers tick the box for licensing mode (per seat/per server). Click Next.
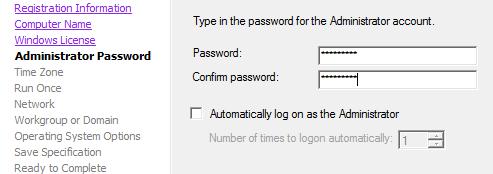
Enter the password and confirm. You can optionally auto login as administrator if you wish. Click Next.
Set the timezone. Click Next.

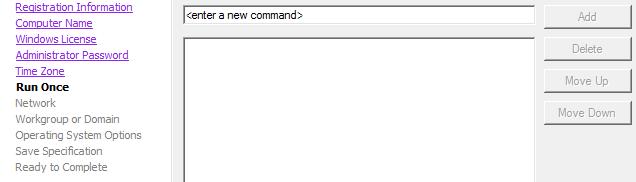
It is possible to run commands during the customization, if you want to do this now is the time to enter them. Click Next.
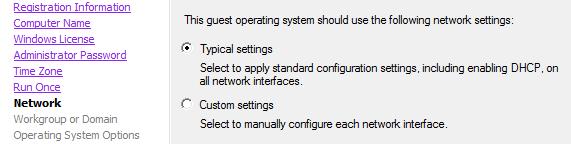
Configure the network settings. Click Next.
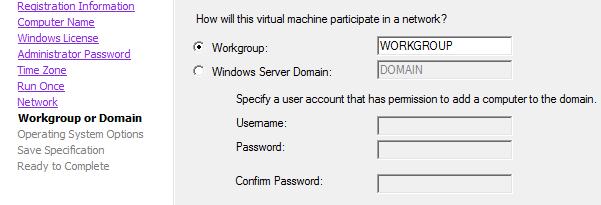
Configure the domain/workgroup settings. Click Next.
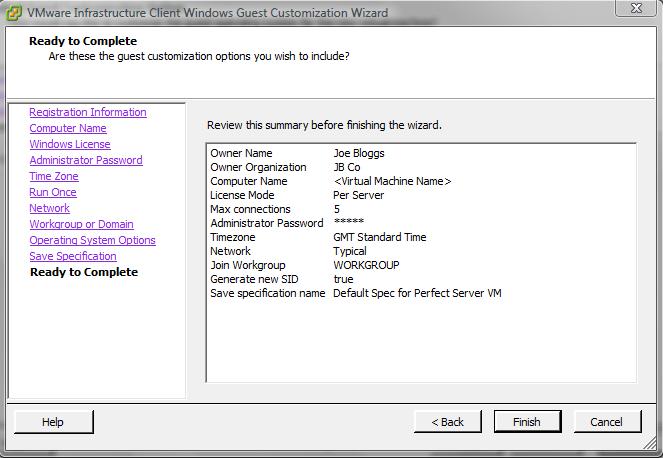
You can also save this specification for deploying these settings without having to enter them again. Click Next.

Review guest customization settings and click Next.
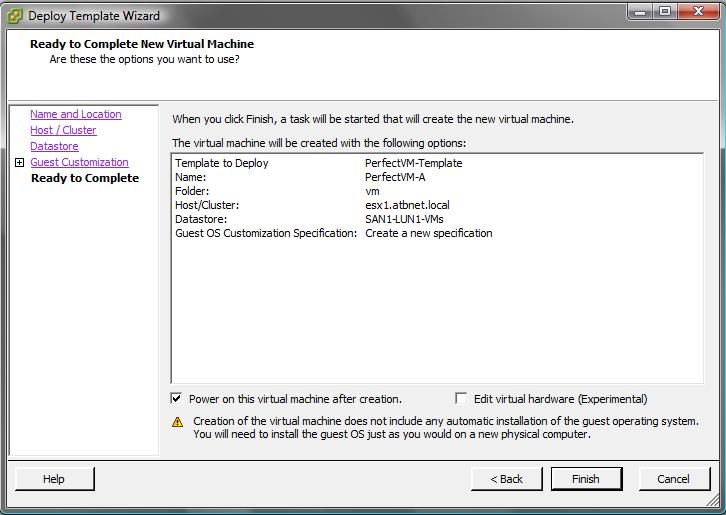
Review template settings and click Finish.
The VM will now be created and configured to the defined settings. It will take sometime to first copy the template and then customize the OS. During the customization process the OS will reboot several times before completing.
Share this blog post on social media:
Tweet


Latest Blog Posts
- vSphere 7 U1 - Part 3 - Creating a Datacenter, HA/DRS Cluster and Adding a Host
- vSphere 7 U1 - Part 2 - Deploying vCenter 7.0 U1 VCSA
- vSphere 7 U1 - Part 1 - Installing ESXi 7.0 U1
- Veeam CBT Data is Invalid - Reset CBT Without Powering Off VM
- View Administrator Blank Error Dialog/Window After Upgrade