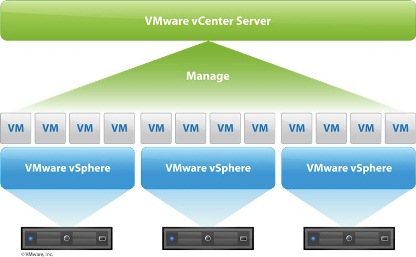
VMware vCenter Server is "THE" management system for your VMware vSphere virtual infrastructure. It's used to manage your clusters of ESXi servers, configure HA, DRS and vMotion, manage your virtual networks and their interfaces to the physical network.
Its also used to provison storage (maybe even integrated with your SAN) and create virtual machines, including templates and other wonderful things.
For those wanting to find out the new features specifically in vSphere and vCenter server 4.1 please see here.
So whats required for VMware vCenter server you ask...(and you do!)
Well firstly it CAN be either virtual or physical and its supported on either.
The operating system for vCenter 4.x must be 64-bit, this has changed from earlier releases such as vCenter 2.5 which was 32-bit only. Also note that a 64-Bit DSN is now required to access the vCenter database.
Minimum requirements for the vCenter Server are as follows:
Processor: Two 64-bit CPUs Intel or AMD x64 2.0GHz or faster (could be one dual core - the key is two logical processors at a minimum)
Memory: 3GB RAM. RAM requirements may be higher if your database runs on the same machine. (VMware VirtualCenter Management WebServices requires 128Mb to 1.5GB of memory which is allocated at startup)
Disk storage: 2GB (Disk requirements may be higher if your database runs on the same machine)
Networking: 1GB recommended (If physical team NICs for redundancy)
Database: SQL Express for small deployments (5 hosts/50 VMs) or see below for supported databases.
Note: If you will be running SQL Server on the same server as vCenter server (thats either express or standard/enterprise) the requirements for the above will be higher.
Operating System:
Windows XP Pro SP2 (SP2 required, 64-bit)
Windows Server 2003 (SP1 required, 64-bit)
Windows Server 2008 (64-bit)
Windows Server 2008 R2
Database:
Microsoft SQL server Database Support:
Microsoft SQL Server 2005 Express (Note: Microsoft SQL Server 2005 Express is intended for use with small deployments of up to 5 hosts and/or 50 virtual machines)
Microsoft SQL Server 2005 Standard edition (SP1, SP2, SP3)
Microsoft SQL Server 2005 Standard edition (SP2, SP3) 64 bit
Microsoft SQL Server 2005 Enterprise edition (SP1, SP2, SP3)
Microsoft SQL Server 2005 Enterprise edition (SP2, SP3) 64 bit
Microsoft SQL Server 2008 Standard Edition
Microsoft SQL Server 2008 Standard Edition 64 bit
Microsoft SQL Server 2008 Enterprise Edition
Microsoft SQL Server 2008 Enterprise Edition 64 bit
Oracle Database Support:
Oracle 10g Standard edition (Release 2 [10.2.0.4])
Oracle 10g Enterprise edition (Release 2 [10.2.0.4])
Oracle 10g Enterprise edition (Release 2 [10.2.0.4]) 64 bit
Oracle 11g Standard edition
Oracle 11g Enterprise edition
IBM DB2 9 Support:
IBM DB2 Express Edition 9
IBM DB2 Workgroup Server Edition 9
IBM DB2 Enterprise Server Edition 9
(For detailed OS and Database information please refer to the VMware vSphere Compatibility Matrix)
The following is used in this walkthrough installation of vCenter Server 4.1:
Windows Server 2008 Standard R2 64-Bit
SQL Server 2008 R2 Standard 64-Bit (on a seperate server sql1.vmadmin.local)
VMware vCenter Server 4.1
1. Creating the SQL Server Database
1a. Install a supported version of SQL server on a seperate server or on the vCenter server (skip to step if using SQL Server Express).
1b. Create a new SQL Server database:
SQL Server -> Databases -> Right Click -> New Database...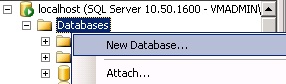
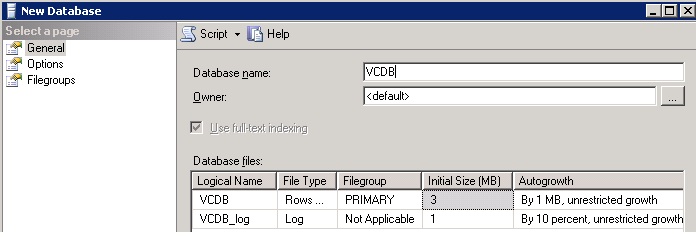
1c. Name the new database "VCDB" and set the required location for the database files (this will server as your vCenter Server database).
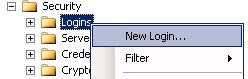
1d. Create a SQL Server user named "vpxuser":
SQL Server -> Security -> Logins -> Right Click -> New Login
1e. Enter the login name "vpxuser", enter a password.
Untick "Enforce password policy" and change the default database to "VCDB". 
1f. While still in the user login dialog, goto the "User Mapping" section.
Tick the "Map" box next to both the "msdb" and "VCDB" databases.
For both databases set the default schema to "dbo" and set the role membership to "db_owner".
Click Ok.
Note: The role membership of "db_owner" on the "msdb" database can be revoked after installation (It will be required again when upgrading).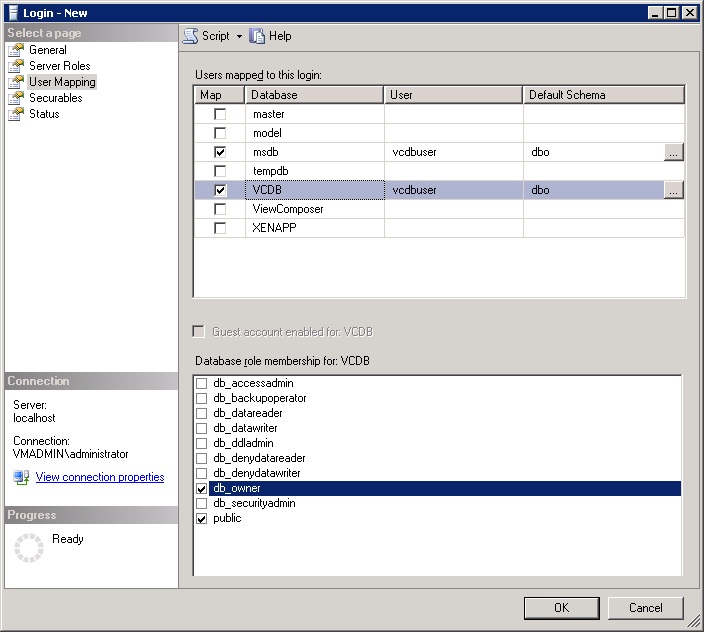
2. Creating the Data Source
Note: The DSN must be a 64-bit DSN.
2a. Create a system DSN on the vCenter server:
Go to Start -> Control Panel -> Administrative Tools -> Data Sources (ODBC).
Go to the "System" tab.
Click Add.
2b. Select SQL Native Client and click Finish.
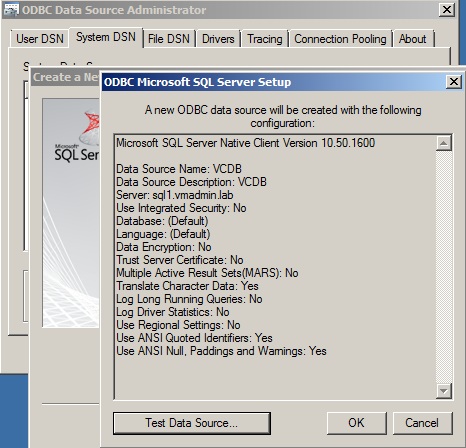
2c. Give the ODBC DSN a name "VCDB" and description.
Select/type in the server name from the drop-down menu.
Configure SQL Server authentication and click Next.
Type your SQL Server login name and password.
Configure the default database as the vCenter database you created "VCDB" and click Next.
Click Finish.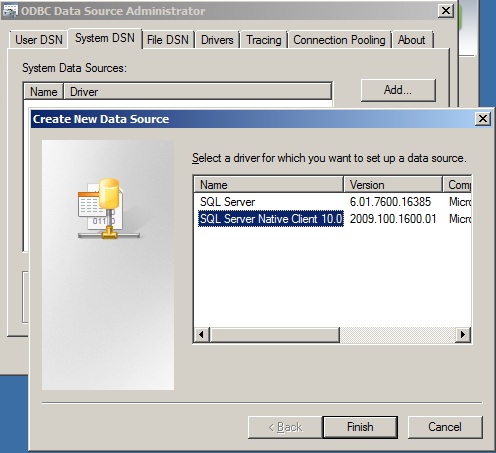
2d. Test Data the Source.
Click Ok and Close the ODBC Data Source Administrator.
3. Installing vCenter Server
3a. Insert DVD or unzip "VMware-VIMSetup-all-4.1.0-259021.zip"
If it does not autorun, use "autorun.exe" in the root of the cd or folder.
Click "vCenter Server" to start the installation.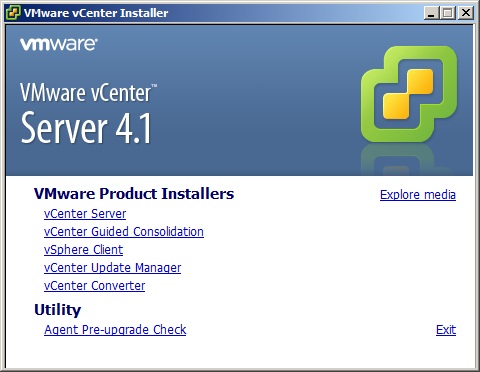
3b. Choose your language.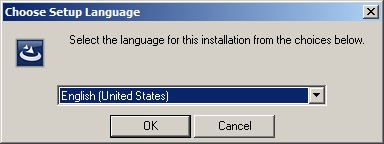
3c. Read the Introduction page and click Next.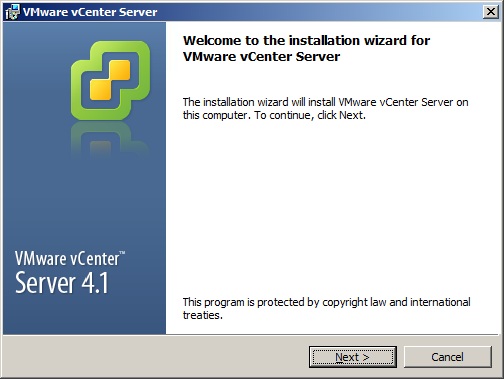
3d. Read the license agreement and agree. Click Next.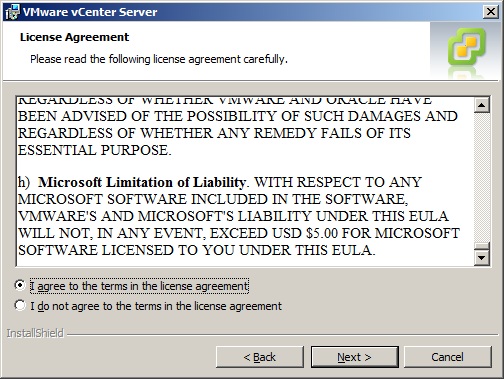
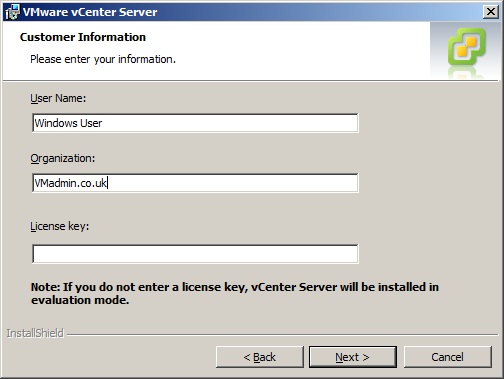
3e. Enter the username, company name and license key (if you havent got a license key it will install a full evaluation version for 60 days)
Click Next.
3f. Enter the system DSN that your created for the vCenter server database.
If using SQL Server 2005 Express select so and continue the installation which will install an instance of SQL Server Express to use as the vCenter database.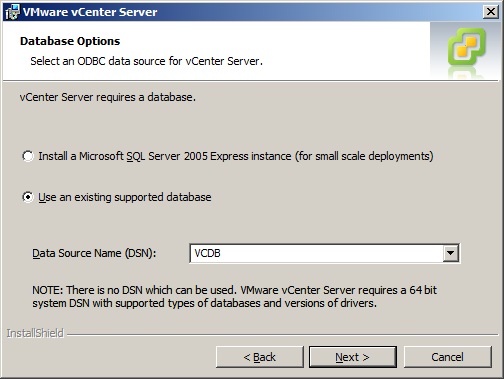
3g. Enter the username and password for the system DSN SQL Server user.
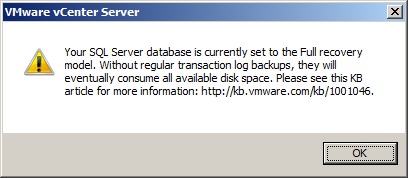
3h. If your SQL Server database for vCenter server is set to the full recovery model you will get the following warning about transaction log backups.
Click Ok or read the KB article 1001046 if you do not understand what this means, essentially ensure you are making regular transaction log backups otherwise the transaction logs will fill up your database servers disk!
3i. Enter the service acccount information that the vCenter server service will run under.
It can run under the SYSTEM account fine but it is recommended you create a standard active directory user to be used as the service account and add this to the "local administrators group" on the vCenter server.
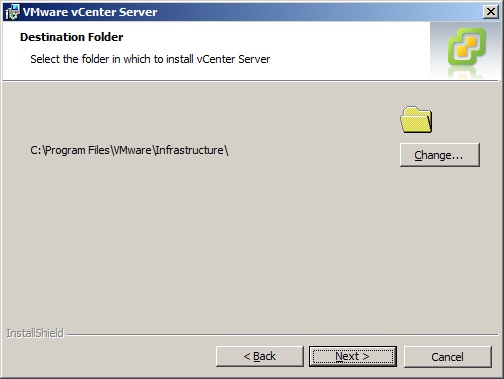
3j. Change the installation destination as required.
3k. Choose "Create a standard VMware vCenter Server Instance".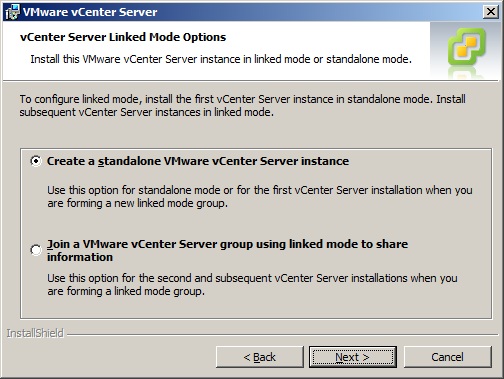
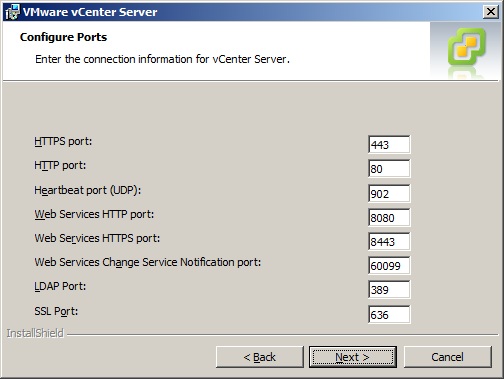
3l. Keep the ports unless your are required to specifically change them form their defaults.
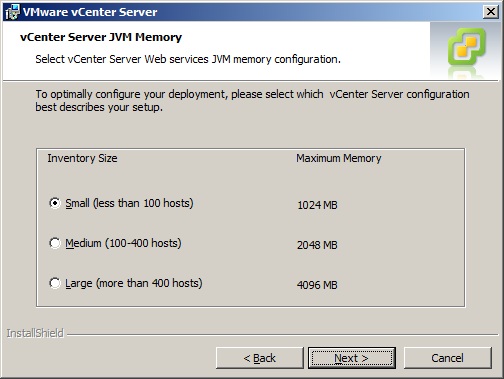
3m. Select your deployment inventory size to correctly size the JVM memory for vCenter server web services.
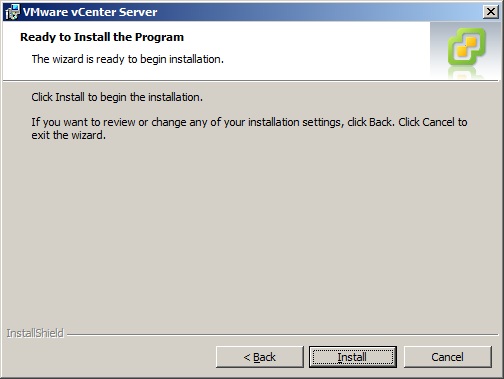
3n. Click install and make a cup of tea!
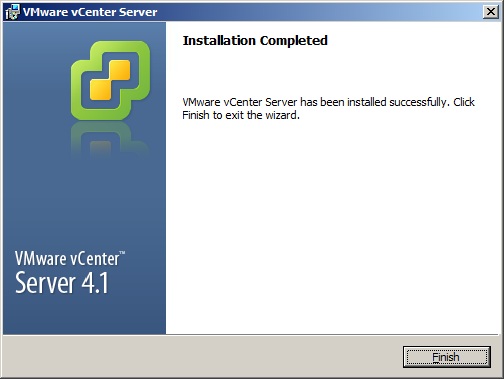
3o. The installation will complete and click Finish.
4. Check and Login to vCenter Server
4a. Check the services for vCenter server have been installed and are started:
Click Start -> Run -> services.msc
Ensure the following services are started and are running under the account your specified (SYSTEM or domain\svc_yourvcenteraccount)
VMware VirtualCenter Management Webservices
VMware VirtualCenter Server
VMwareVCMSDS (Note: Runs under Network Service)

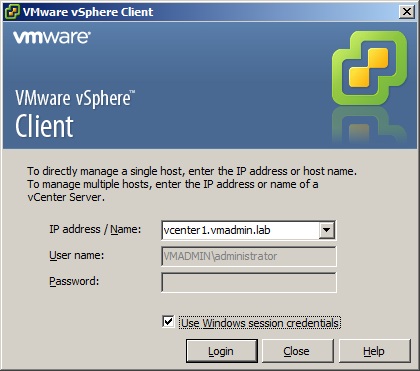
4b. Login to vCenter Server:
Start -> Programs -> VMware -> VMware vSphere Client
Enter the FQDN or IP of your vCenter server, username and password (or use windows session credentials to passthrough).
Click Login.
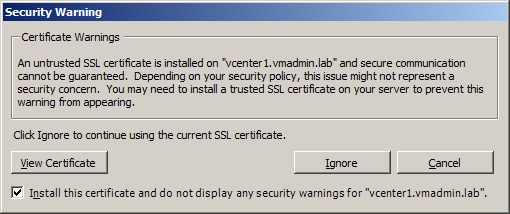
4c. You will receive a security warning due to the vCenter server using self signed certificates.
Tick "Install this certificate.." and click Ignore.
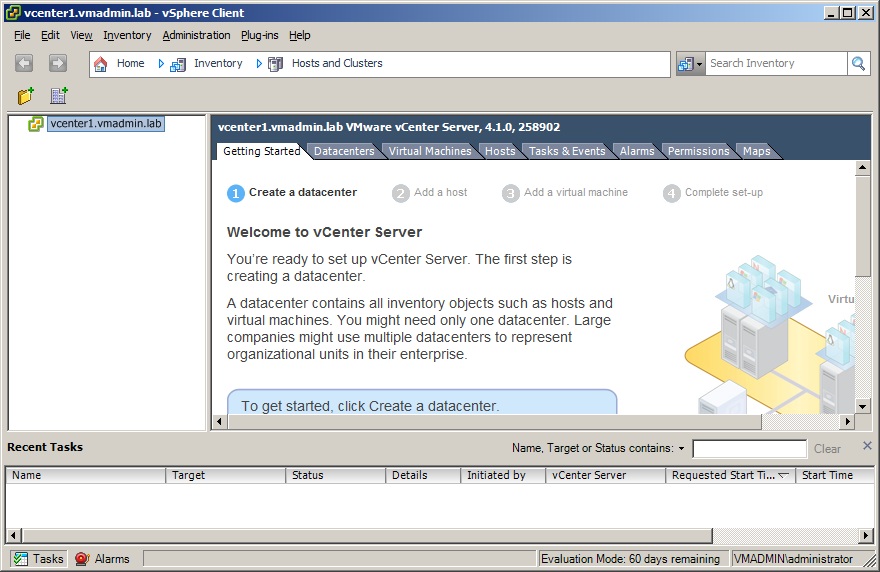
4d. And there you have it! Your vCenter Server is installed and ready to configure.
See Creating a Datacenter, HA DRS Cluster and Adding a Host for the next steps you need to take...
Share this blog post on social media:
Tweet


Latest Blog Posts
- vSphere 7 U1 - Part 3 - Creating a Datacenter, HA/DRS Cluster and Adding a Host
- vSphere 7 U1 - Part 2 - Deploying vCenter 7.0 U1 VCSA
- vSphere 7 U1 - Part 1 - Installing ESXi 7.0 U1
- Veeam CBT Data is Invalid - Reset CBT Without Powering Off VM
- View Administrator Blank Error Dialog/Window After Upgrade