DirectAccess is a feature of the Remote Access role in Windows Server 2012 and 2012 R2, however it has actually been around since 2008 R2.
The client component of DirectAccess is actually built into Windows 8.x and does not require any additional roles or software installing.
DirectAccess is a remote access solution which can replace traditional VPN (either MS based or otherwise).
Instead of the client having to initiate a VPN connection to the office/datacentre after they logon, DirectAccess automatically connects computers and users to their corporate network if they are connected to the internet.
The DirectAccess client computer is intelligent enough to realise if it is on the corporate network or not.
It does this using the NCA (Network Connectivity Assistant) to check if it can reach the NLS (Network Location Server) and any additional checks such as a ping to an internal server.
If those checks don't succeed, the client assumes it's on a public/private network and will try to connect using DirectAccess via the internet.
The client connects to the DirectAccess server simply over HTTPS (port 443), which is great for firewalls when accessing remotely in public places and hotels etc as this port is almost always allowed.
Firstly the HTTPS connection is secured with SSL certificates, then a secure IPSEC tunnel is established.
Something else you need to know is DirectAccess uses IPv6 only. However it does utilise NAT64 and DNS64 to provide access to internal IPv4 resources.
One important point I will make is unless you have IPv6 or ISATAP configured in your corporate network (or the bits you want to reach the DirectAccess clients from), then you will be unable to reach them.
For example SCCM remote control from the SCCM server to the DirectAccess client. This is because the DirectAccess client will have been given an IPv6 address from the DirectAccess server. The client will be able to access IPv4 resources just fine provided it is using an FQDN (not the IPv4 IP address as that will not work).
Another important point to make is the use of a PKI. An internal PKI is of course recommended but in a small single site DirectAcess deployment you can actually use the default self-signed certificates.
I'm a huge fan of DirectAccess and it's simplicity from a user perspective. It really is an advancement within the remote access solution arena and to have this part of Windows Server and the Windows client by default is simply amazing.
Here I will be installing a single DirectAccess server in a single site using self-signed certificates.
It is possible to install DirectAccess in a multi-site topology with multiple DirectAccess servers at each site for a highly available DirectAccess solution.
First we will get started with some simple pre-requisites, followed by the installation of the role/feature.
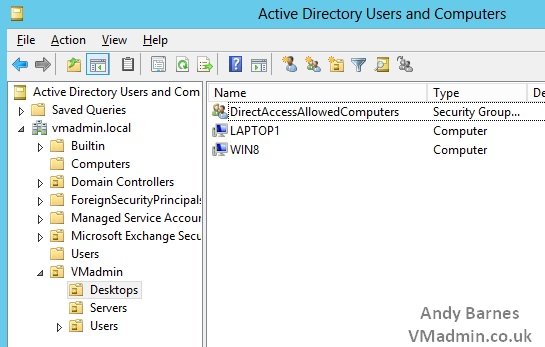
1. Open Active Directory Users and Computers
2. Create a Security Group named "DirectAccessAllowedComputers" (or to that effect)
3. Add a test computer to this group (do not all the clients yet - misconfiguration could see them disappear from the corporate network!)
4. Create an external DNS A record to a public IP you own
5. On you're firewall ensure that port 443 for the public IP is forwarded to the IP of the DirectAccess server
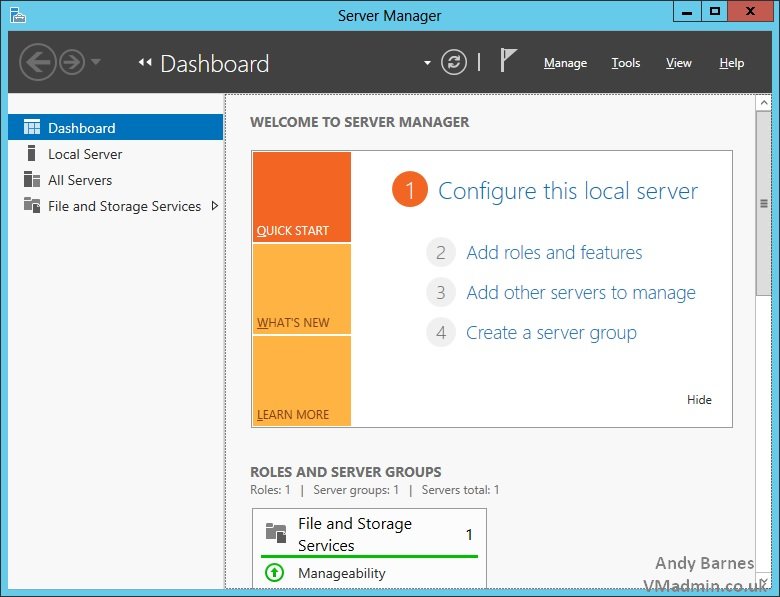
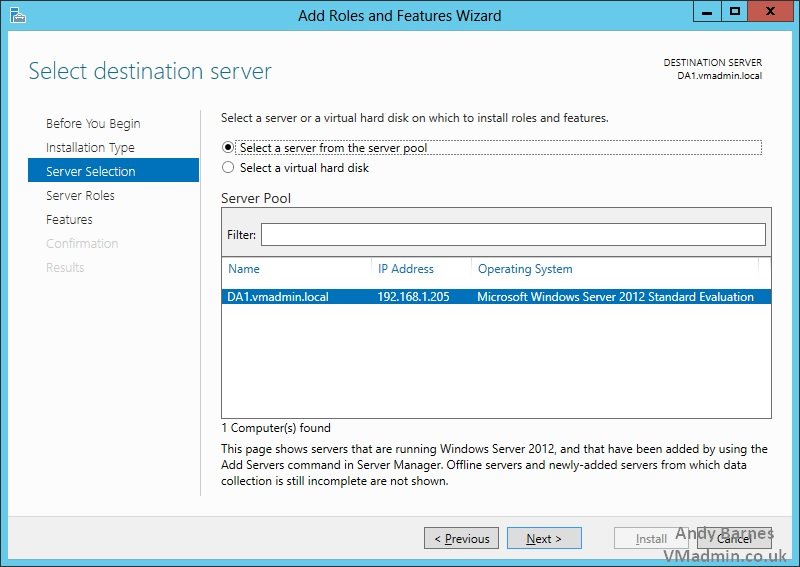
6. Open Server Manager on the server which will become the DirectAccess server
Note: This must not be a domain controller and should be a dedicated server
The DirectAccess server should exist within the DMZ on a separate network to the rest of the backend network so that you can control the resources remote clients can access.
It can be a virtual machine with a single network adaptor (which is what I will be building here).
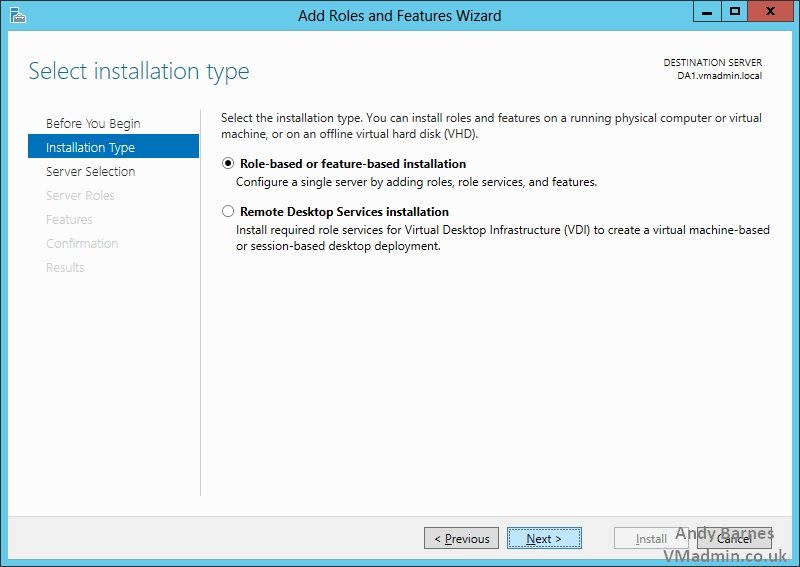
7. Click Add roles and features
8. Select Role-based or feature-based installation
9. Keep the default local server selected
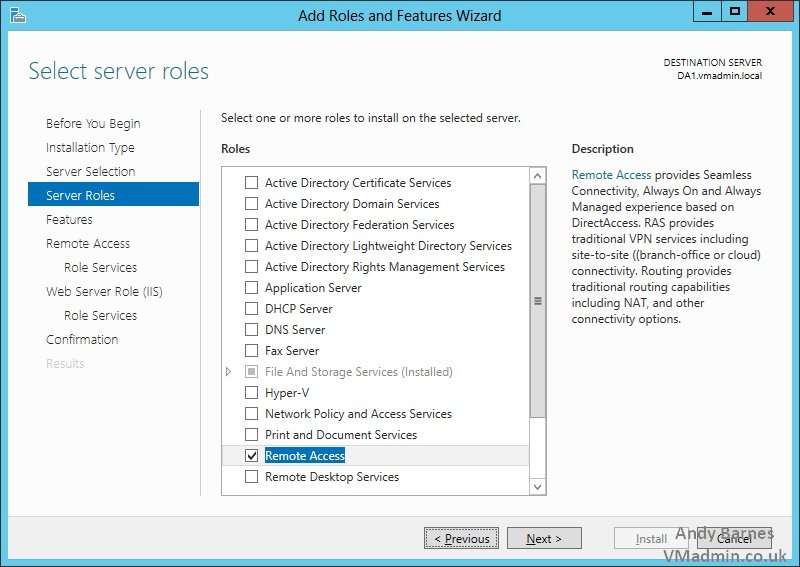
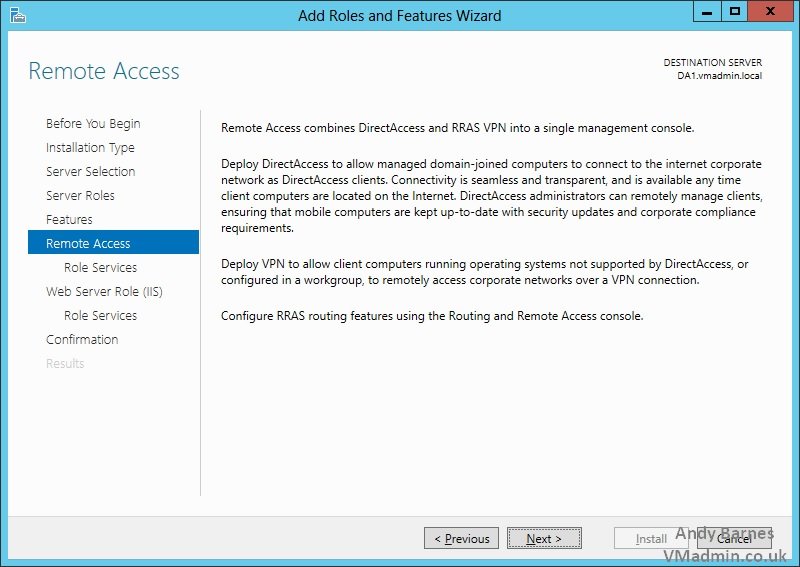
10. Select the "Remote Access" role
11. Accept the dependant roles and features required for the Remote Access role
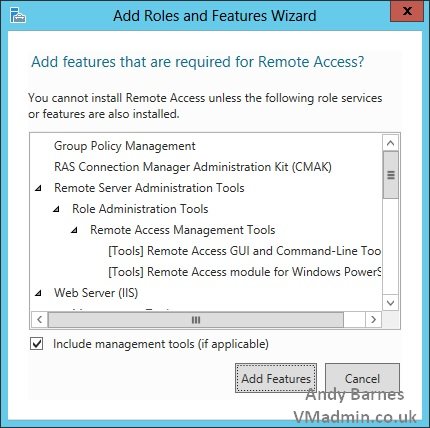
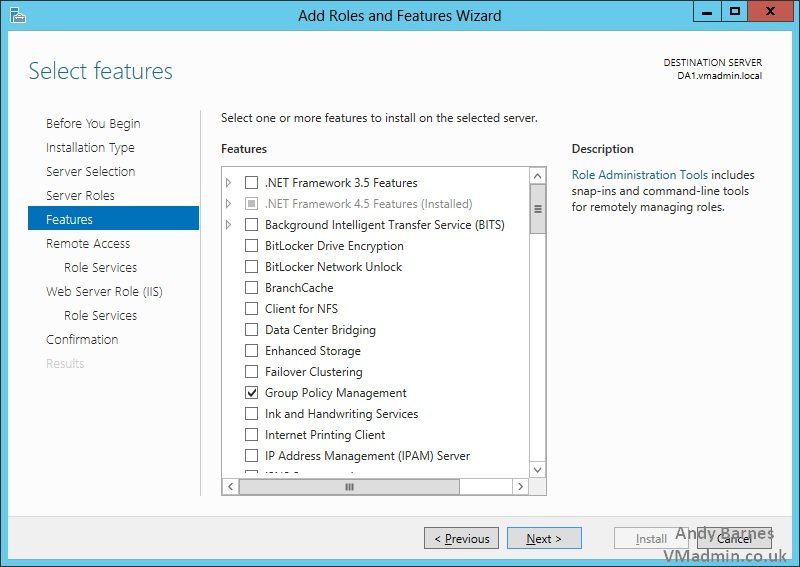
12. Note the Group Policy management role will be installed
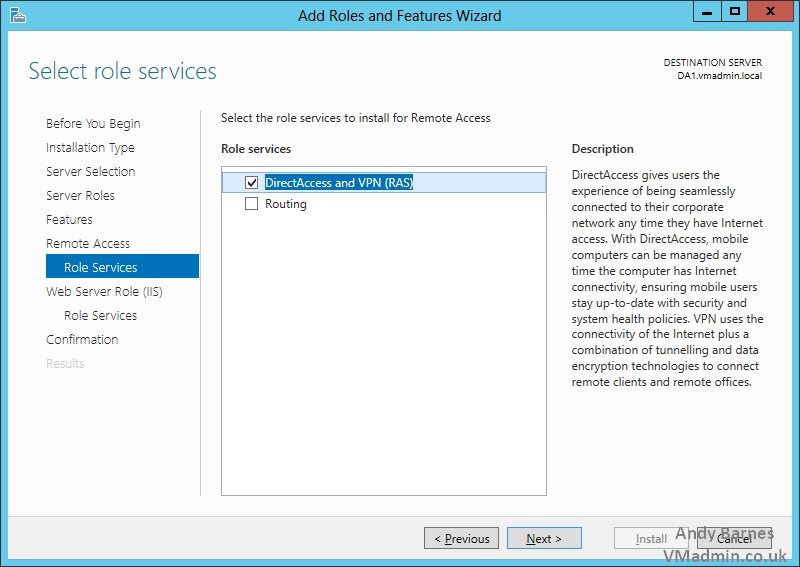
13. Now the Remote Access role services will be selected
14. Tick the "DirectAccess and VPN (RAS) role service
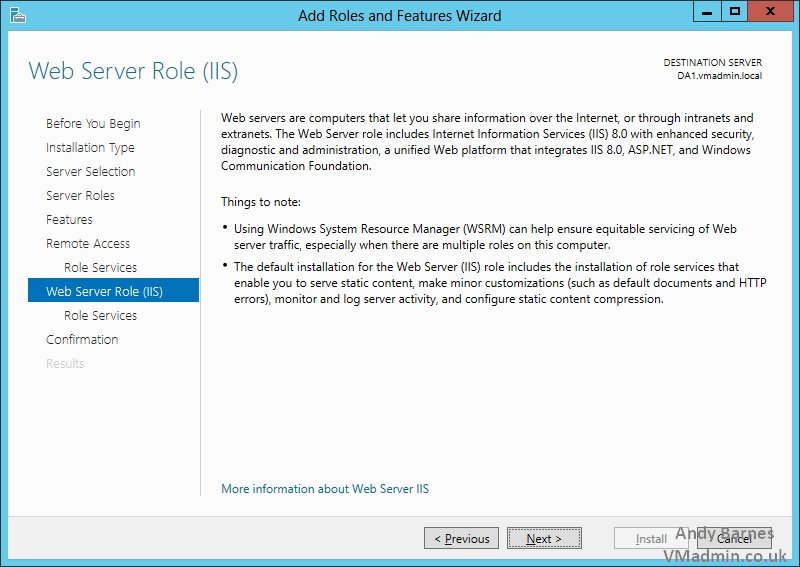
15. The IIS role will be installed as a dependency for Remote Access role with the DirectAccess feature
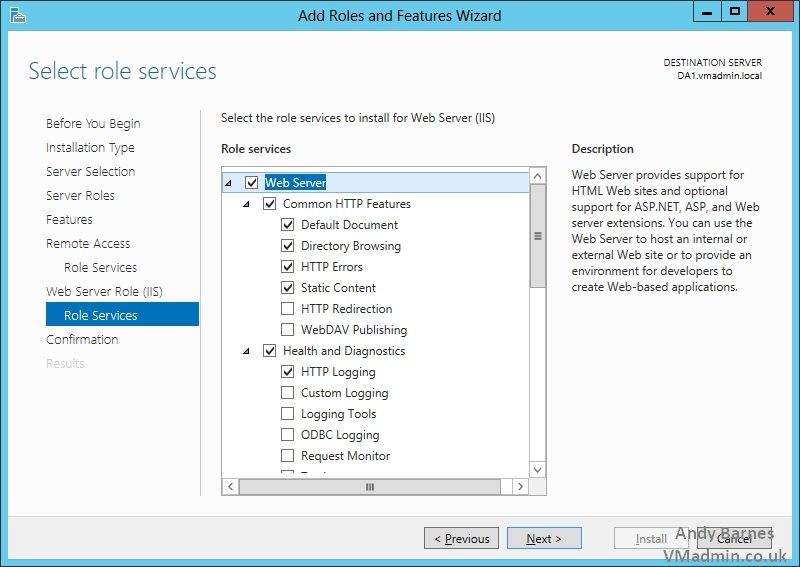
16. Keep the automatically selected role services for IIS
17. Click Install!

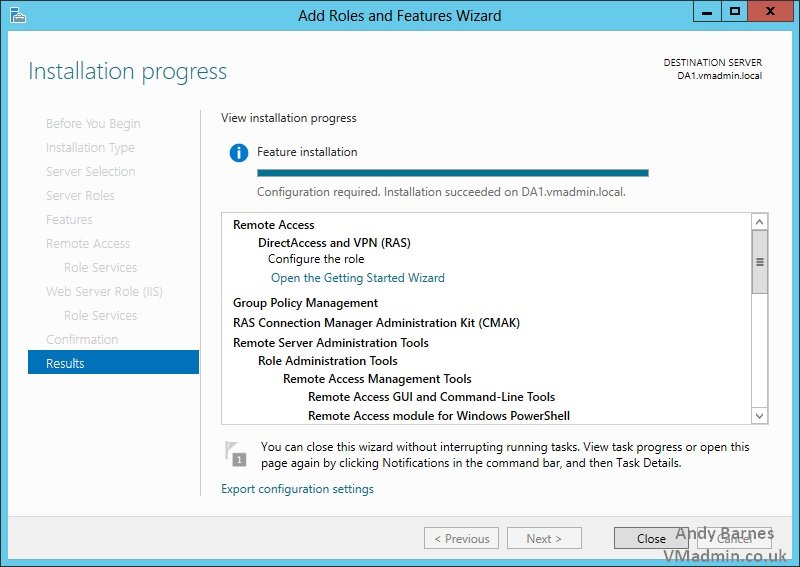
18. Once the roles and features have been installed Click Close.
Share this blog post on social media:
Tweet


Latest Blog Posts
- vSphere 7 U1 - Part 3 - Creating a Datacenter, HA/DRS Cluster and Adding a Host
- vSphere 7 U1 - Part 2 - Deploying vCenter 7.0 U1 VCSA
- vSphere 7 U1 - Part 1 - Installing ESXi 7.0 U1
- Veeam CBT Data is Invalid - Reset CBT Without Powering Off VM
- View Administrator Blank Error Dialog/Window After Upgrade