Resizing virtual disks is relativley straight forward. However, as with anything before making changes ensure you have a backup (especially when making changes to disks).
Note: You cannot change the disk size if you take a snapshot, plus if there was an issue with the disk the snapshot would be useless anyway.
Another thing to be aware of is you can only INCREASE the size of a virtual disk. You cannot reduce the size of a virtual disk, VMware does not currently allow it as it could risk losing data. If you want to reduce the disk size you could either use VMware converter to copy the VM and resize the disks at the same time or create a new smaller virtual disk and copy the data over to it.
To Increase the size of a virtual disk (.VMDK):
2. Right click on the virtual machine and select "Edit Settings".

We are not finished yet. If you boot the virtual machine now the OS will not see the new size, it will only see the old size. You need to expand the volume into the new free space. Below are two methods of doing this, and depding on the guest OS and your preference depends which one you will choose.
Method 1 (Windows DISKPART) will of course only work in windows.
Method 2 (GParted) will work for any OS, including Linux and Unix provided as the filesystem type is supported by your chosen partitional utility.
Method 1 (Windows DISKPART):
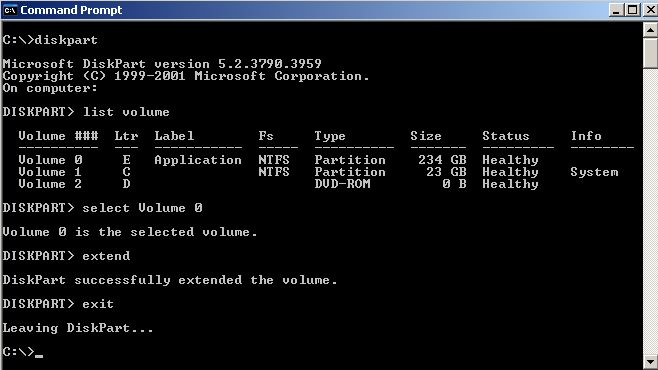
1. Click Start --> Run and type "diskmgmt.msc"
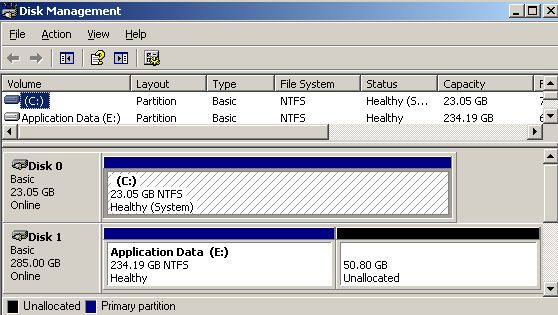
2. You will see the free space after your volume.
3. Use DISKPART to extend the volume into all the free space:
4. You will now see the volume has been extended to use all the free space.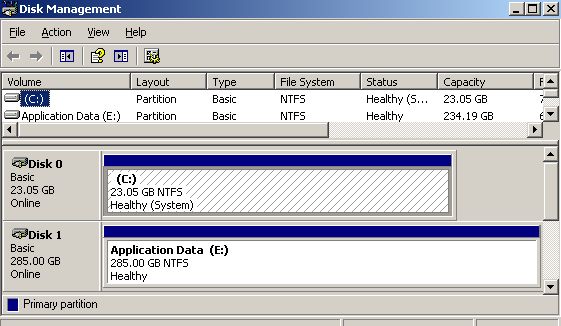
Method 2 (GParted):
To resize the partition on the disk use your favourite partition resizing tool. If you dont have one mine is GParted, which there is a live CD for. Download the GParted Live CD
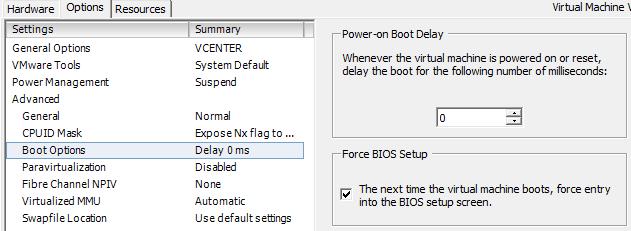
1. Click on the "Options" tab and go to "Boot Options".
2. Tick "Force BIOS Setup" (This will boot into the BIOS screen when the VM is powered on - This is so that you can mount and ISO image before the OS boots.)
3. Click Ok to reconfigure the virtual machine.
4. Connect the ISO image or connect the CD drive with your GParted Live CD (This is easier with force BIOS option set in step 5).

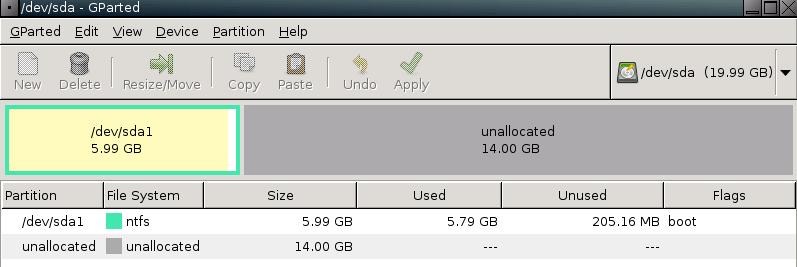
5. Boot into GParted and you will see the current partion in the now much larger disk.
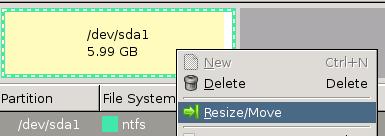
6. Right click on the partion and select "Resize/Move".
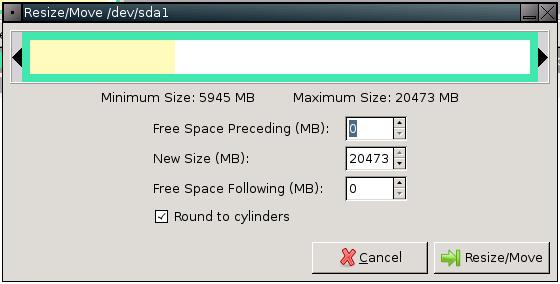
7. Resize the partion to fill entire remaining space and click "Resize/Move".
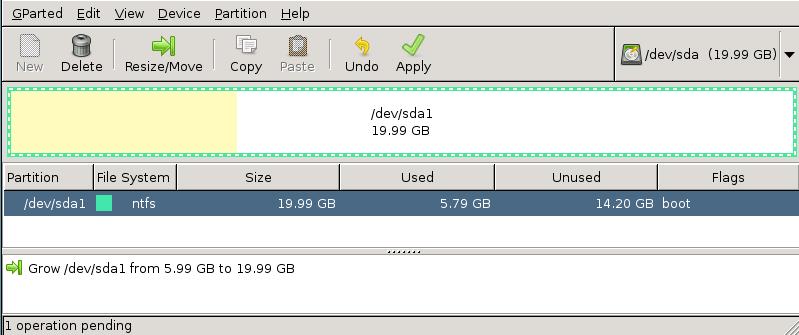
8. Click "Apply" to run the resize task. After sometime depending on the size the task will complete.
9. Reboot the computer, remove the CD and boot into the OS.
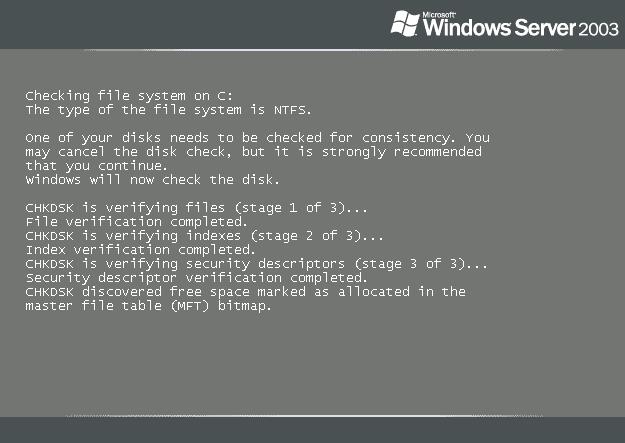
10. Depending on the OS it may perform a disk check like Windows Server 2003 here.
11. You should now see the disk has been resized.

Share this blog post on social media:
Tweet


Latest Blog Posts
- vSphere 7 U1 - Part 3 - Creating a Datacenter, HA/DRS Cluster and Adding a Host
- vSphere 7 U1 - Part 2 - Deploying vCenter 7.0 U1 VCSA
- vSphere 7 U1 - Part 1 - Installing ESXi 7.0 U1
- Veeam CBT Data is Invalid - Reset CBT Without Powering Off VM
- View Administrator Blank Error Dialog/Window After Upgrade