A catalog in XenDesktop is essentially a collection or aka a pool of desktops.
This catalog could be a pool of desktops automatically created by machine creation services (MCS), existing desktops created manually by the admin in the hypervisor (ideally not), or even physical blade PCs and desktops (yes if you want). It can also be desktops created and streamed by provisioning server (PVS).
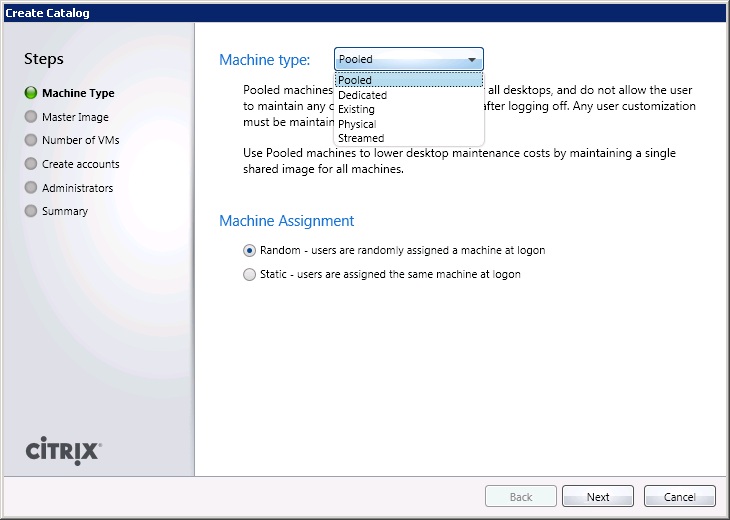
Here we are going to create the most common type of catalog which is "Pooled".
A pooled desktop requires the least amount of management because each time a user logs on they get a clean desktop which is an exact copy of our master image. At log off the virtual desktop gets refreshed. hence any changes/customisations are lost.
Now that sounds like a bad thing right?! What about that important document they saved on their desktop of their shopping list corporate report. It's going to be lost when they logoff! Well you need to employ something to manage their profiles such as folder redirection, Citrix profile manager, RES Workspace manager, AppSense etc (this is a large topic so I won't go into this now). Now they are free to logon to any desktop in the pool and their documents are still on their desktop and all application settings in their profile are retained (outlook settings and so on).
1. Open Citrix Desktop Studio
Start -> All Programs -> Citrix -> Desktop Studio
2. Select "Machines" from the inventory on the left.
3. Right click and select "Create catalog"
4. For machine type select "Pooled". For machine assignment select "Random". Click Next
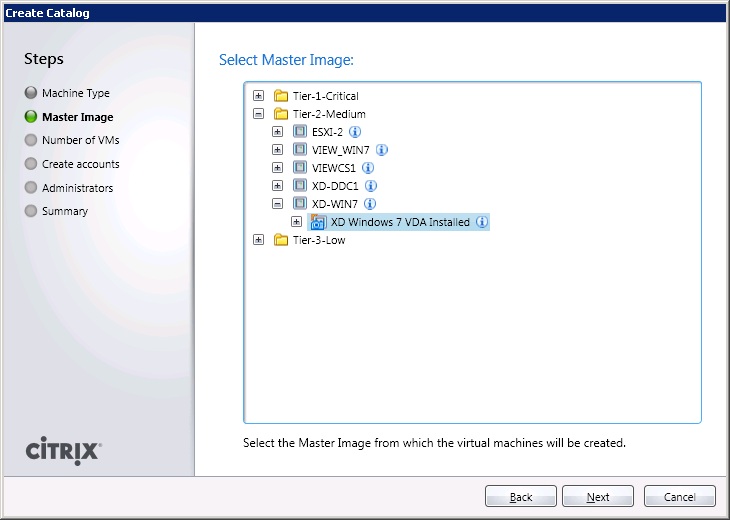
5. Select the master image and appropriate snapshot we created earlier (make sure you installed the VDA anc configured the DDC correctly).
By clicking the (+) next to the VM will expand through the various snapshots taken.
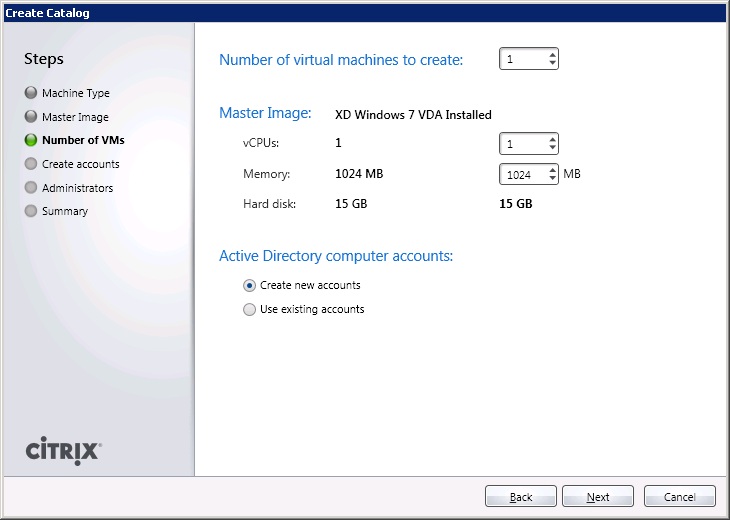
6. Enter the number of VMs to create. Tip: keep low to start with while you test.
You can adjust here the number of VCPUs and memory for all the VMs (if you want different from the master image).
Opt to create new AD computer accounts or use existing computer accounts. Click Next.
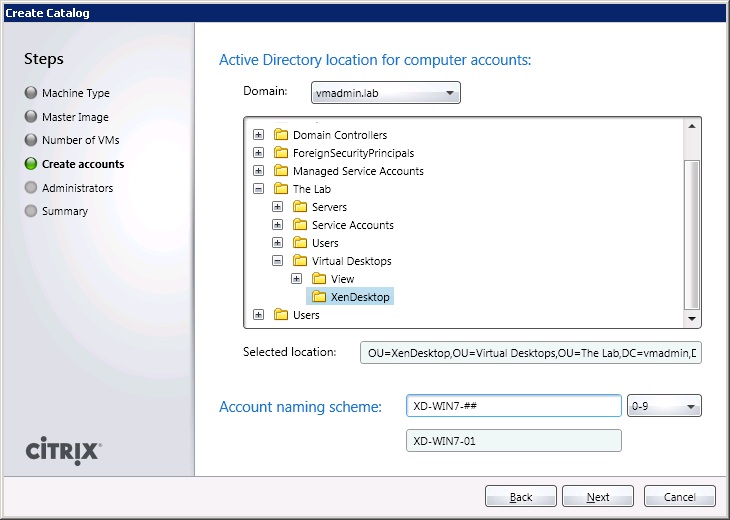
7. If you selected to create computer accounts we are prompted which OU in AD we want to create them in.
Use a naming scheme that make sense, ideally it identifies the catalog. Tip keep this within 15 characters :-)
e.g. XD-CAT1-###
Adding the (#) will insert an icremental value for each desktop provisioned in the catalog.
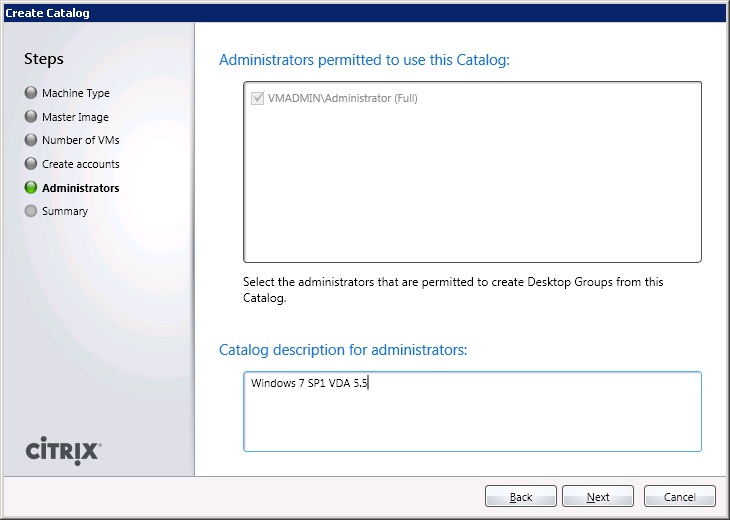
8. Enter a description for the XenDesktop admins to identify this catalog.
If you have configured additional administrators in Desktop Studio then you can permit them here.
Click Next.
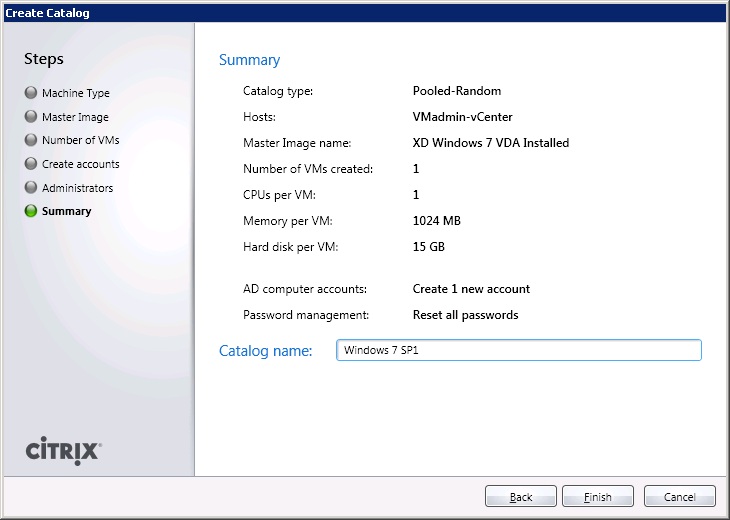
9. Review the catalog summary and give the catalog a useful name.
Click Finish to create the catalog and start provisioning desktops with MCS.
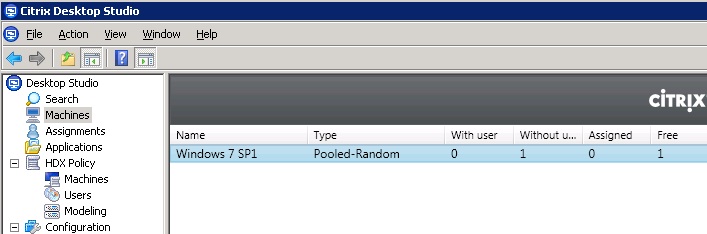
10. Once provisioning is complete you will see the catalog without any users assigned.
Before a user can access this desktop we need to assign users and groups to the catalog (aka entitle them).
Share this blog post on social media:
Tweet


Latest Blog Posts
- vSphere 7 U1 - Part 3 - Creating a Datacenter, HA/DRS Cluster and Adding a Host
- vSphere 7 U1 - Part 2 - Deploying vCenter 7.0 U1 VCSA
- vSphere 7 U1 - Part 1 - Installing ESXi 7.0 U1
- Veeam CBT Data is Invalid - Reset CBT Without Powering Off VM
- View Administrator Blank Error Dialog/Window After Upgrade