This is a guide to removing the Cisco Nexus 1000V DVS and VSM virtual machine cleanly from your hosts and vCenter Server.
DO NOT TRY TO DELETE THE NEXUS DVS OR VSM VM DIRECTLY!! This needs to be performed in a specific way (very strightforward when you know how), the DVS is removed via the the Nexus VSM so this is the last part to be deleted - Don't do it first!
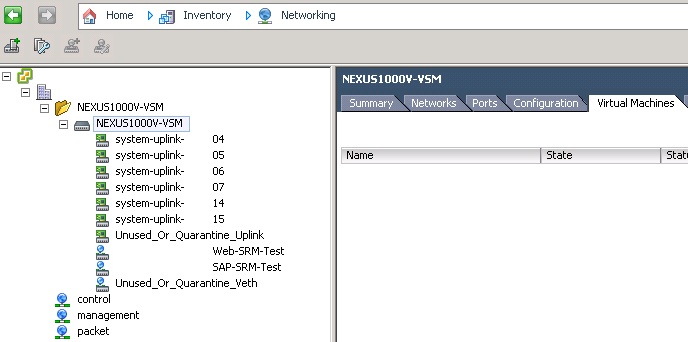
1. Login to vCenter and browse to your Cisco Nexus 1000V dvSwitch.
2. If you have not done so already ensure they are no VMs connected to the Nexus DVS port groups.
If there are still VMs connected to the Nexus 1000V port groups you need to migrate them all to another vSwitch/dvSwitch port group now.
Of course you will need to make sure the the new port groups are configured as required and any physical uplinks have the correct settings such as allowed VLANs etc (but thats out the scope of this article).
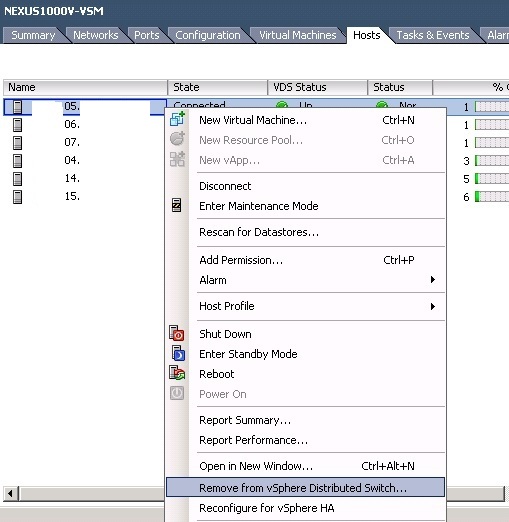
3. Remove the ESXi hosts from the Nexus vSphere Distributed vSwitch.
This is a pretty simple step and performed the same way as a normal dvSwitch.
Provided there are no VMs connected to the dvSwitch then this remove operation will complete successfully, if not you will need to see whats still connected.
4. Confirm the removal of the host from the DVS.
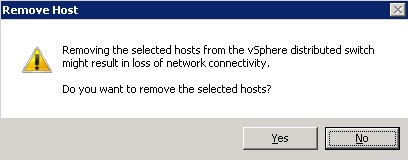
5. A vCenter task will run removng the host from the dvSwitch confirming this.
6. Repeat the removal of each ESXi server from the Nexus 1000V dvSwitch.

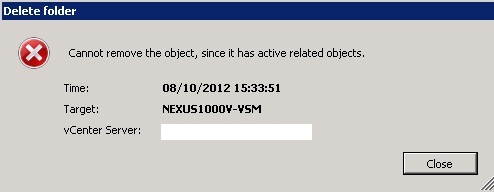
7. If you try to right-click remove the Nexus dvSwitch from vCenter at this point you will get the following error message:
"Cannot remove the object, since it has active related objects"
Don't get ahead of yourself! We need to unrelate the Cisco Nexus 1000V VSM from vCenter first, which then removes all the dvSwitch port groups, uplinks and switch automatically for us.
8. Connect to the Cisco Nexus 1000V VSM either via SSH or VM console
9. Check that the Cisco Nexus 1000V VSM is connected to vCenter Server
If the VSM is not connected to vCenter the next operations will fail to remove the DVS.
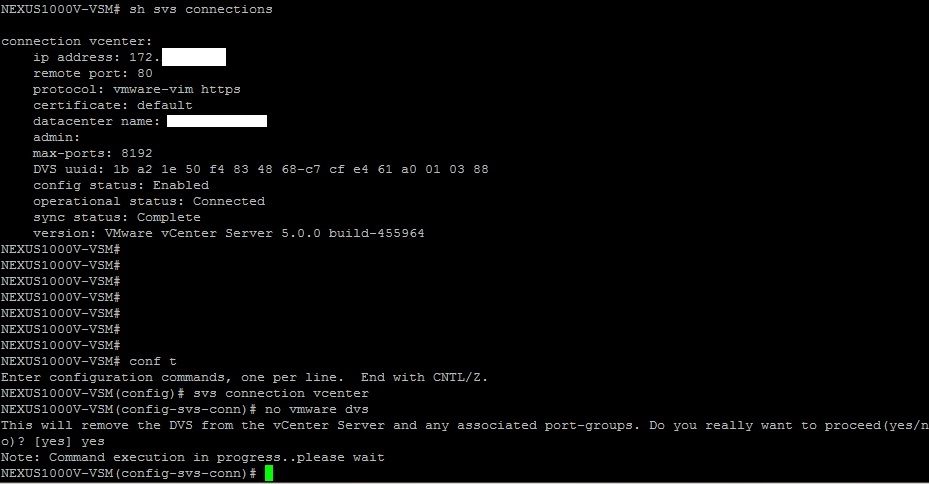
Ensure that the operational status and sync status are "connected" and "complete" by running "sh svs connections"
If its not connected try pinging, checking the vNIC is connected, reboot the VSM to see if it reconnects at boot etc.
NEXUS1000V-VSM# sh svs connections
connection vcenter:
ip address: 172.123.123.123
remote port: 80
protocol: vmware-vim https
certificate: default
datacenter name: Datcenter
admin:
max-ports: 8192
DVS uuid: 1b a2 1e 50 f4 83 48 68-c7 cf e4 61 a0 01 03 88
config status: Enabled
operational status: Connected
sync status: Complete
version: VMware vCenter Server 5.0.0 build-455964
NEXUS1000V-VSM#
10. Remove the DVS from vCenter
Thiis where the magic happens, removing the port groups, uplinks, dvSwitch and folder, run the following commands on the Nexus VSM below:
NEXUS1000V-VSM# conf t
Enter configuration commands, one per line. End with CNTL/Z.
NEXUS1000V-VSM(config)# svs connection vcenter
NEXUS1000V-VSM(config-svs-conn)# no vmware dvs
This will remove the DVS from the vCenter Server and any associated port-groups. Do you really want to proceed(yes/no)? [yes] yes
Note: Command execution in progress..please wait
NEXUS1000V-VSM(config-svs-conn)# exit
NEXUS1000V-VSM(config)# exit
NEXUS1000V-VSM#
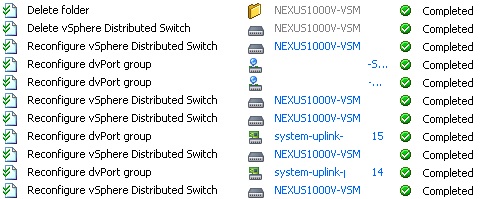
11. After running the above commands you will see vCenter Server kick off a number of tasks, removing the port groups and finally the Cisco Nexus 1000V DVS.
12. Remove the Cisco Nexus 1000V VM(s)
Once you have confirmed the dvSwitch has been removed above you can delete the VSM VM.
Right click the VM and Delete.
If you have a VSM in HA (i.e. a primary and secondary VM) delete both VMs.

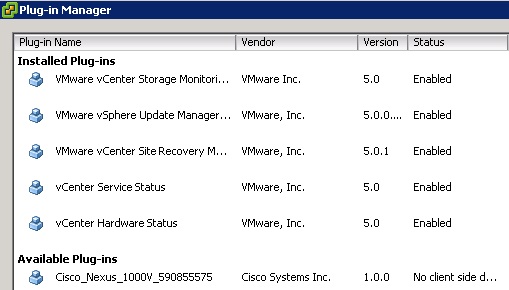
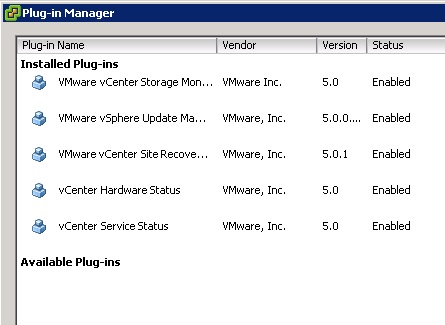
13. Now we are almost there but there is still a plugin showing in plug-in manager that needs removing. Note down the unique plug-in name e.g. "Cisco_Nexus_1000V_590855575"
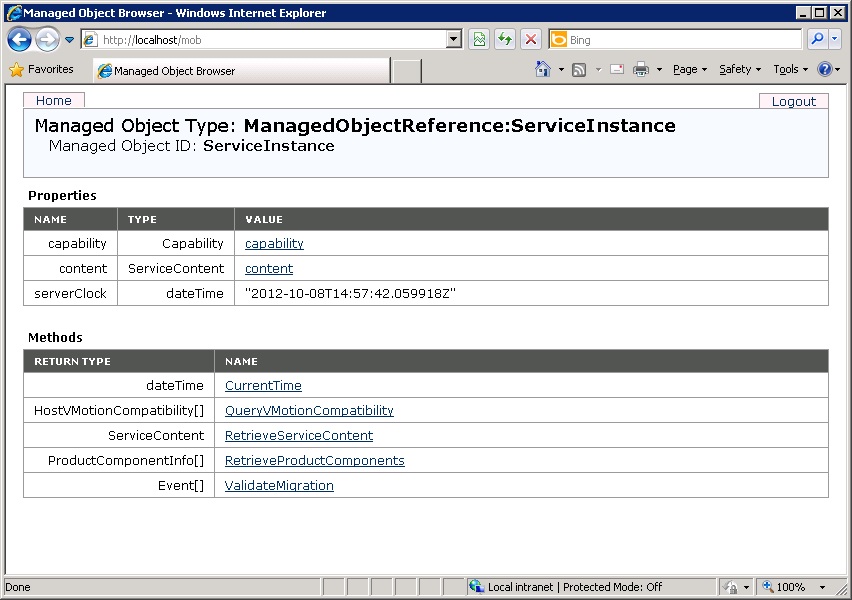
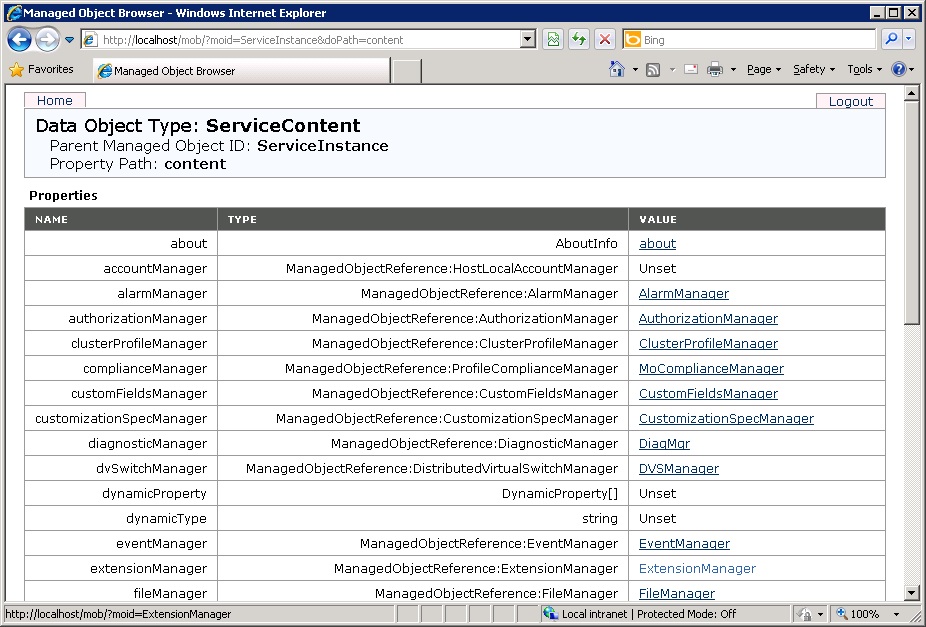
14. Open up IE and browse to the vCenter MOB (Managed object browser)
15. In the "Properties" section, Click on "Content"
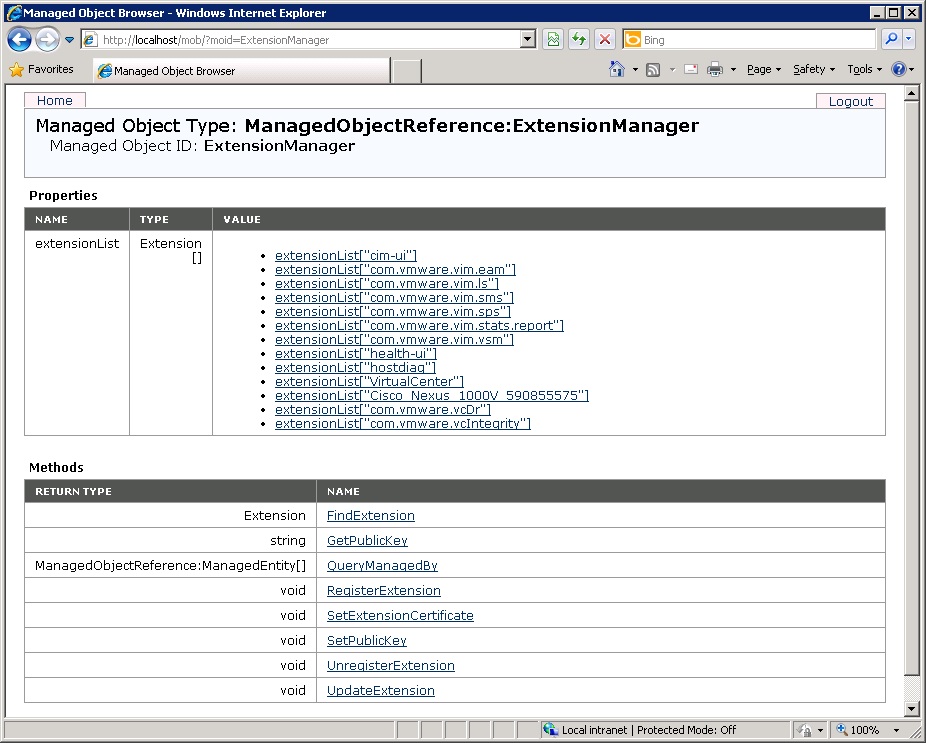
16. Click on "ExtentionManager"
17. In the list of extentions you will see the plug-in you noted earlier
18. In the "Methods" section, Click "UnregisterExtension"
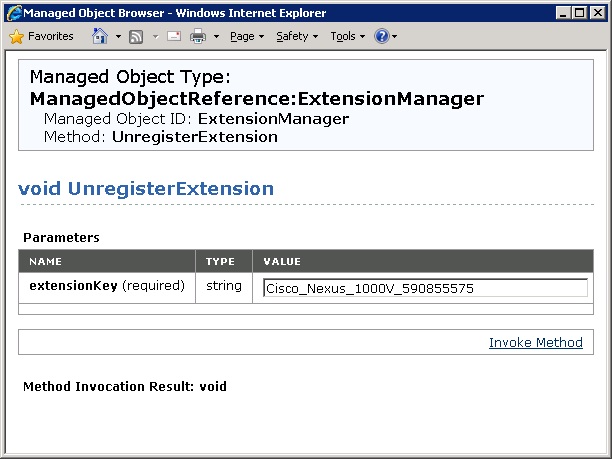
19. Now copy/paste in your extentionKey and Click "Invoke Method"
e.g. Cisco_Nexus_1000V_590855575 (yours will be unique - without quotes)
20. Hurrah the plug-in has now been removed!
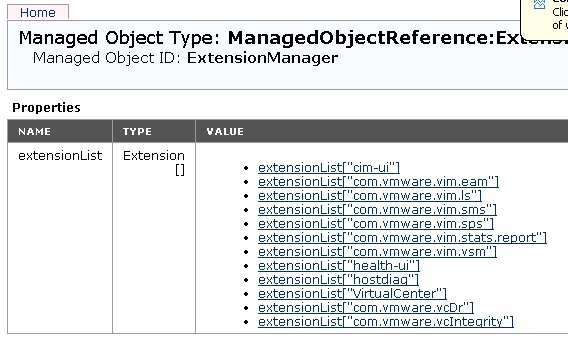
21. Close and re-login to vCenter with the vSphere Client, you will now also see the plug-in has been removed from plug-in manager.
And there we have it - The Cisco Nexus 1000V dvSwitch and VSM have been successfully removed correctly, including the vSphere plug-in.
Share this blog post on social media:
Tweet


Latest Blog Posts
- vSphere 7 U1 - Part 3 - Creating a Datacenter, HA/DRS Cluster and Adding a Host
- vSphere 7 U1 - Part 2 - Deploying vCenter 7.0 U1 VCSA
- vSphere 7 U1 - Part 1 - Installing ESXi 7.0 U1
- Veeam CBT Data is Invalid - Reset CBT Without Powering Off VM
- View Administrator Blank Error Dialog/Window After Upgrade