In Part 1 we deployed the vCenter Orchestrator virtual appliance. Now in part 2 we are going to configure vCO, such as SSO integration, vCenter and SSL certificates amongst other items.
If you missed any of the previous parts of the series or want go back here is the jump list:
- vCenter Orchestrator (vCO) 5.5 - Part 1 Deploying the Virtual Appliance
- vCenter Orchestrator (vCO) 5.5 - Part 2 Configuring vCO
- vCenter Orchestrator (vCO) 5.5 - Part 3 Using vCO and Running a Workflow
- vCenter Orchestrator (vCO) 5.5 - Part 4 Adding a Workflow to a Context Menu
1. Now you have the vCO appliance deployed, powered on and it has an IP address (plus the DNS A record you created)
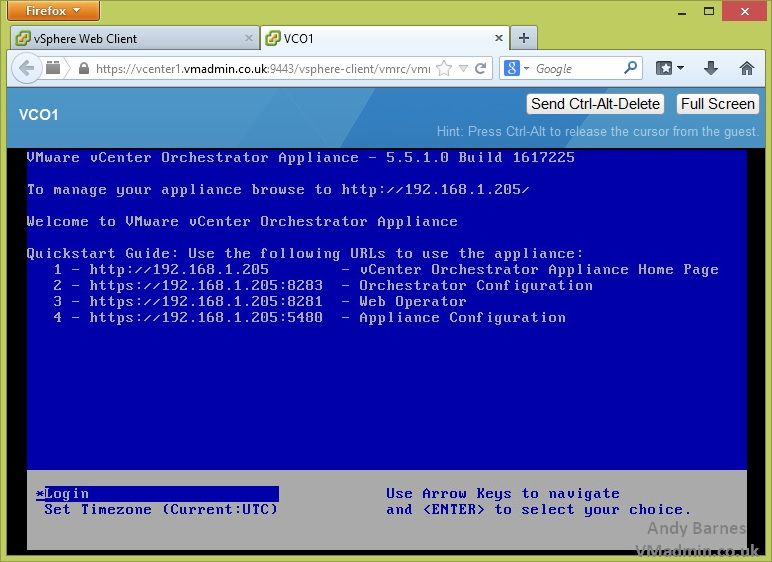
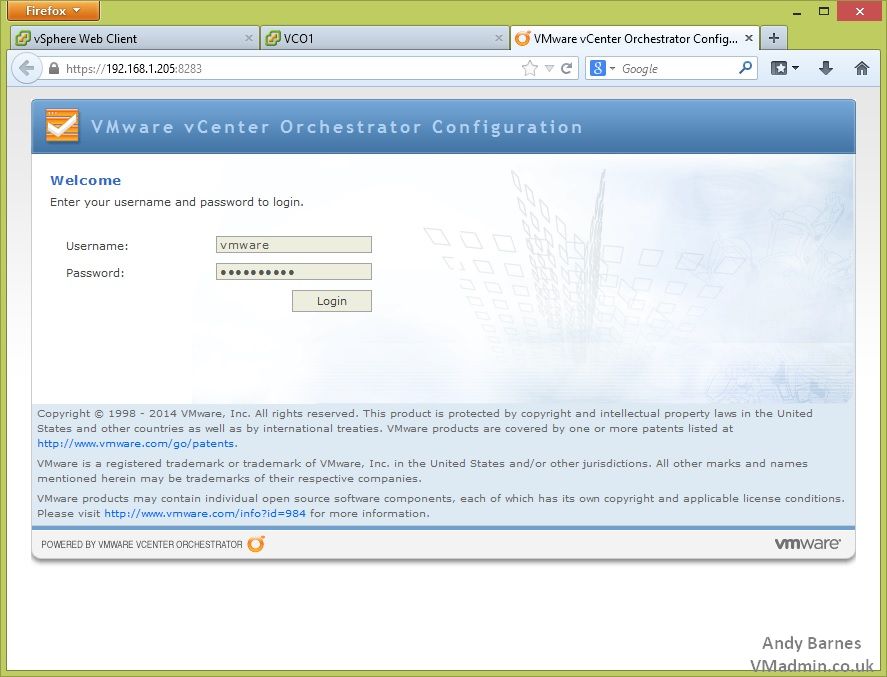
2. Open your web browser to https://vCOappliance:8283
3. Login with Username: VMware
Password: <The Password Set During OVF Deployment>
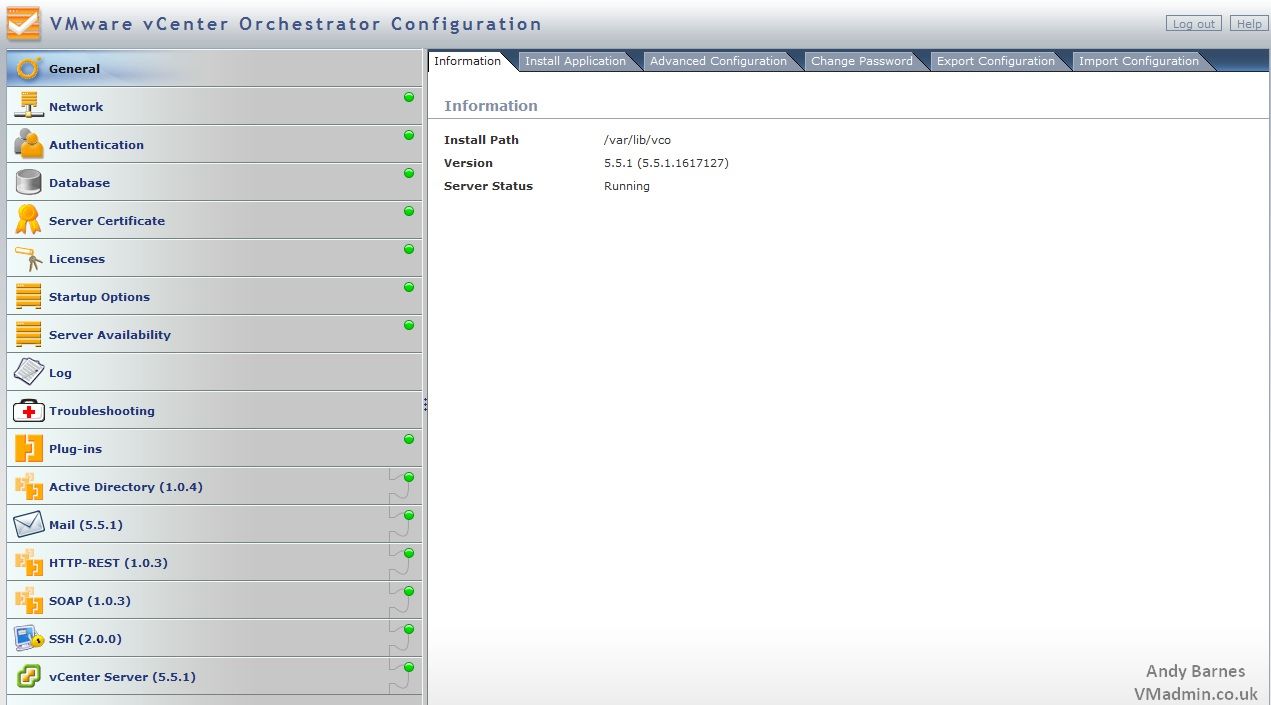
4. Now you are logged into the vCO Configuration page, here we need to make a number of configurations before vCO will work.
5. First go to Network --> SSL Trust manager
6. You want to import from URL your vCenter and SSO certificates so you can connect to them later on in the config
e.g.
https://vcenter1.vmadmin.co.uk
https://vcenter1.vmadmin.co.uk:7444
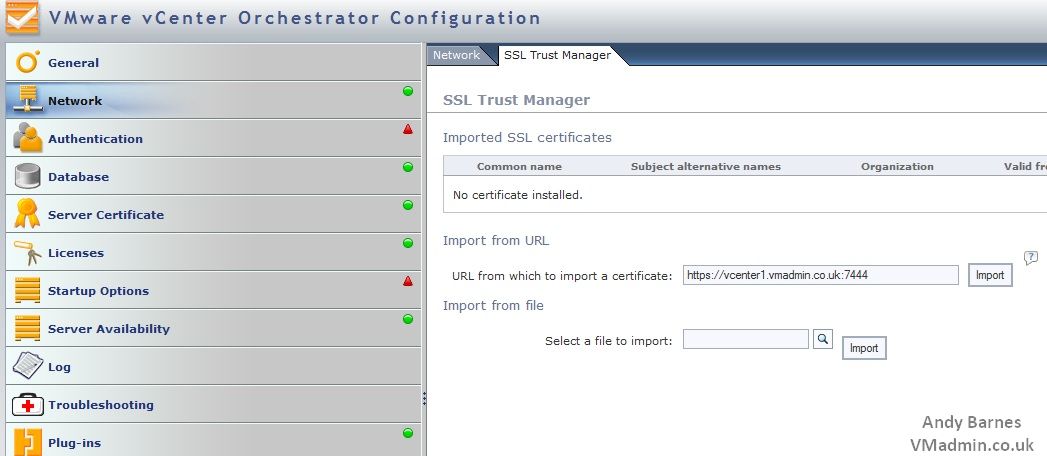
7. You will be prompted to accept the certificate. Click Import.
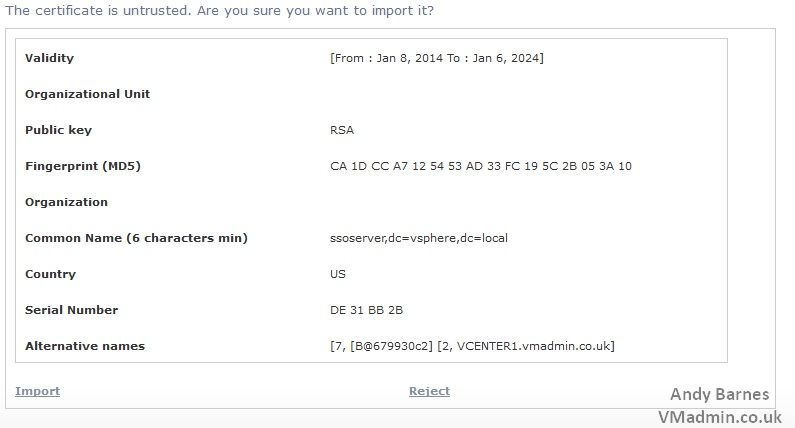
8. You will now see your certificates within the SSL Trust Manager

9. Go to Authentication
10. Select "SSO Authentication"
11. Enter your SSO server details (e.g. https://vcenter1.vmadmin.co.uk:7444), your SSO administrator (this might be This email address is being protected from spambots. You need JavaScript enabled to view it. if you haven't setup any others).
12. Enter your SSO administrators password and Click Register Orchestrator.
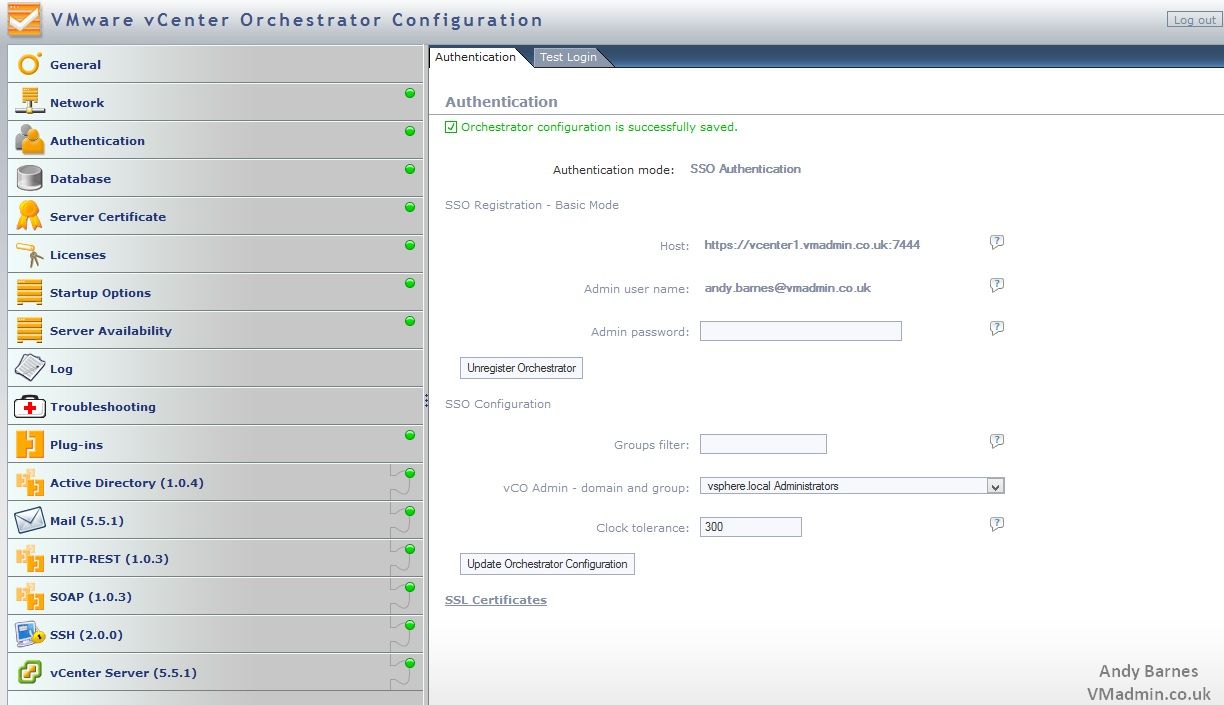
13. Now you need to select a "vCO Admin - domain and group" you can manage vCO (this could be vsphere.local Administrators, or your Domain Admins group if configured in SSO)
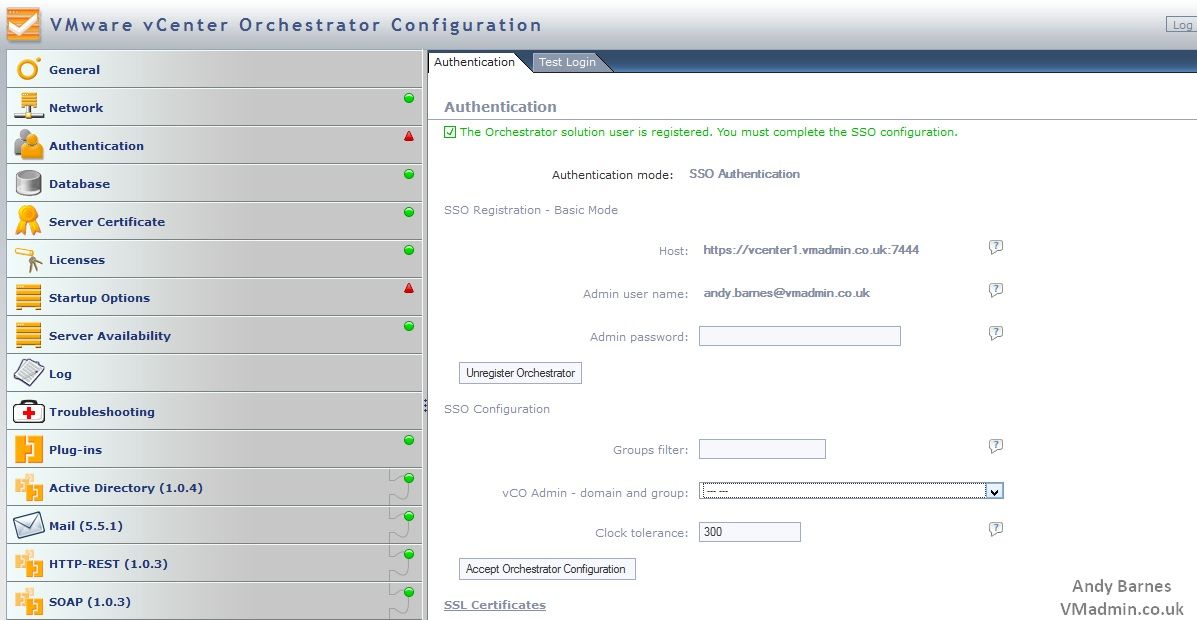
14. Click Update Orchestrator Configuration, all the dots next to the config items will turn green indicating that config is complete.
15. Go to vCenter Server
16. We need to add a vCenter Server so browse to the New vCenter Server Host tab and enter the details of a vCenter Server, Click Apply Changes.
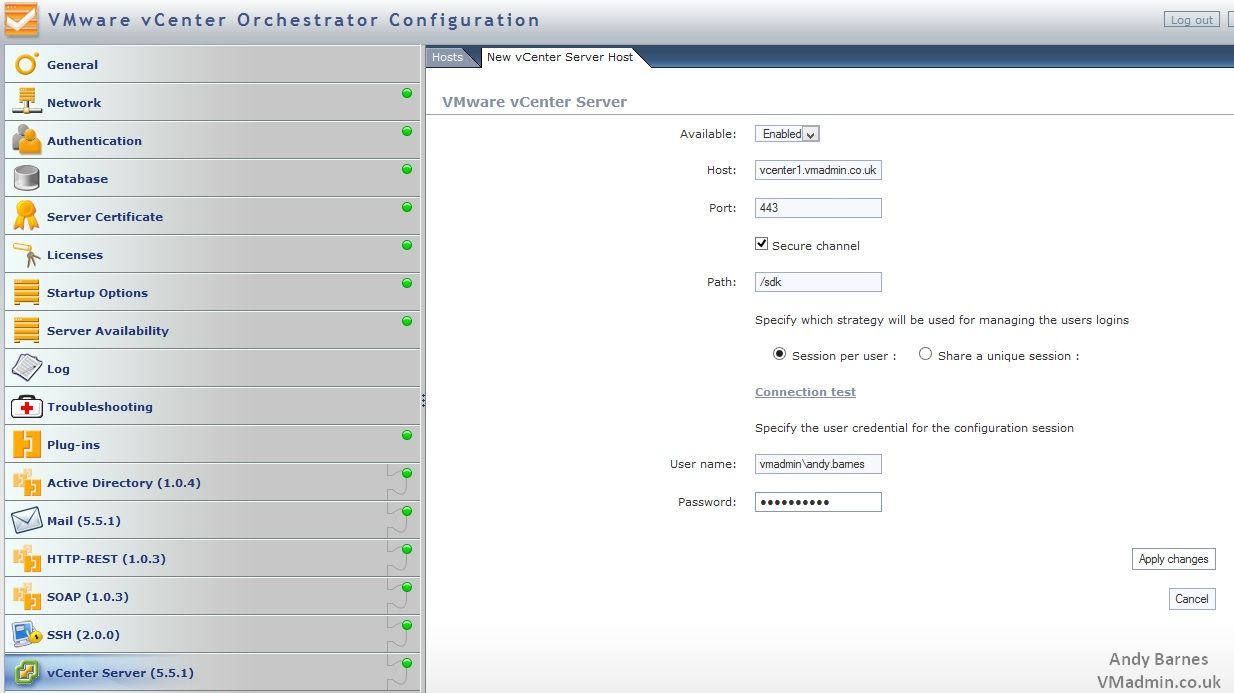
17. Check your vCenter Server has been added in the Hosts tab.

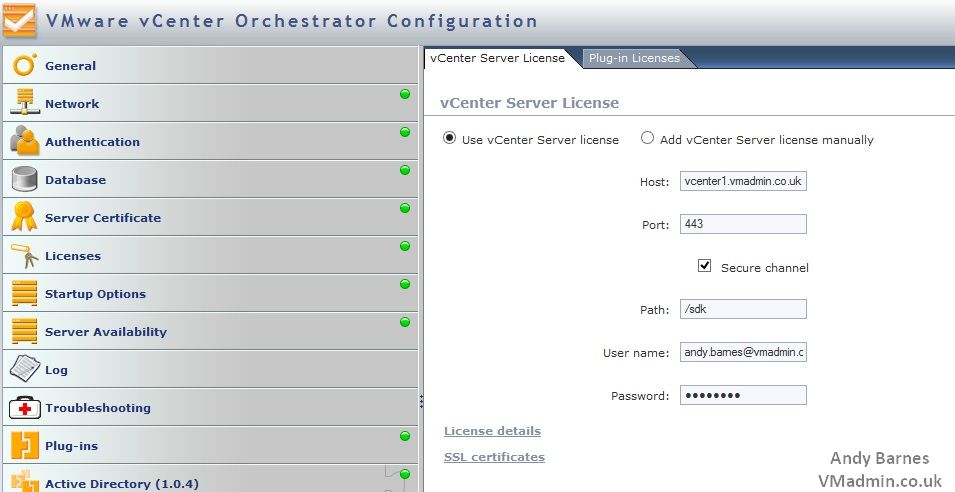
18. Go to Licenses
19. Select "Use vCenter Server license" and enter your vCenter server details
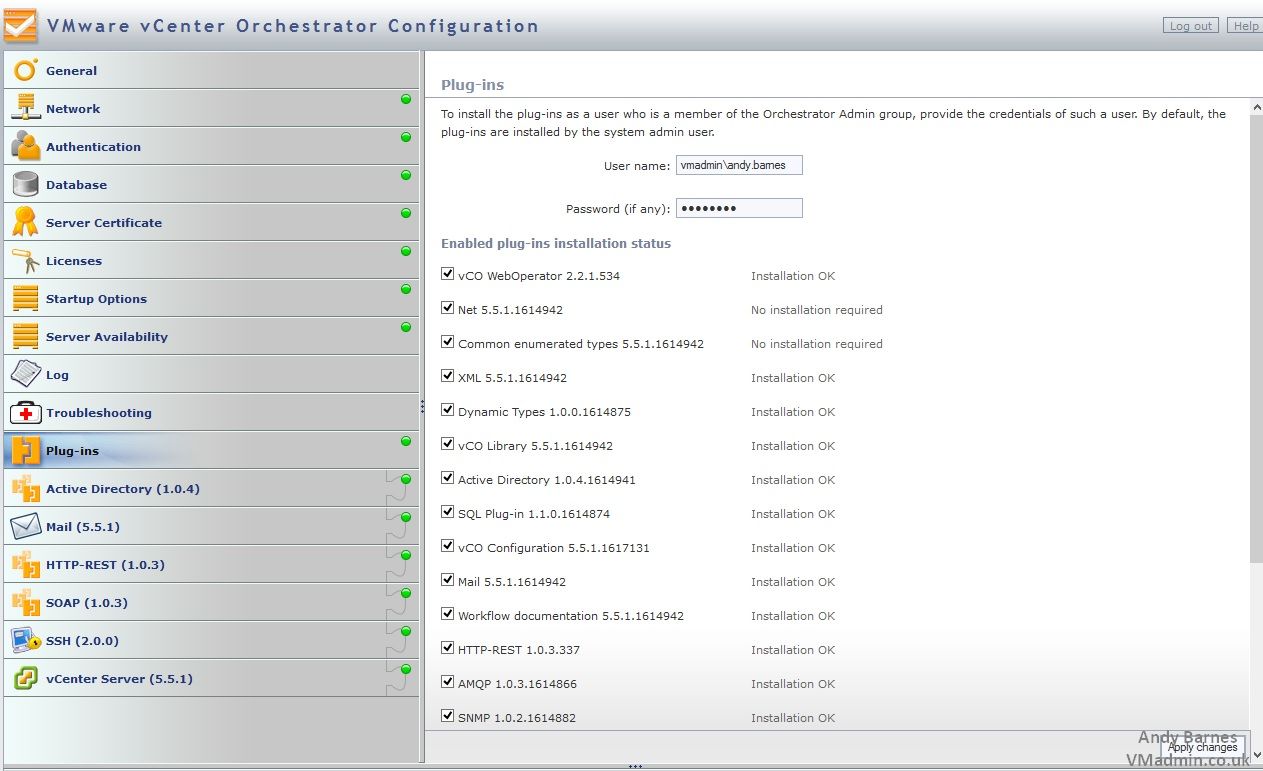
20. Go to Plug-ins
21. Ensure the plugins are enabled, enter your SSO user and Click Apply changes
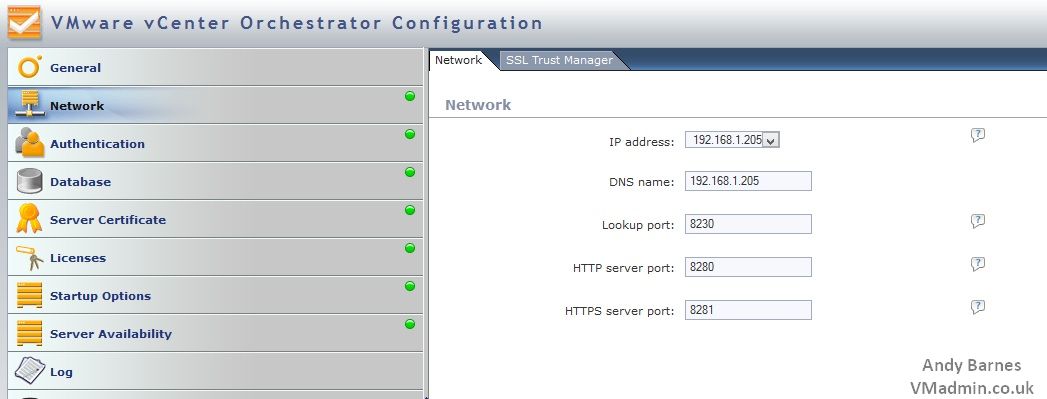
22. Go to Network
23. In the IP Address box select the IP address that the vCO service should bind to and Click Apply
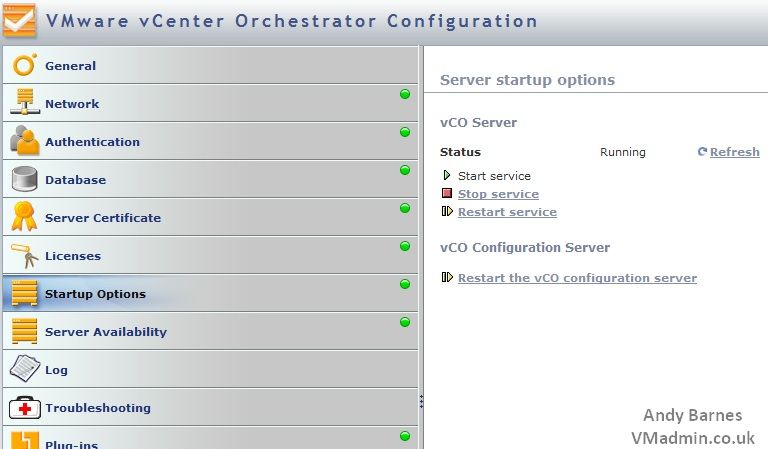
24. Go to Startup Options
25. Under vCO Server, Click "Restart service".
This will restart the vCO service, binding the vCO service to the correct network interface and also set the SSO authentication.
Next up Part 3..
If you missed any of the previous parts of the series or want go back here is the jump list:
- vCenter Orchestrator (vCO) 5.5 - Part 1 Deploying the Virtual Appliance
- vCenter Orchestrator (vCO) 5.5 - Part 2 Configuring vCO
- vCenter Orchestrator (vCO) 5.5 - Part 3 Using vCO and Running a Workflow
- vCenter Orchestrator (vCO) 5.5 - Part 4 Adding a Workflow to a Context Menu
Share this blog post on social media:
Tweet


Latest Blog Posts
- vSphere 7 U1 - Part 3 - Creating a Datacenter, HA/DRS Cluster and Adding a Host
- vSphere 7 U1 - Part 2 - Deploying vCenter 7.0 U1 VCSA
- vSphere 7 U1 - Part 1 - Installing ESXi 7.0 U1
- Veeam CBT Data is Invalid - Reset CBT Without Powering Off VM
- View Administrator Blank Error Dialog/Window After Upgrade