View Manager 4 is a core component of VMware View 4 that is installed on the View Connection Server.
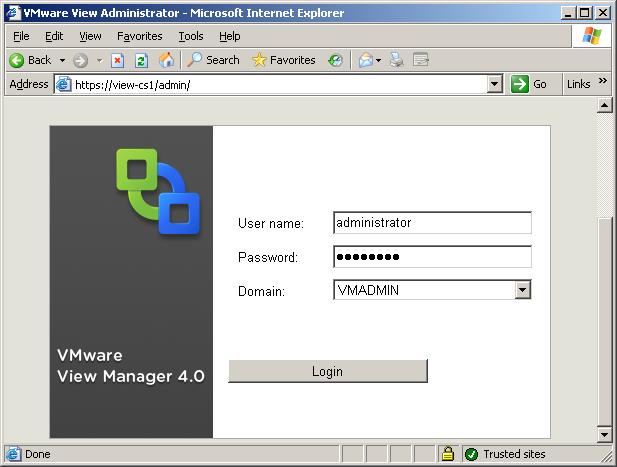
1. Login to View Manager Administrator
https://<your-connectionserver>/admin/
Login with an account which is part of the BUILTIN\Administrators group on the connection server.
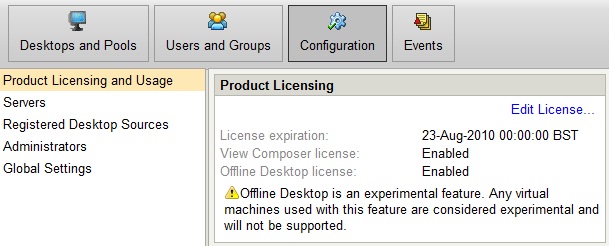
2. License the server.
Navigate to the "Configuration" tab and the "Product Licensing and Usage" section.
Click "Edit License" and enter the license.
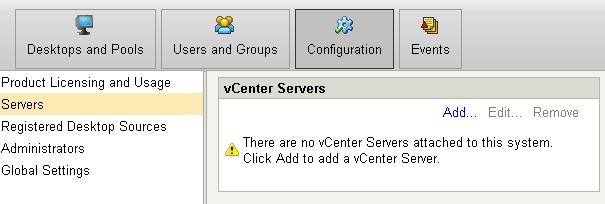
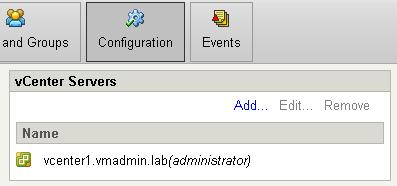
3. Add the vCenter Server.
Navigate to the "Configuration" tab and the "Servers" section.
Click "Add" to add the vCenter server.
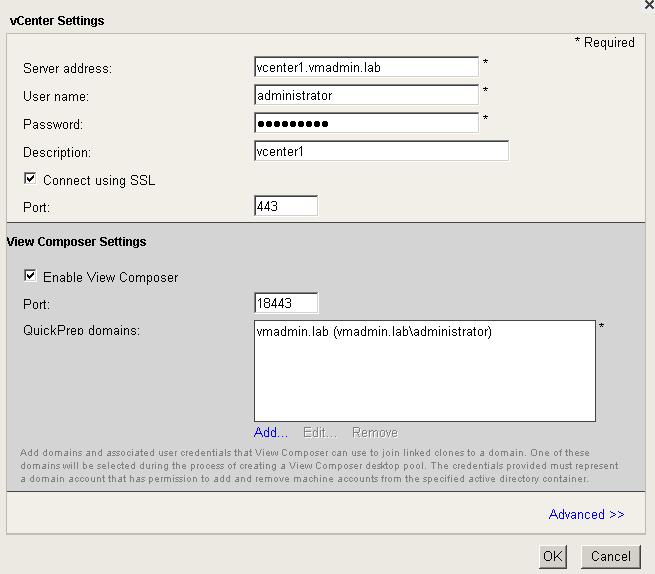
4. Enter the vCenter server details:
-
Server Address (FQDN)
-
Username
-
Password
5. Optionally (If Premier Edition) enter View Composer Server details:
Click "Add" to add a QuickPrep domain.
Click Ok to save all the settings.
6. Confirm the vCenter Server details are added correctly.
7. Confirm the View Connection Server is activated.
Navigate to the "Configuration" tab and the "Registered Desktop Sources" section.

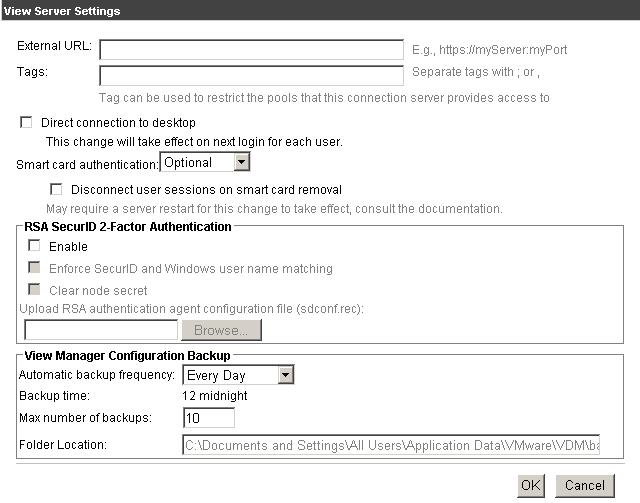
8. Configure Connection Server Settings.
Select a Connection Server and Click "Edit".
By default these settings do not need to be changed for View to work. However here you will find settings for smart cards, 2-factor authenication and backup of the View Manager Configuration.
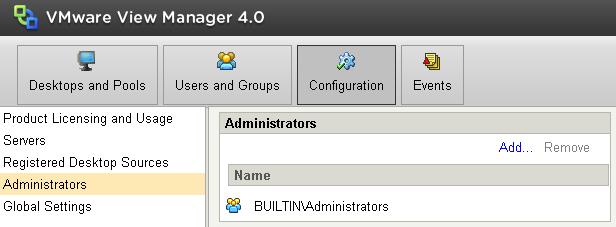
9. Configure any additional Administrators of VMware View Manager.
Navigate to the "Configuration" tab and the "Administrators" section.
Click "Add" to add any additionally groups that require administrator permissions in View Manager.
By default this is only BUILTIN\Administrators group on the connection server.
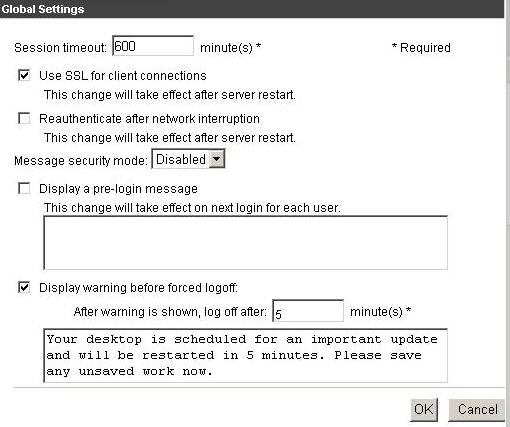
10. Configure any require global settings.
Navigate to the "Configuration" tab and the "Global Settings" section.
Under the global settings configure any additional settings for session timeouts, login messages and forced logoff messages.
Click Ok to save the settings.
For an overview of the components of VMware View see VMware View 4 - Intro and Components.
How To Series: VMware View Installation, Configuration and Management
Part 1 - Installing VMware View Composer 2
Part 2 - Installing VMware View Connection Server 4
Part 3 - Configuring VMware View Connection Server 4 with View Manager
Part 4 - Creating a Master Image for VMware View Desktop Deployment
Part 5 - Provisioning an Individual Desktop with View Manager
Part 6 - VMware View 4 - Windows 7 Deployment Guide
Part 7 - Creating an Automated Desktop Pool
Share this blog post on social media:
Tweet


Latest Blog Posts
- vSphere 7 U1 - Part 3 - Creating a Datacenter, HA/DRS Cluster and Adding a Host
- vSphere 7 U1 - Part 2 - Deploying vCenter 7.0 U1 VCSA
- vSphere 7 U1 - Part 1 - Installing ESXi 7.0 U1
- Veeam CBT Data is Invalid - Reset CBT Without Powering Off VM
- View Administrator Blank Error Dialog/Window After Upgrade