For an overview of the components of VMware View see VMware View 4 - Intro and Components.
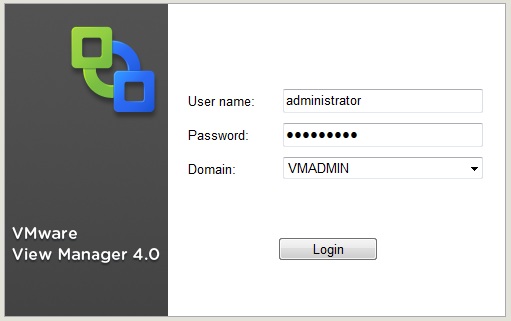
1. Login to View Manager Administrator
https://<your-connectionserver>/admin/
Login with an account which is part of the BUILTIN\Administrators group on the connection server.
2. Note the name of your template virtual machine you have created and the snapshot you created for it.
3. Under "Desktops and Pools" section and tab Click "Add" to create a new desktop.
4. Select "Automated Desktop Pool" for the desktop/pool type, Click Next.

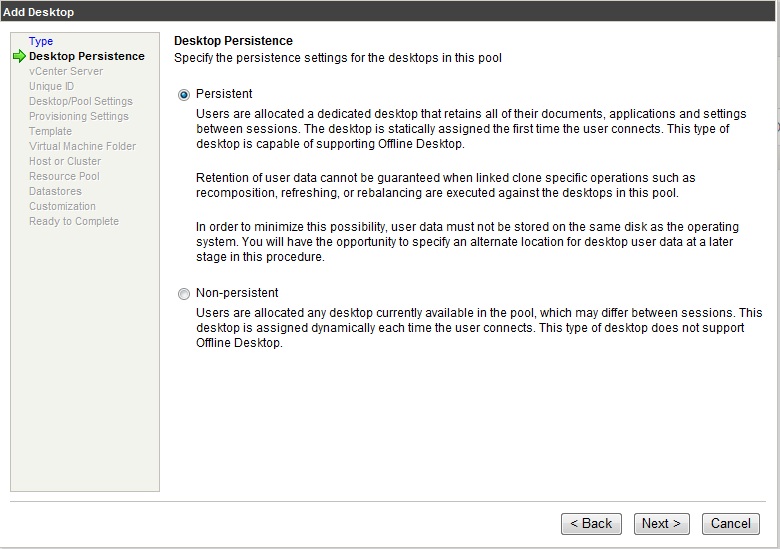
5. Select Desktop Persistance settings, then click Next.
To ensure users get the same desktop each time so that all their settings are kept between sessions choose "Persistent".
Choose "Non-persistent" to dynamically assign any desktop in the pool to a user, which may change between sessions.
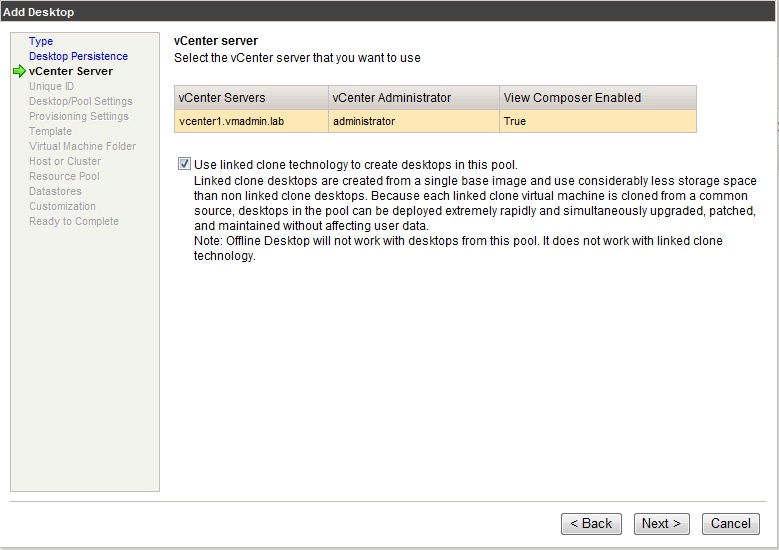
6. Select the vCenter server (you will only see one vCenter server here unless you added more). Click Next.
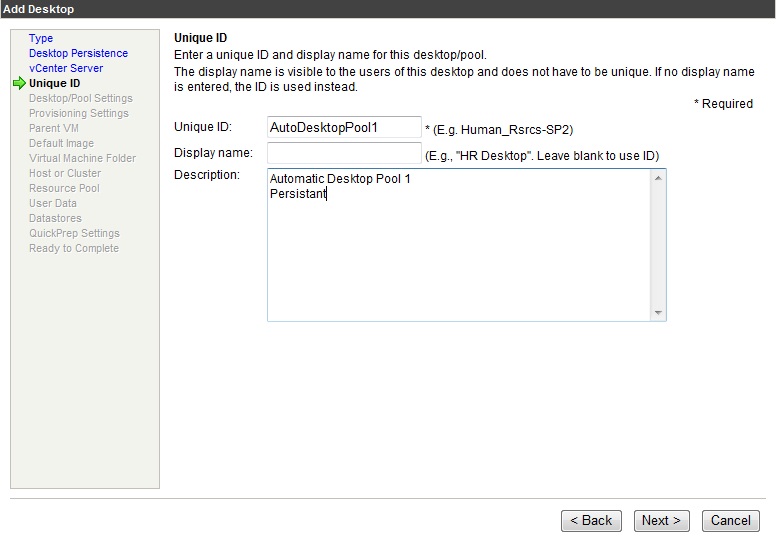
7. Enter a unique ID for the pool. Click Next.
Optionally provide a display name and a description.
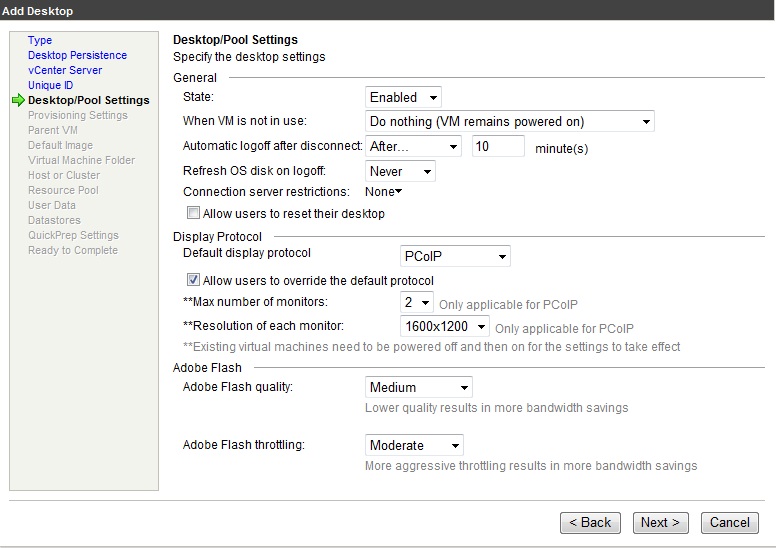
8. Provide the desktop settings:
State: Enabled
When VM is not in use: Do nothing
Automatic Logoff: After 10 Minutes
Default display protocol: PCoIP
Max monitors and Resolution: As required
Adobe flash settings: Medium/Moderate
Click Next.
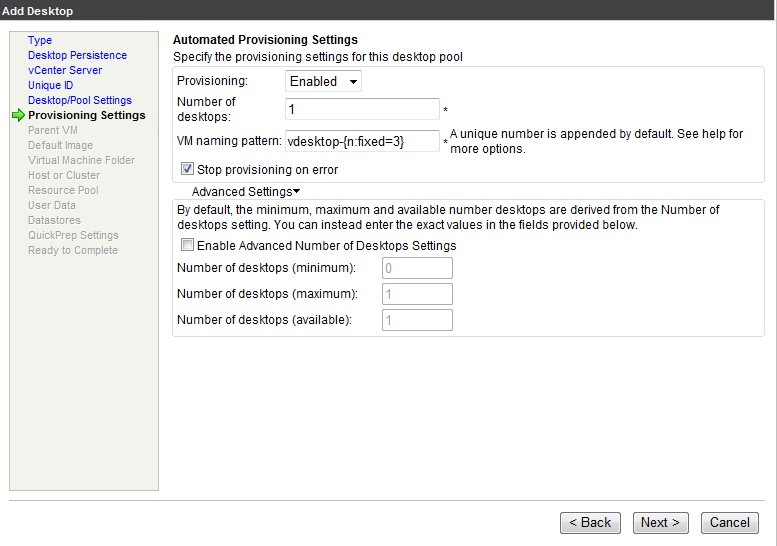
9. Provisioning settings:
Enter the number of desktops to deploy and the computer naming pattern.
If you enter "{n:fixed=3}" this will number each computer in sequence so its unique.
Click Next.
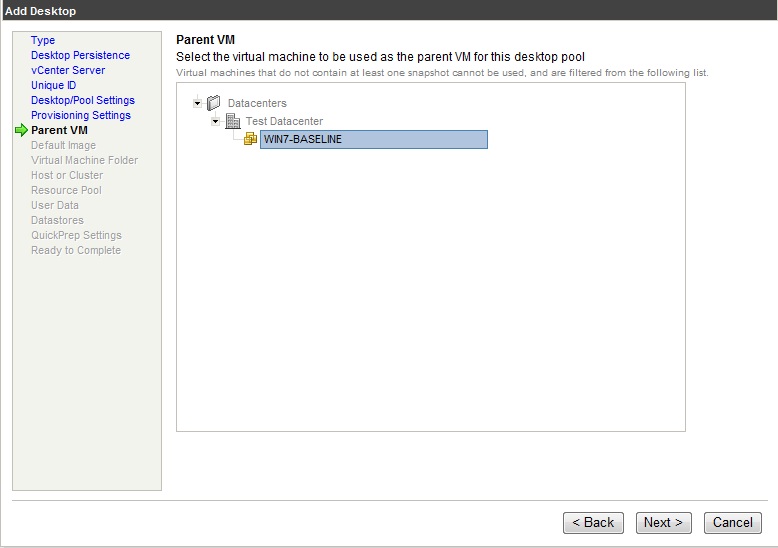
10. Choose the parent template VM.
Note this VM must have a least one snapshot (taken when powered off).
Click Next.
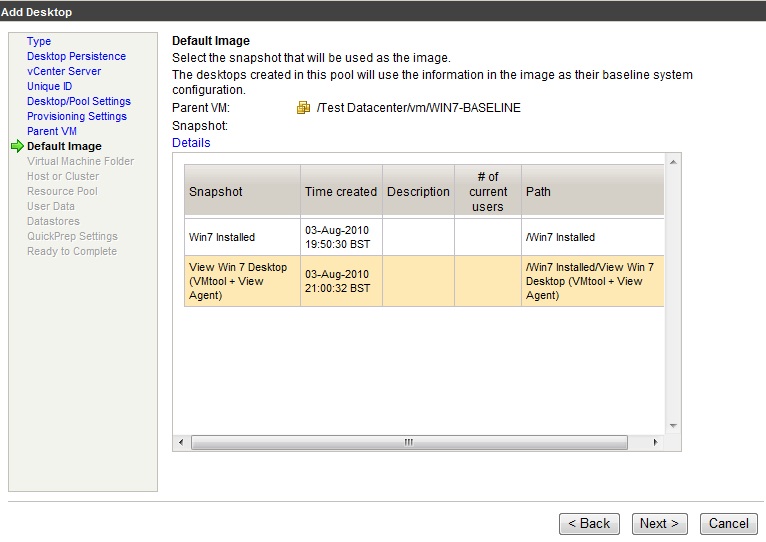
11. Select the snapshot to deploy the images from. Click Next.
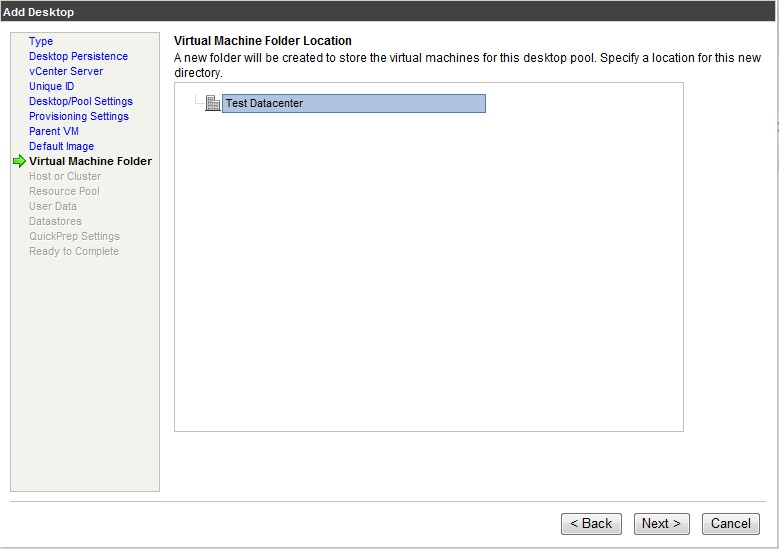
12. Select the location to create pool folder and the store virtual desktops. Click Next.
13. Select the host or cluster where the desktop pool will run from. Click Next.

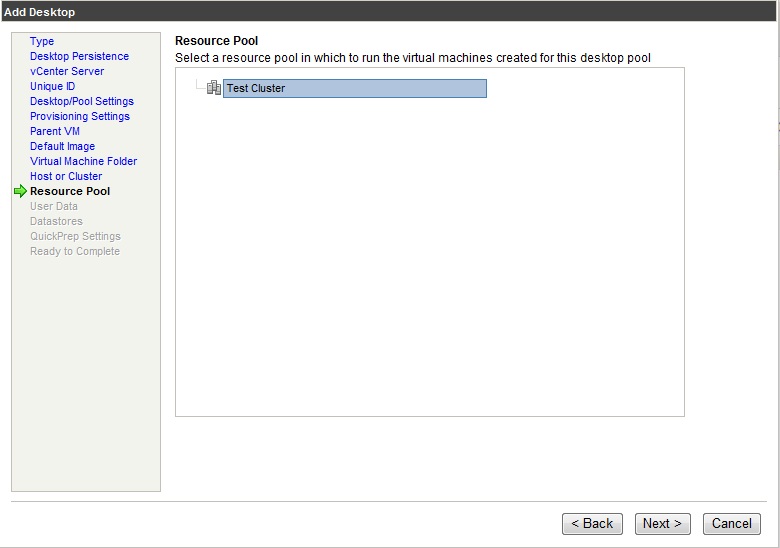
14. Select the resource pool in which the desktops will run from. Click Next.
In this example its the root resource pool.
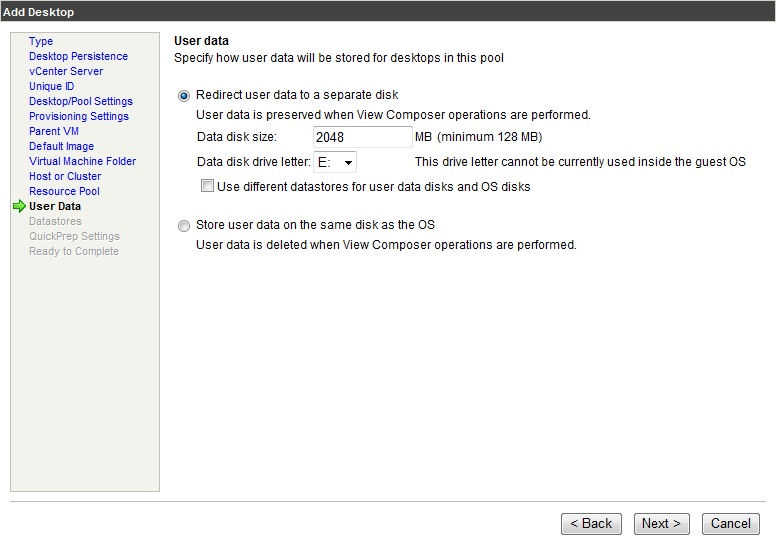
15. Choose whether to store OS and user data on the same disk or seperatley.
If storing user data seperatley ensure you choose a drive letter that is not in use.
If required you can store user data on a different VMFS datastore to the virtual desktop OS disk.
Click Next.
16. Choose the datastore where the virtual desktops will be created. Click Next.

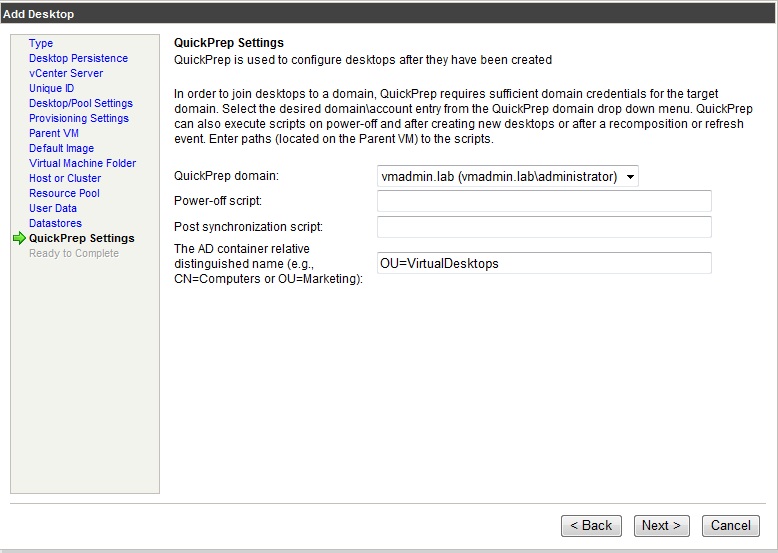
17. QuickPrep configures virtual desktops once created. It joins them to the active directory domain and can also put them in a specific OU.
Select the QuickPrep domain from the dropdown and enter an OU if required (If not they will be placed in the default "Computers" container).
Click Next.
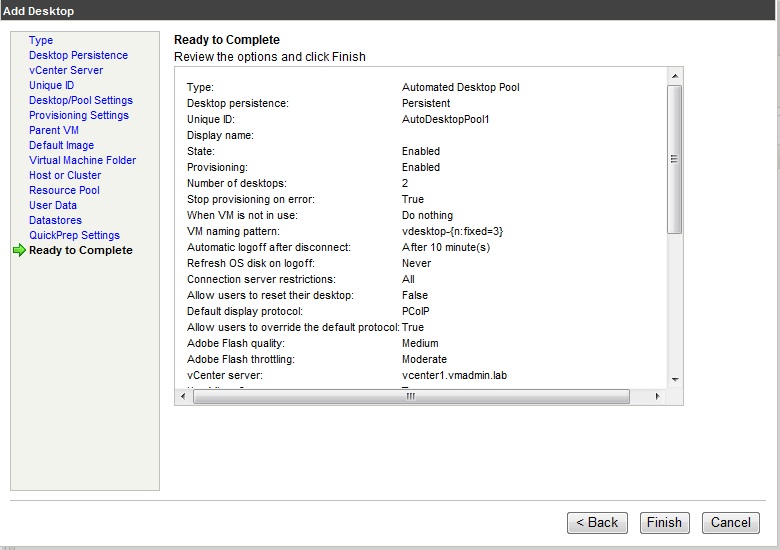
18. Review the settings and Click Finish.
View Manager will then work with Composer and vCenter to create the virtual desktops.
The time to do this will vary based on your setup (mainly your SAN/disks performance).
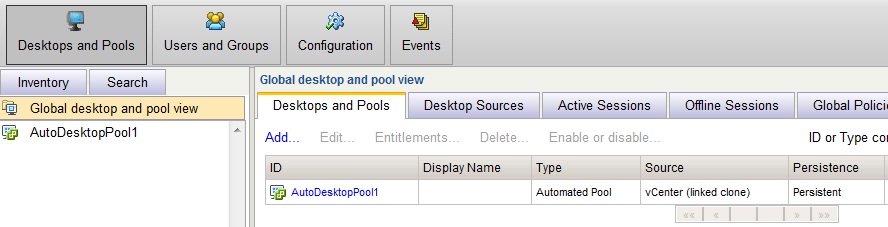
19. You will see the automated desktop pool you just created while the VMs are being provisioned.
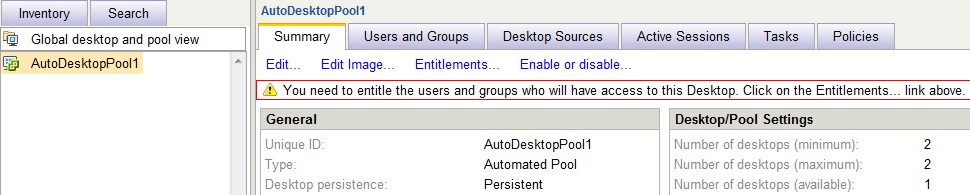
20. Click on the desktop pool and it will have a warning about users need entitling to this desktop.
While the VMs are being provisioned will will set this up.
Click "Entitlements..."
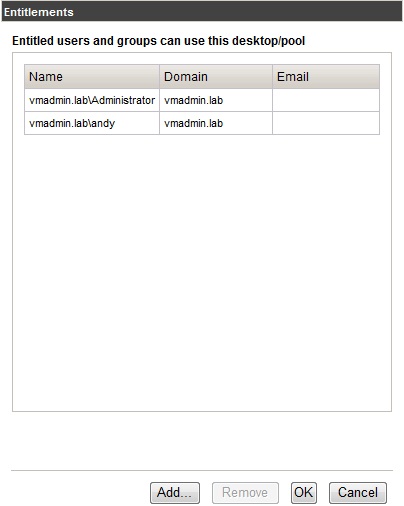
21. Add the users that are allowed to use virtual desktops in this pool.
Click Ok.
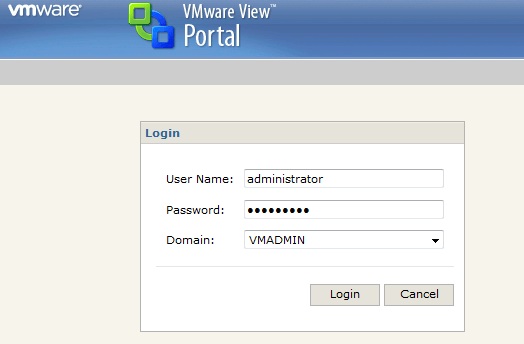
22. Login to View Portal
https://<your-connectionserver>
Ensure you login as the entitled user. This cannot be done on Windows Server 2003 as its unsupported so ensure you use another computer (e.g. running XP).
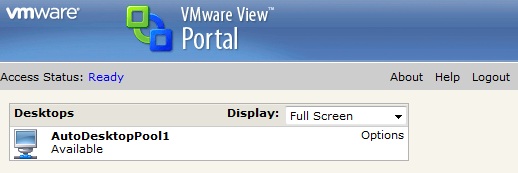
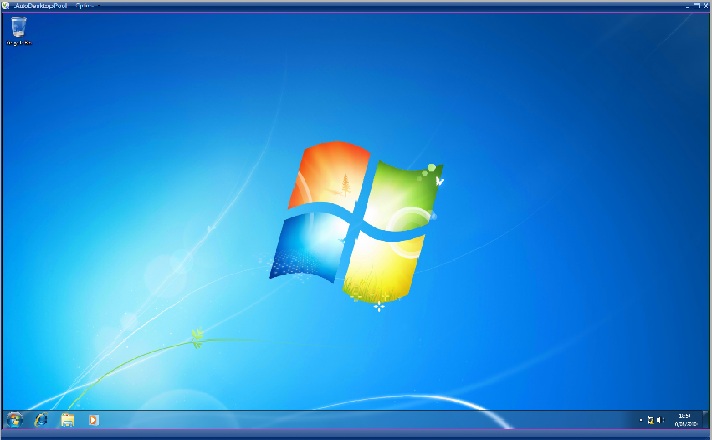
23. The View Portal will then display the entitled desktop pool we created named "AutoDesktopPool1".
Click on the desktop pool and it will open the desktop to use.
24. And there you have it Windows 7 running in an automated desktop pool.
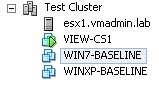
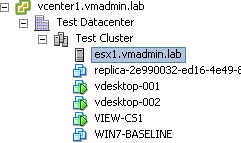
25. If your intrested what happened in vCenter here you go...
It created a replica (master/parent image) from which it then created the linked clones vdesktop-001 and vdesktop-002.
Basically to create 200 virtual desktops instead of 2 would be no more work! just change the earlier amount to 200 and ensure you have scoped enough storage, cpu, memory and network bandwidth for your applications on your virtual desktops.
Thanks for reading, I hope you found it useful.
For an overview of the components of VMware View see VMware View 4 - Intro and Components.
How To Series: VMware View Installation, Configuration and Management
Part 1 - Installing VMware View Composer 2
Part 2 - Installing VMware View Connection Server 4
Part 3 - Configuring VMware View Connection Server 4 with View Manager
Part 4 - Creating a Master Image for VMware View Desktop Deployment
Part 5 - Provisioning an Individual Desktop with View Manager
Part 6 - VMware View 4 - Windows 7 Deployment Guide
Part 7 - Creating an Automated Desktop Pool
Share this blog post on social media:
Tweet


Latest Blog Posts
- vSphere 7 U1 - Part 3 - Creating a Datacenter, HA/DRS Cluster and Adding a Host
- vSphere 7 U1 - Part 2 - Deploying vCenter 7.0 U1 VCSA
- vSphere 7 U1 - Part 1 - Installing ESXi 7.0 U1
- Veeam CBT Data is Invalid - Reset CBT Without Powering Off VM
- View Administrator Blank Error Dialog/Window After Upgrade