In part 1 and 2 we covered the installation of the pre-requisite's required for SCCM and the actual install of SCCM.
System Center Configuration Manager SCCM 2012 R2 Installation Step by Step - Part 1
System Center Configuration Manager SCCM 2012 R2 Installation Step by Step - Part 2
In this part (part 3) we will perform the post installation tasks for SCCM.
We are going to cover checking the publishing status to Active Directory, Network access account, Software update syncing from Microsoft, Email alerts and network boundaries.
Post Installation Tasks
1. Open the Configuration Manager Management Console and connect to your primary site.
By default the user account which installed SCCM has full administrator permissions in SCCM. We will change/amend this later.
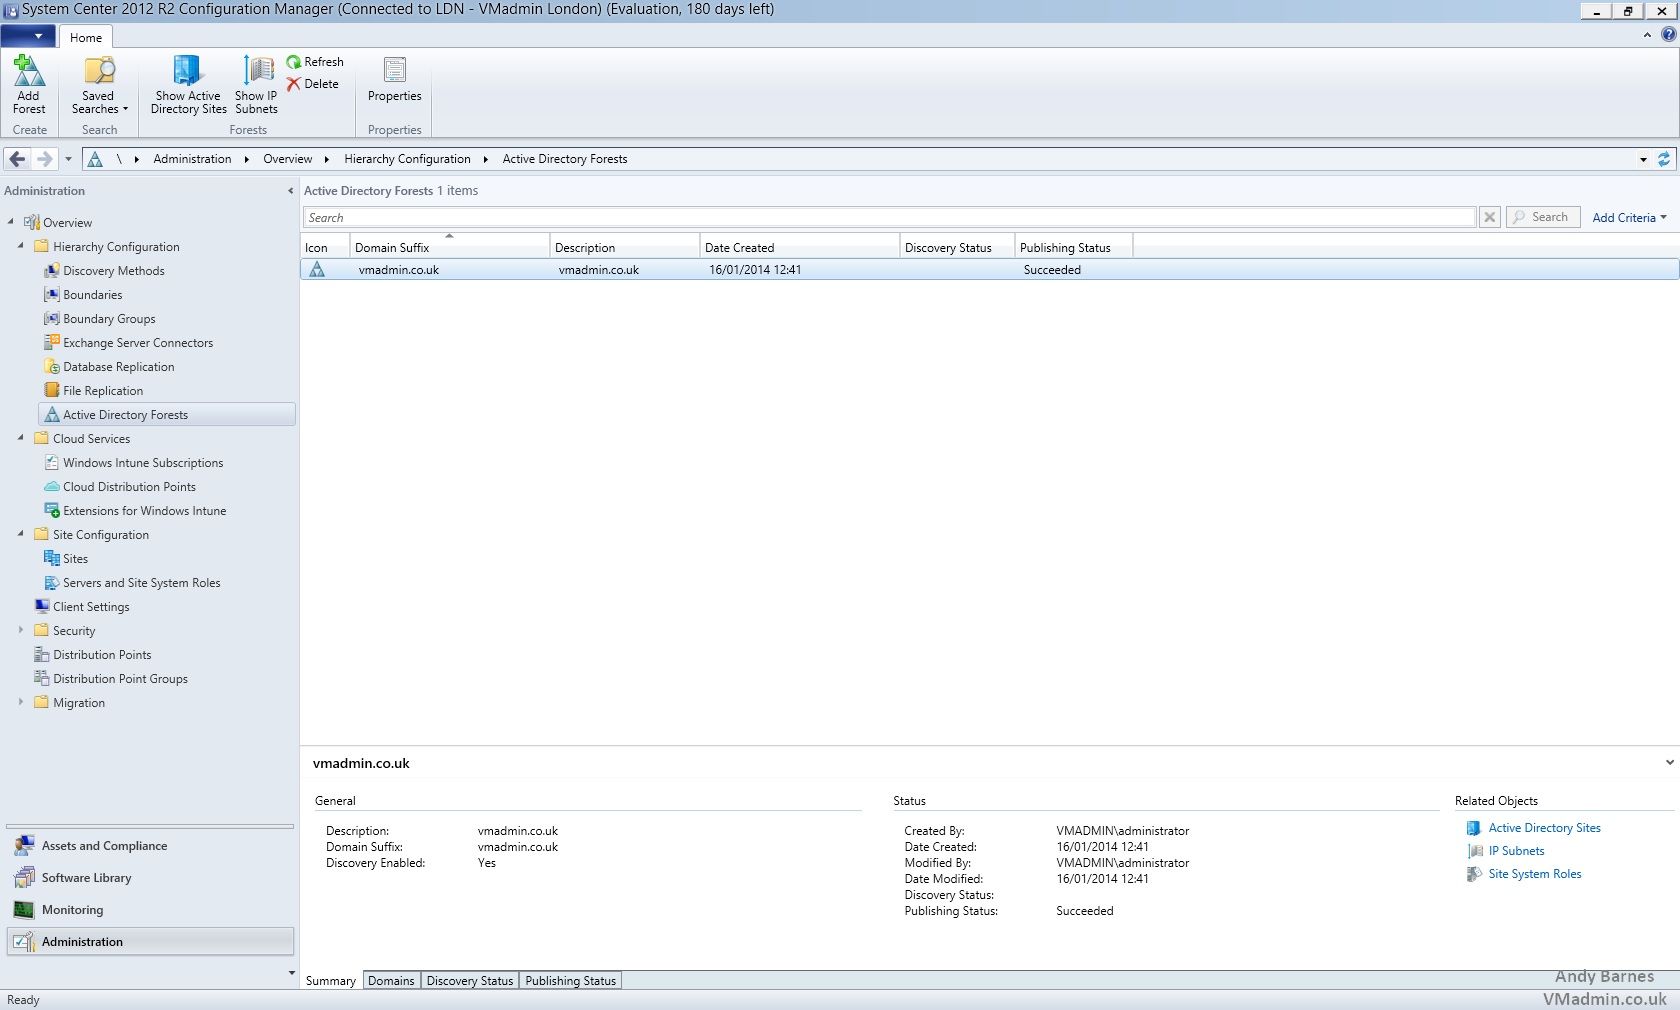
2. Select the "Administration" section
Navigate to the following Hierarchy Configuration -> Active Directory Forests
3. We are looking to confirm that your Active Directory domain is listed and the "Publishing Status" is "Succeeded".
If it is not then you either forgot or incorrectly performed the steps with ADSI edit to create the systems management container.
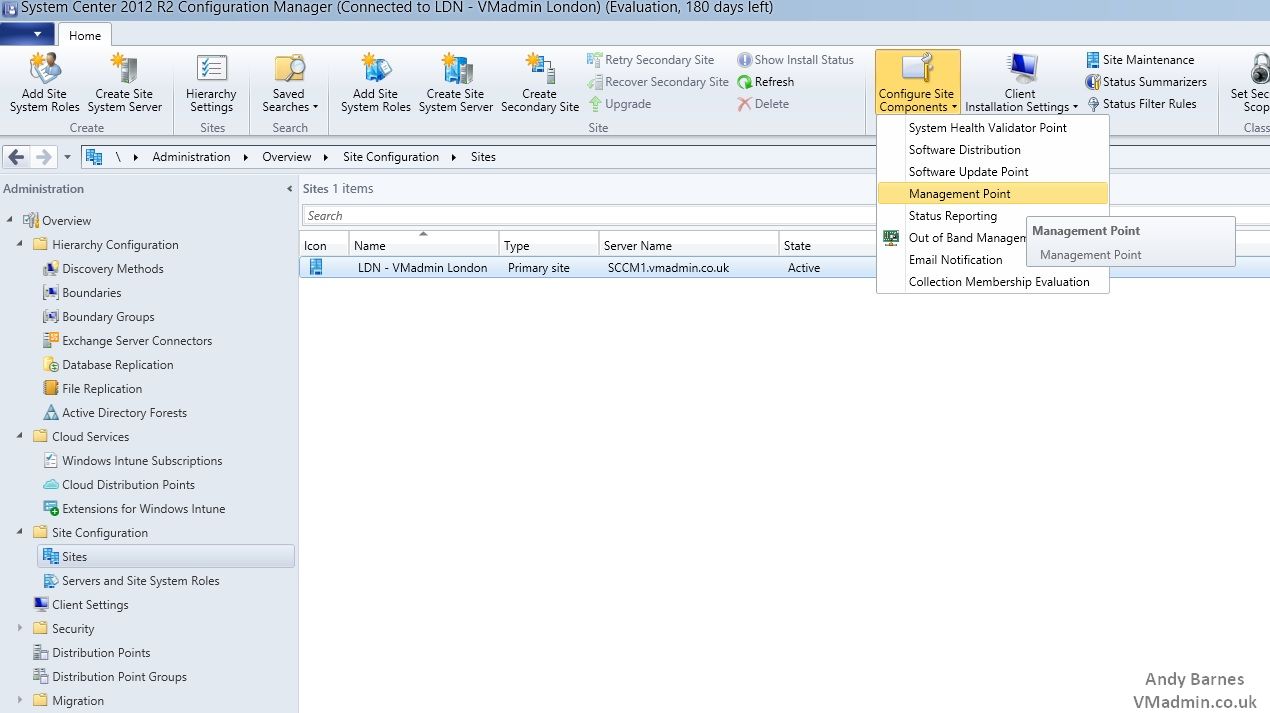
4. Next still within the "Administration" section
Navigate to the following Site Configuration -> Sites
5. Select the site which you created so that it is highlighted
6. Now select "Configure Site Components" from the above ribbon drown down and choose "Software Distribution"
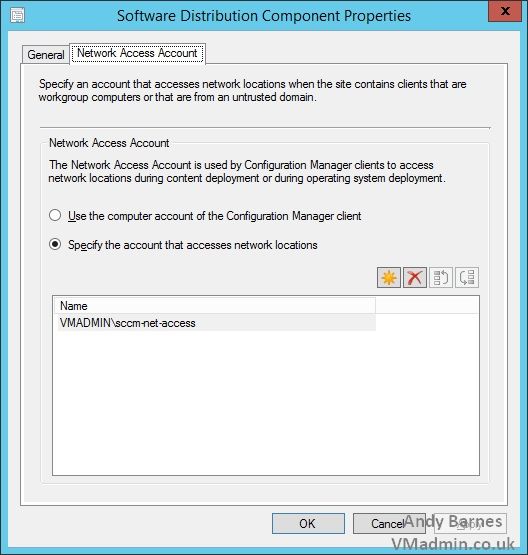
7. Click on the Network Access Account tab.
8. Create a normal user account with standard user rights in AD such as "sccm-net-access"
9. Add your new user for the network access account in this dialog. Click Ok.
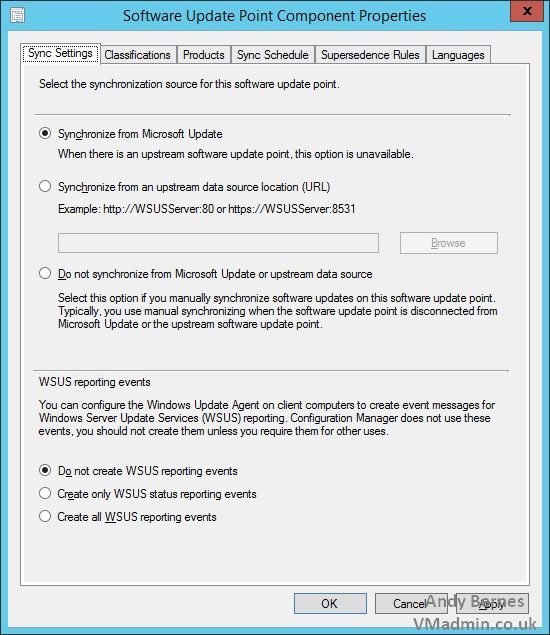
10. Now select "Configure Site Components" again from the above ribbon drown down and choose "Software Update Point".
11. Ensure "synchronize from Microsoft is selected".
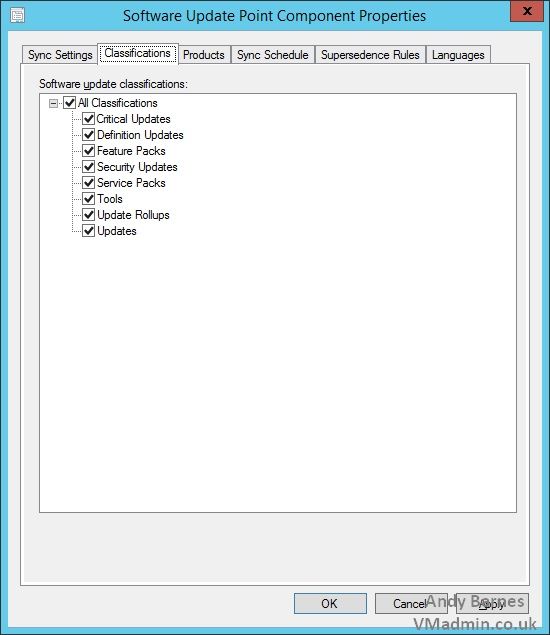
12. On the Classifications tabs select All Classifications of the types of updates you wish to sync (such as security updates).
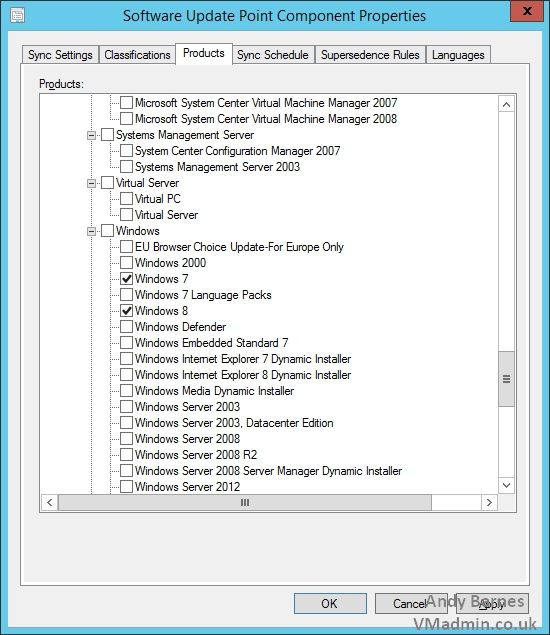
13. On the products tab tick all the products you which to sync to the SCCM server (such as Windows 7/8, Server 2008/2012 and Office 2010/2013).
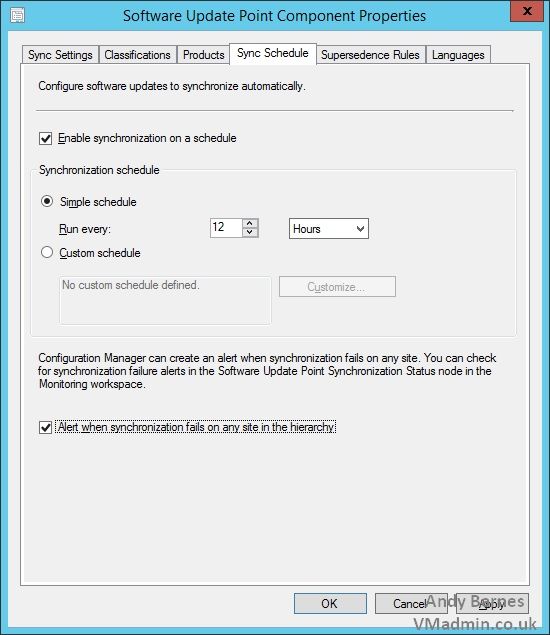
14. On the Sync schedule tab, Enable synchronisation on schedule and change it to run every 12 (or what you require).
Ensure you tick to receive and alert if sync fails.
15. Set the supercedence rule to not expire updates right away and wait 1 month.

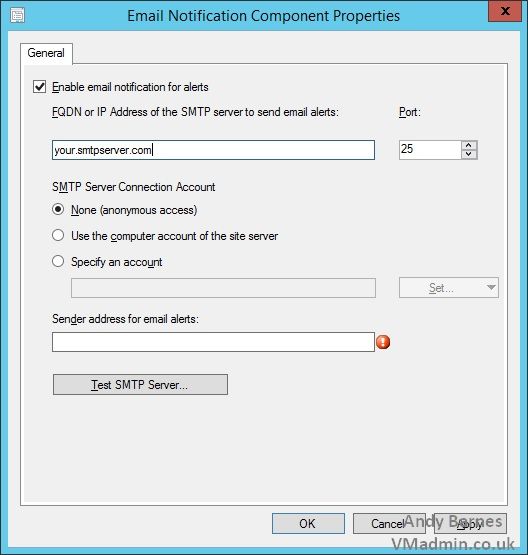
16. Now select "Configure Site Components" again from the above ribbon drown down and choose "Email Notification".
17. Enter your SMTP server details so that SCCM can send email alerts to you when required (e.g. this might be your exchange server).
You will also need to set an email address for the alerts to come from, such as This email address is being protected from spambots. You need JavaScript enabled to view it.
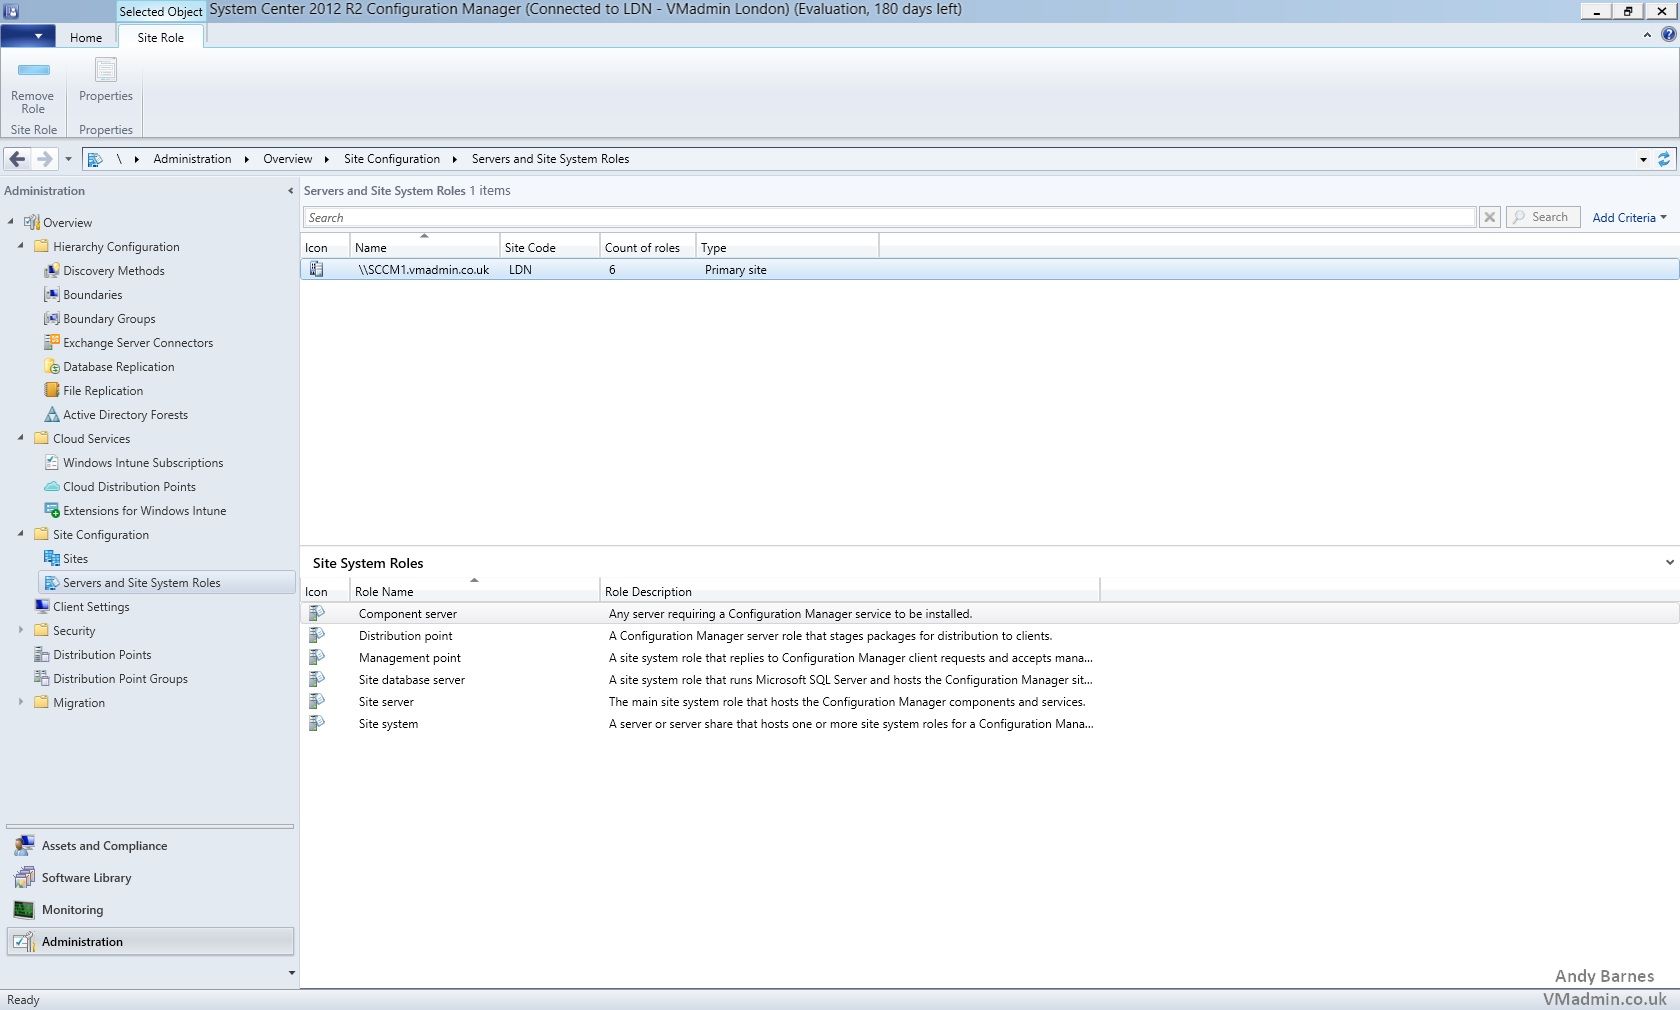
18. Within the "Administration" section
Navigate to the following Site Configuration -> Servers and Site System Roles
19. Select you SCCM server and take note of the "Site System Roles" that are installed in the bottom pane. You can add to these in future such as the application catalog role.
20. Navigate to the following Hierarchy Configuration -> Discovery Method
21. Double click and open "Active Directory Forest Discovery"
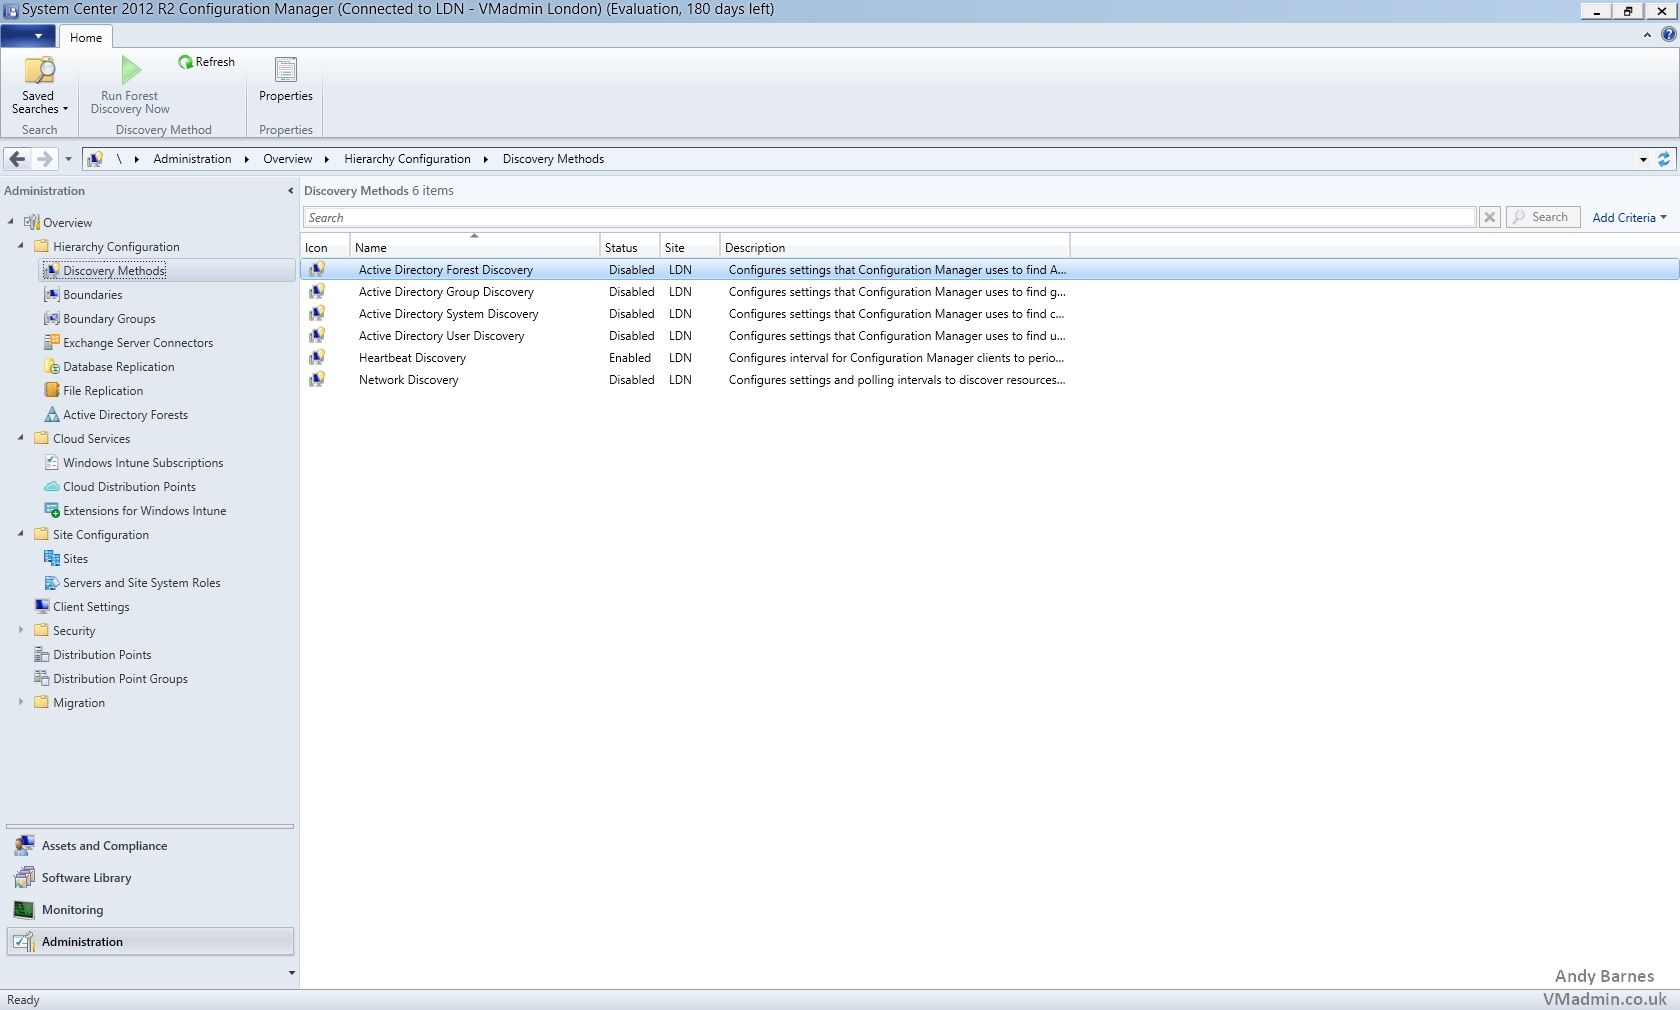
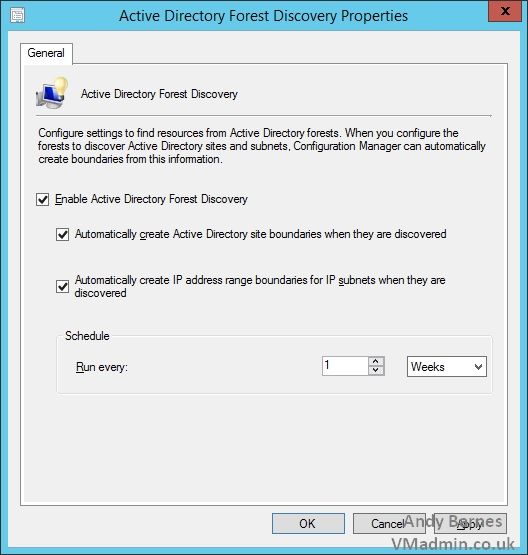
22. Enable Active Directory Forest Discovery
You can also optionally tick to auto create the SCCM boundaries and subnets from the AD sites and subnets you have (if they are configured correctly) which will save you time.
If your AD sites and subnets are not correctly setup them shame on you and you should get that sorted. If possible now is the time to plan getting that done properly, however it does not stop our SCCM setup though.
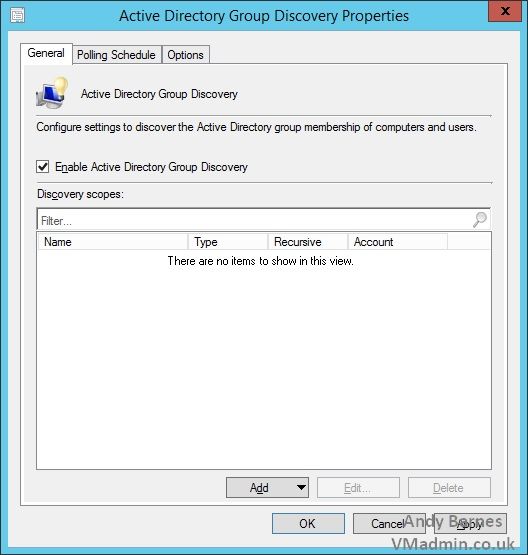
23. Repeat enabling Active Directory group discovery so that you can deploy software etc to AD groups.
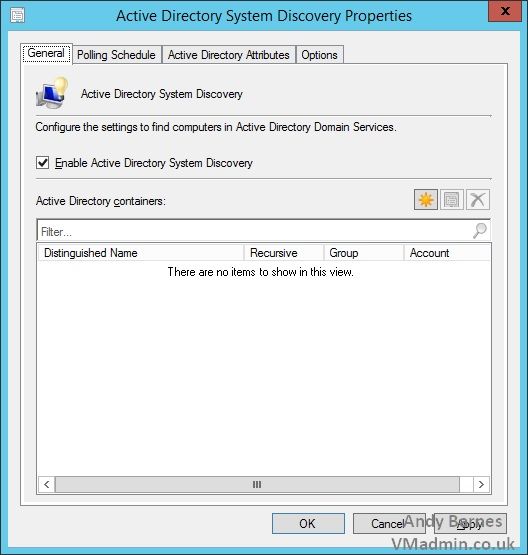
24. Repeat enabling Active Directory system discovery so that you can deploy software etc to computers in your domain.
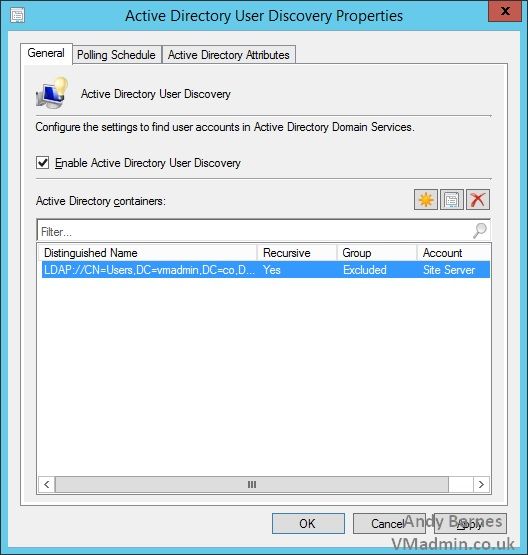
24. Repeat enabling Active Directory user discovery so that you can deploy software etc to individual AD users.
If you wish you can limit discovery to a specific OU in AD if you so wish as I have done below, only discovering users in the USERS container in AD.
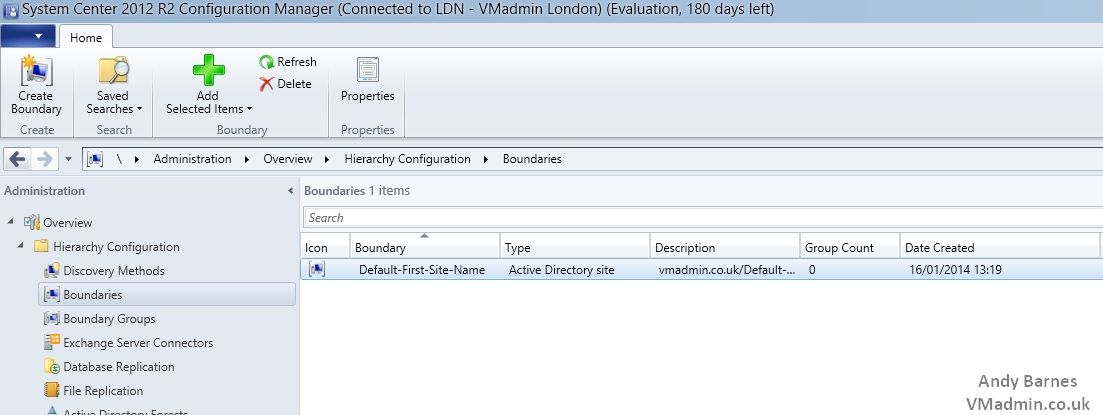
25. Navigate to the following Hierarchy Configuration -> Boundaries
26. My home lab has the default active directory site name of "Default-First-Site-Name". Notice that the group count next to this is 0.
If you have your AD sites and subnets correctly setup then you may see several boundaries and a group count of 1 or higher for each subnet in that site.
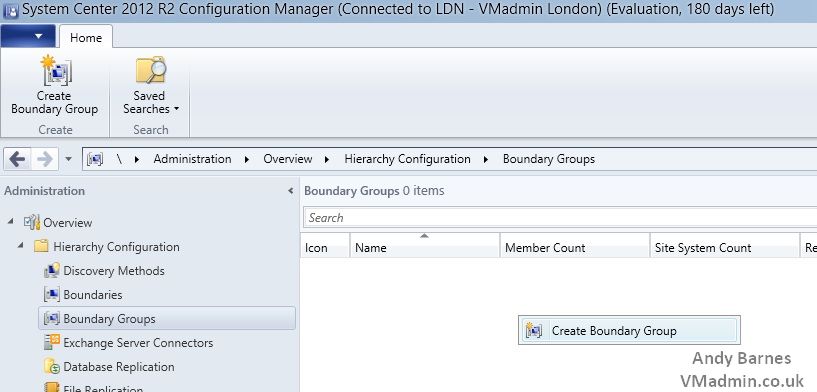
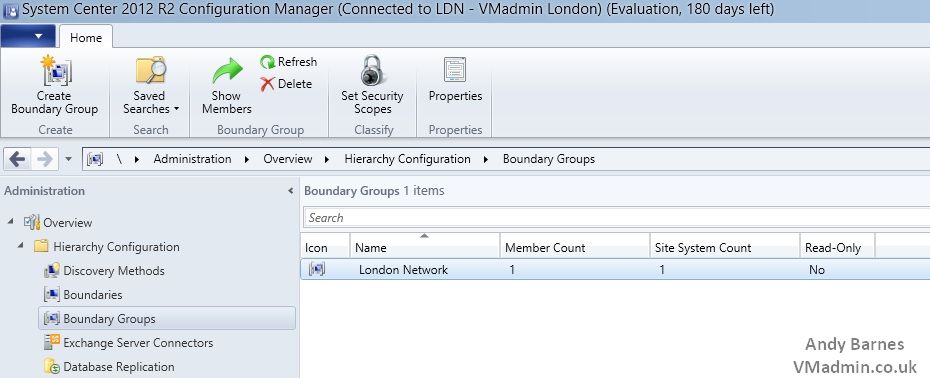
27. Next Select "Boundary Groups".
28. Right click and select "Create Boundary Group"
29. Give your boundary group a name, such as "London Network" and select the AD site which the network is applicable to.
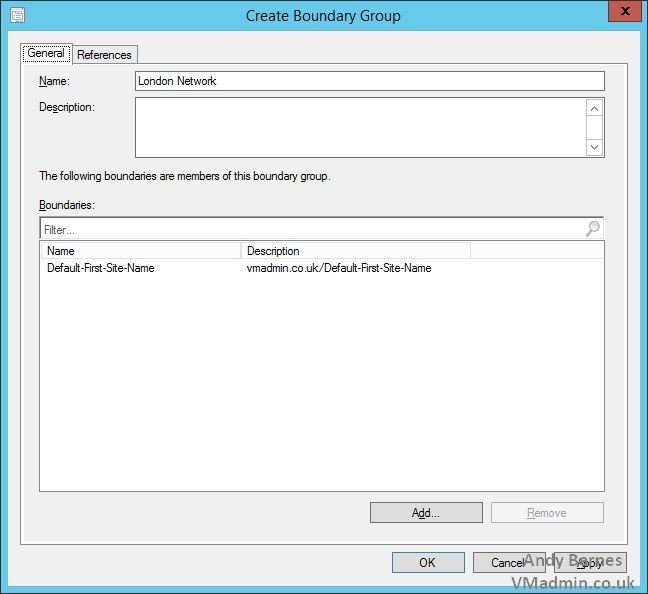
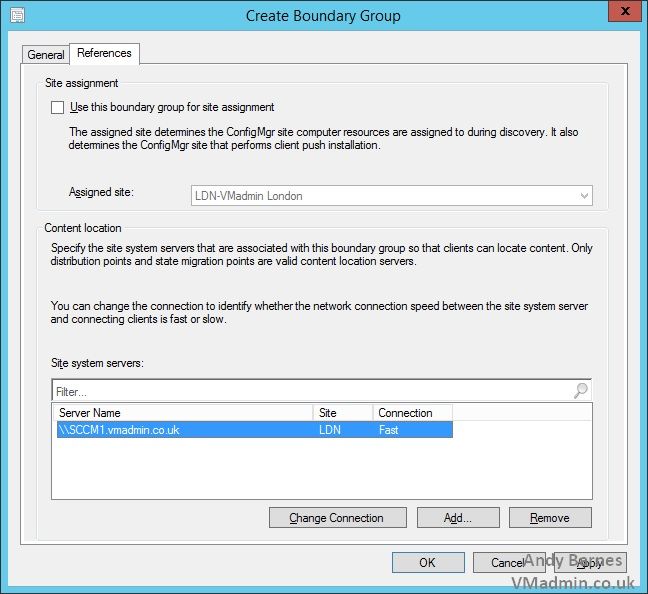
30. On the references tab, add the SCCM site system server which clients within this boundary group should use.
31. You will then see your boundary group listed and clients within this network can now received software, updates and have task sequences deployed to them.
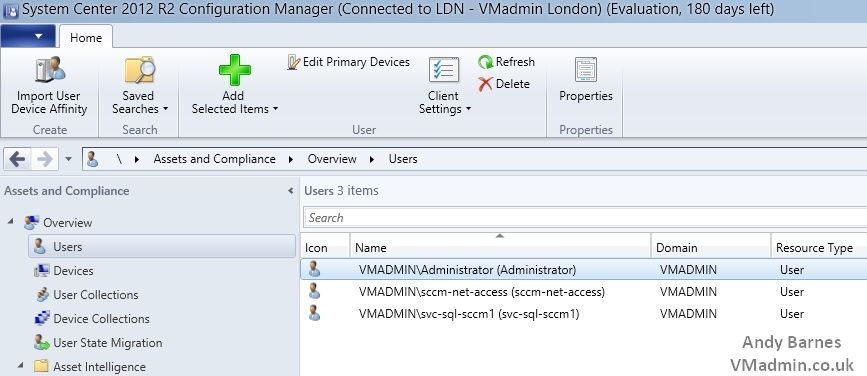
32. If you navigate to the following Software Library -> Overview -> Users
You will see the users which you discovered by enabling Active Director user discovery earlier in a previous task.
Next I will blog about how to build a Windows 7 desktop via SCCM
Share this blog post on social media:
Tweet


Latest Blog Posts
- vSphere 7 U1 - Part 3 - Creating a Datacenter, HA/DRS Cluster and Adding a Host
- vSphere 7 U1 - Part 2 - Deploying vCenter 7.0 U1 VCSA
- vSphere 7 U1 - Part 1 - Installing ESXi 7.0 U1
- Veeam CBT Data is Invalid - Reset CBT Without Powering Off VM
- View Administrator Blank Error Dialog/Window After Upgrade