In this blog post I will go through the installation of System Center Configuration Manager 2012 SP1 as a single Primary Site Server.
SQL Server 2012 is installed on the same server which SCCM will be installed on, which itself will be Windows Server 2012.
You can install SQL Server 2012 on the same server as SCCM or on a seperate server if you wish, If you are yet to install SQL Server 2012 you can view the step by step process for that here SQL Server 2012 Install Step by Step.
I now have a newer version of this for SCCM 2012 R2:
System Center Configuration Manager SCCM 2012 R2 Installation Step by Step - Part 1
System Center Configuration Manager SCCM 2012 R2 Installation Step by Step - Part 2
I will go through the server requirements and their install follwed by the installation of SCCM 2012 SP1. The steps I will go through will cover SCCM being capable of deploying desktops through task seqences, software updates, application installation and endpoint protection, pretty much anything you want to do with SCCM.
Prerequisites
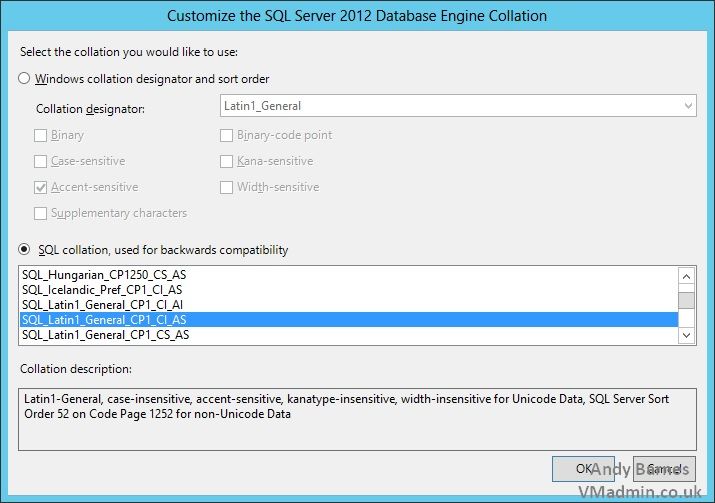
1. One important requirement to note when installing SQL Server for use as the SCCM database, is to customize the default collation of the SQL instance to "SQL_Latin1_General_CP1_CI_AS".
You cannot use SCCM with the default collation that SQL Server is installed with by default.
2. In this step by step I am installing a primary site server, which is capable of serving upto 100,000 clients with SQL installed on the same server.
The minimum suggested configuration for this is:
- Windows Server 2008, 2008 R2, 2012
- 8 cores
- 32 GB RAM
- 300 GB of hard disk space for OS, SCCM, SQL and database files. In reaility add on then additional for client software, updates and OS images.
3. Install the Windows Server roles and features required by SCCM 2012 SP1 via Powershell:
Import-module servermanager
Add-WindowsFeature NET-Framework-Features,Web-Common-Http,Web-Static-Content,Web-Default-Doc,Web-Dir-Browsing,Web-Http-Errors,Web-Http-Redirect,Web-Asp-Net,Web-Net-Ext,Web-ASP,Web-ISAPI-Ext,Web-ISAPI-Filter,Web-Http-Logging,Web-Log-Libraries,Web-Request-Monitor,Web-Http-Tracing,Web-Basic-Auth,Web-Windows-Auth,Web-Url-Auth,Web-Filtering,Web-IP-Security,Web-Stat-Compression,Web-Mgmt-Tools,Web-WMI,NET-Framework,RDC,BITS,UpdateServices-Services,UpdateServices-WidDB -Restart
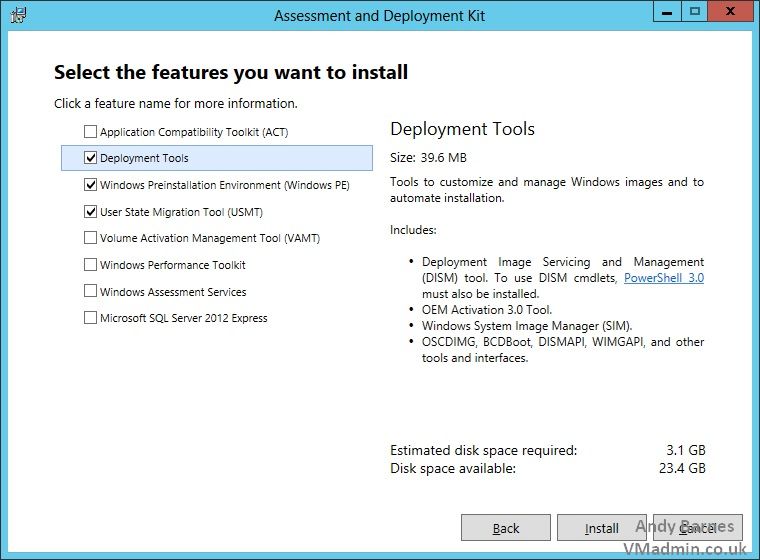
4. Download and install the Windows Assessment and Deployment Kit (ADK) for Windows 8
http://www.microsoft.com/en-us/download/details.aspx?id=30652
We want to install the following features of the ADK:
- Deployment Tools
- Windows Preinstallation Environment (Windows PE)
- User State Migration Tool (USMT)
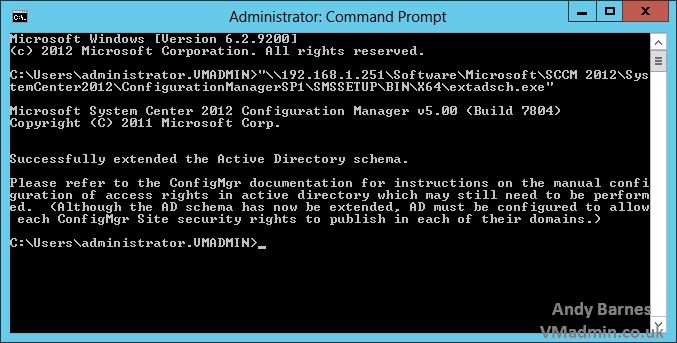
5. Next we can to extend the Active Directory schema for SCCM, you don't need to do this as I have it working without this, however it does help clients discover the SCCM server and their site.
On the SCCM installtion media run the following on a domain controller as a domain admin with schema admin privileges.
<path to install media>\SMSSETUP\BIN\X64\extadsch.exe
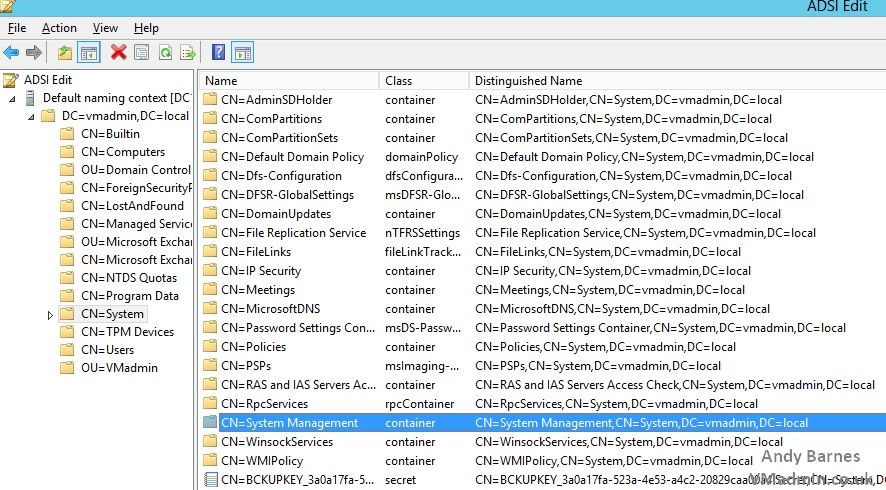
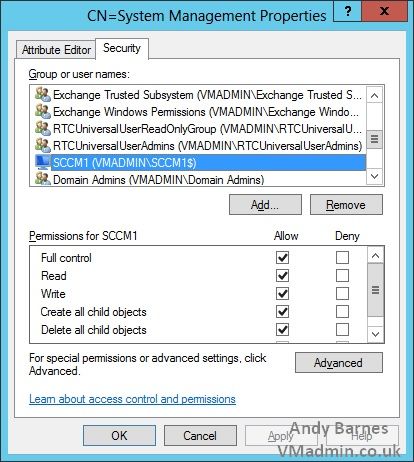
6. Run ADSI Edit and connect to your domain to create the "System Management" container.
Run ADSIedit.msc
Connect to your domain
Right click "System" and Select New Object
Choose "container"
Name the container "System Management"
Edit the Security of the new "System Management" container and add the SCCM server (e.g. SCCM1) with "Full Control" (This ojbect and all descendant objects).
Thats the prerequisites completed, now we can move onto the SCCM installation..
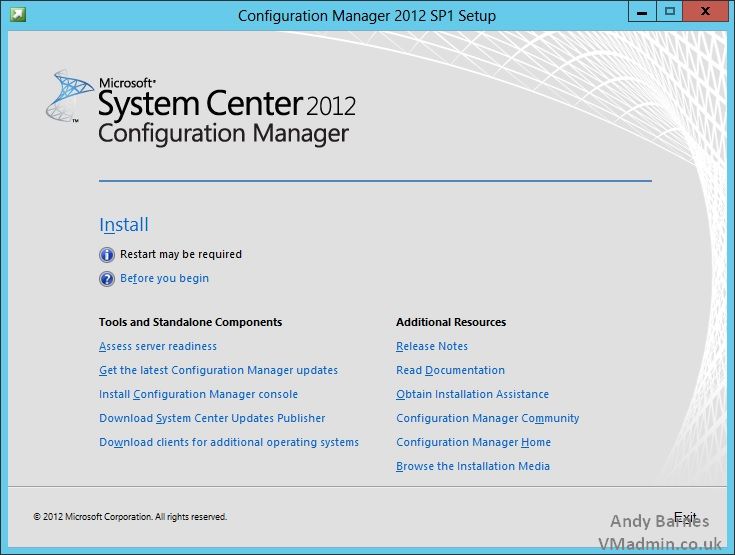
SCCM 2012 SP1 Installation
1. Run the SCCM 2012 SP1 Setup (splash.hta) and Click "Install"
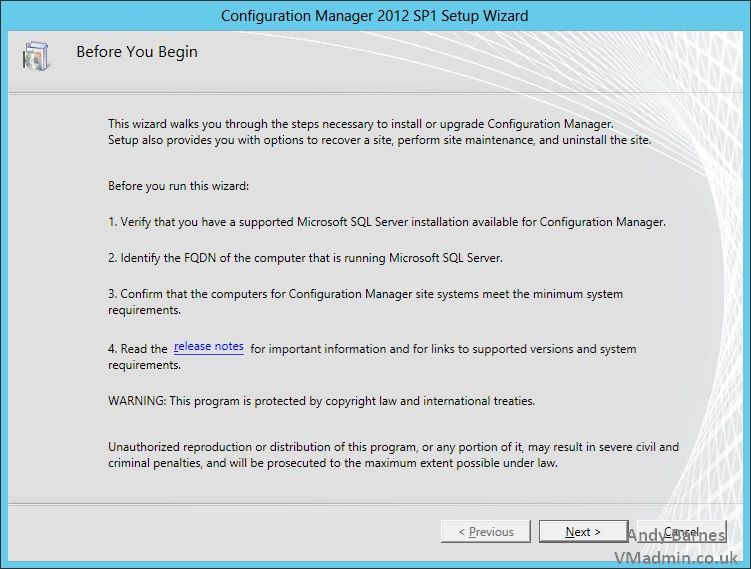
2. Confirm you meet the requirements and Click Next.
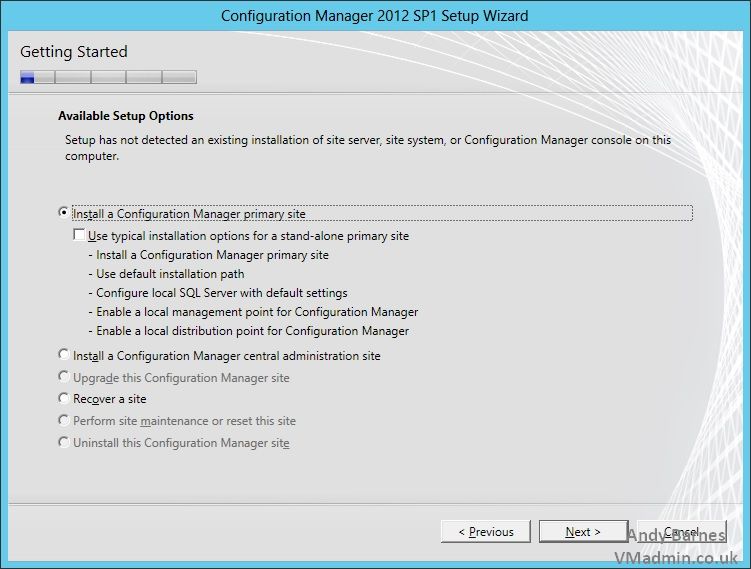
3. Select "Install a Configuration Manager Primary Site"
Click Next.
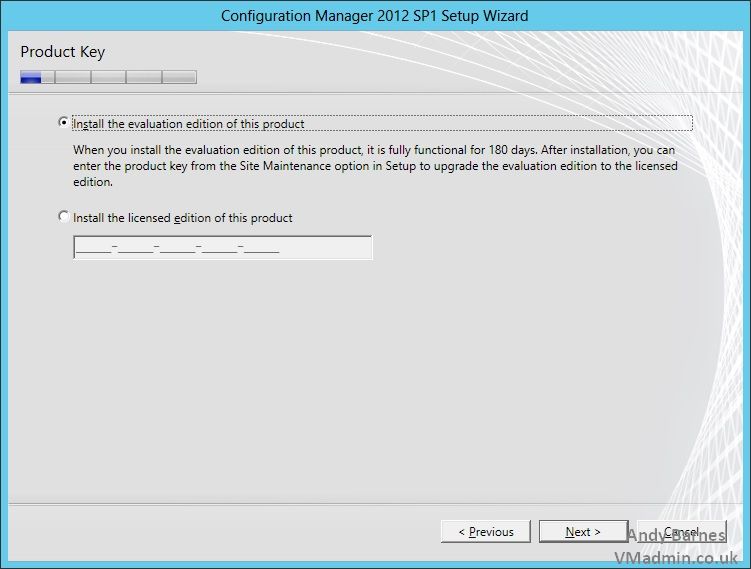
4. Enter your SCCM license key or choose the eval.
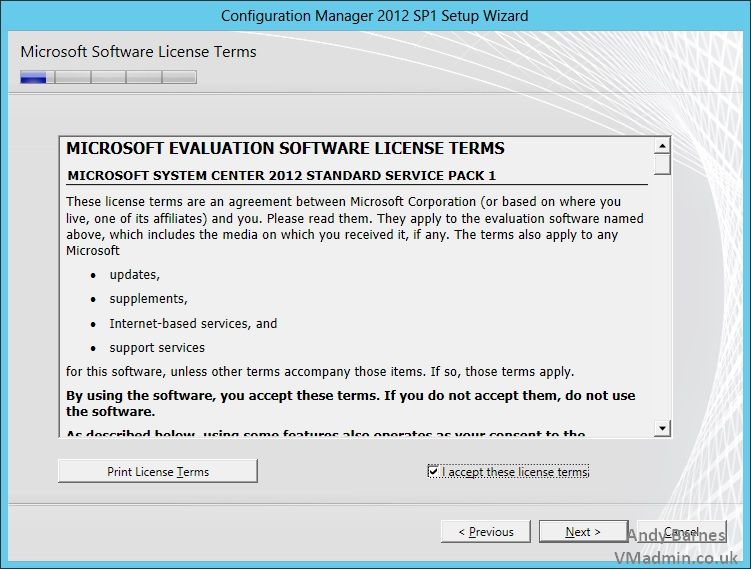
5. Read the license agreement like all good consultants do and accept them ;-)
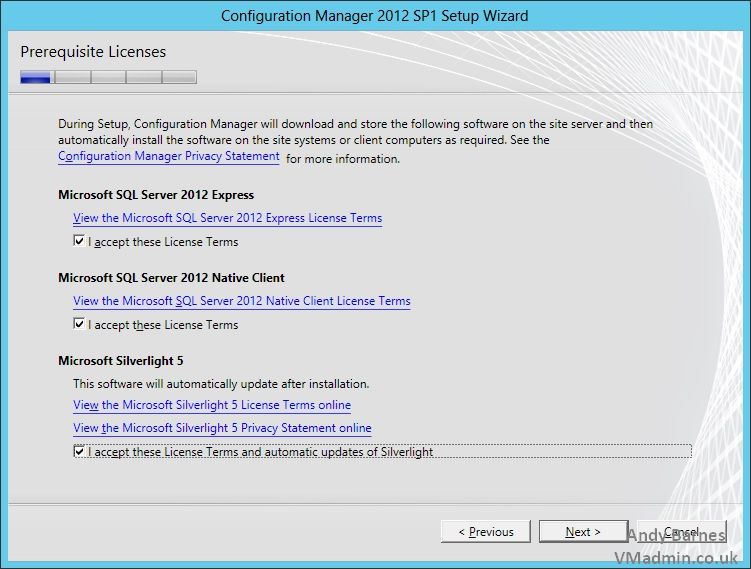
6. Accept the license terms for the listed products and click next.\
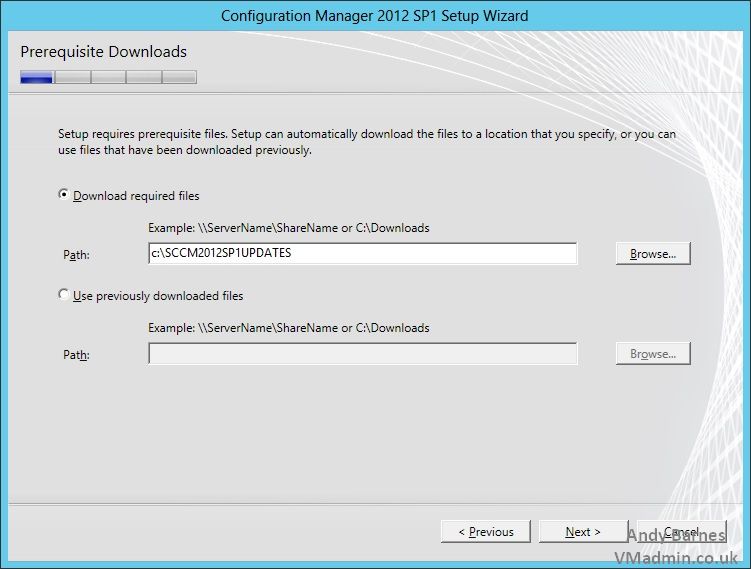
7. SCCM will now try and download any updates and prerequisites it may need that are not in the installation media or have been since updated (you will need internet access).
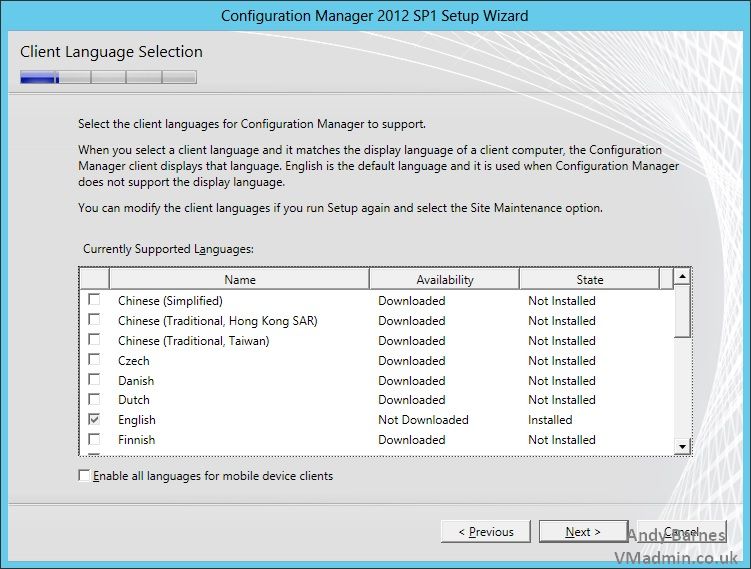
8. Choose your lanuage for the config manager server.

9. Choose the lanauages for your clients.
10. Give your primary site a code (this cannot be changed later).
11. Give your site a name.
12. Choose the installation location for SCCM and tick install configuraiton manager console

13. We are installing this as a somgle primary site server , select "Install the primary site as a stand-alone site"
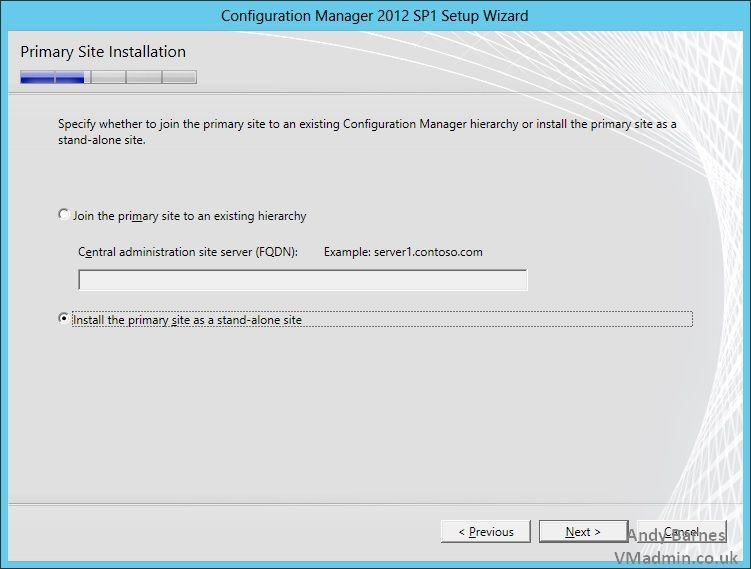
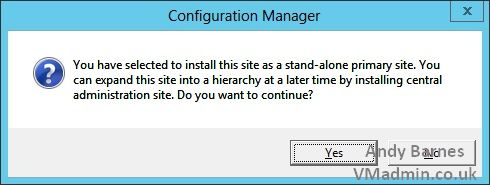
14. Note that if later you want to manage this primary site by installing a centrol administration site you now can do that in SCCM 2012 SP1.
Click Yes.
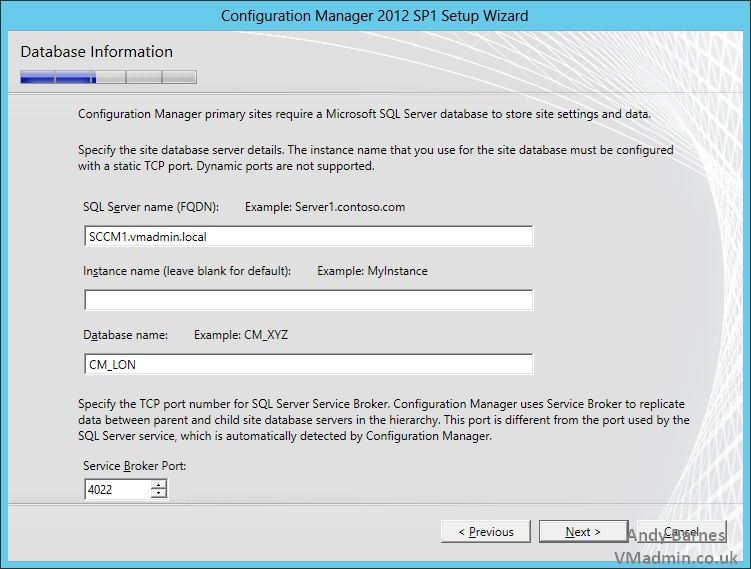
15. Enter the FQDN for your SQL server (inc instance name if not default), remember the collation must be correct for SCCM as stated in the prerequisites.
16. Enter the DB name for your SCCM database and click Next.
17. Enter the FQDN of your SCCM server, this will be your SMS provider.

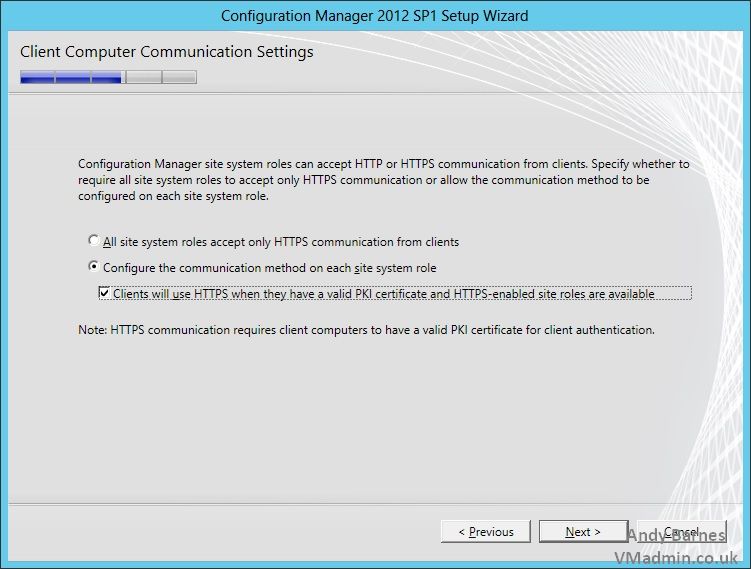
18. Select if you want to use soley HTTPS client communication or if you want to use HTTP if there is no valid PKI certificate for HTTPS.
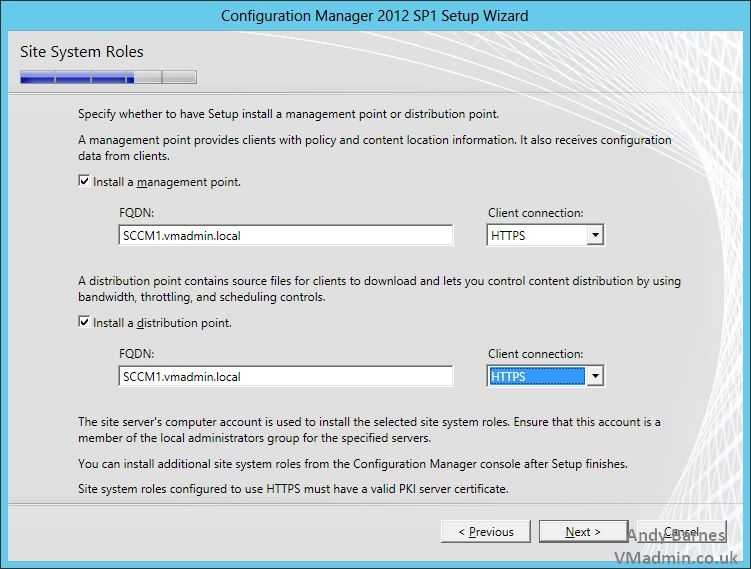
19. We will install a "management point" and "distribution point" on our primary site server.
Choose HTTP for the client connection.
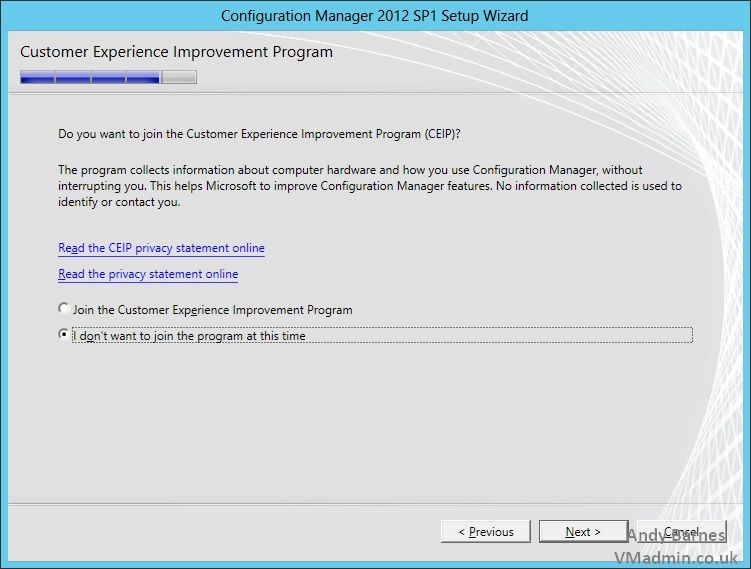
20. Opt out if the customer experience improvement program if you wish.
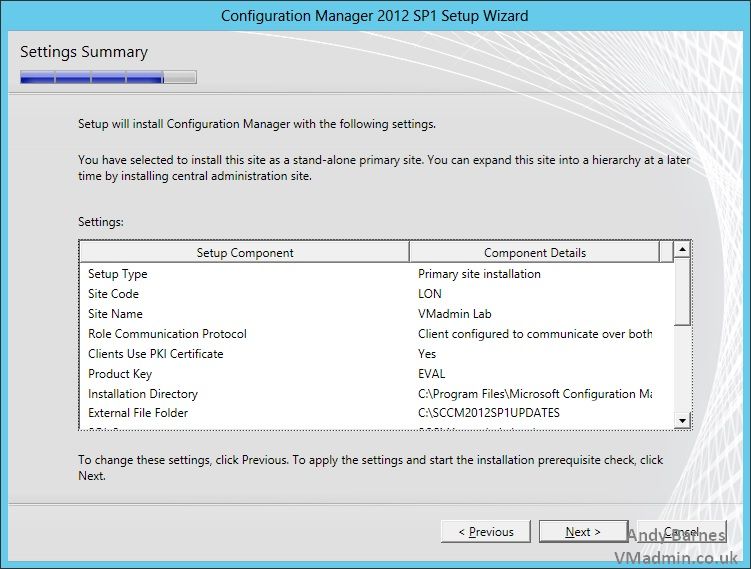
21. Review your settings and click Next.
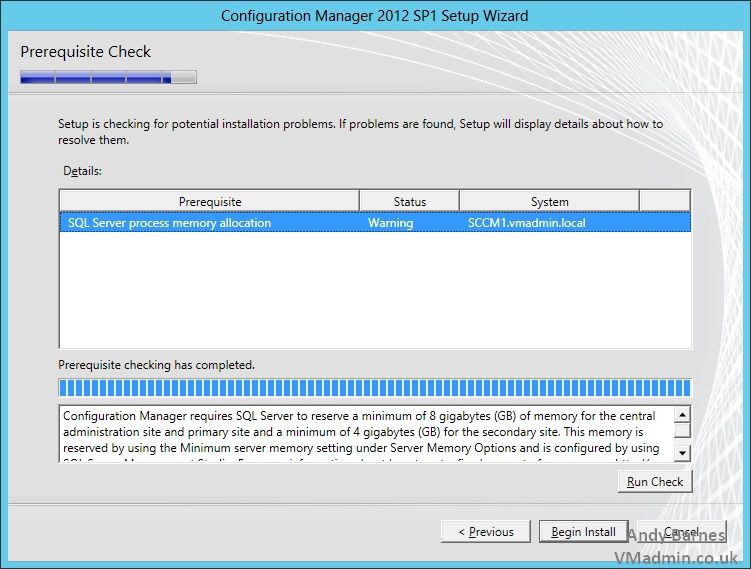
22. The SCCM installer will perform a prerequiste check.
If you are missing any of the previous steps this will highlight any problems and advise what you need to do.
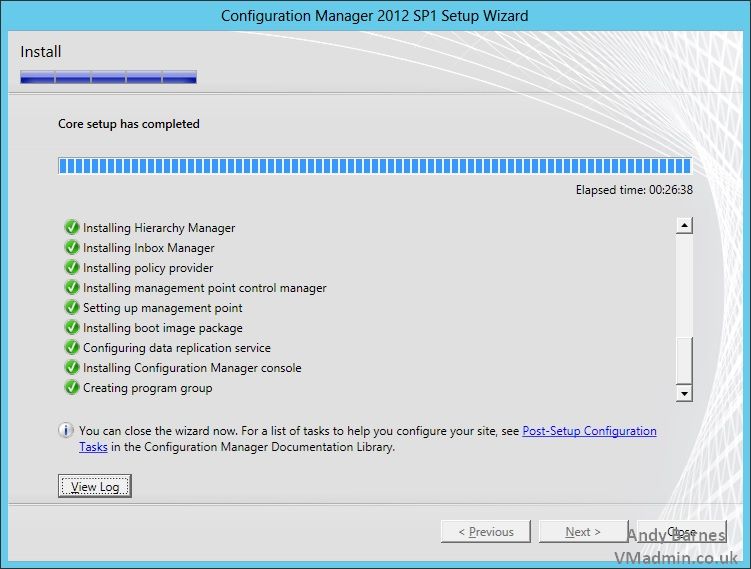
23. SCCM 2012 SP1 will begin to install, this is a good time to get a cuppa!
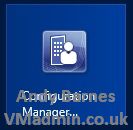
24. Once installation has completed sucessfully you will find the Configuration Manager Management Console on the Start menu tile (Windows Server 2012) as shown below.
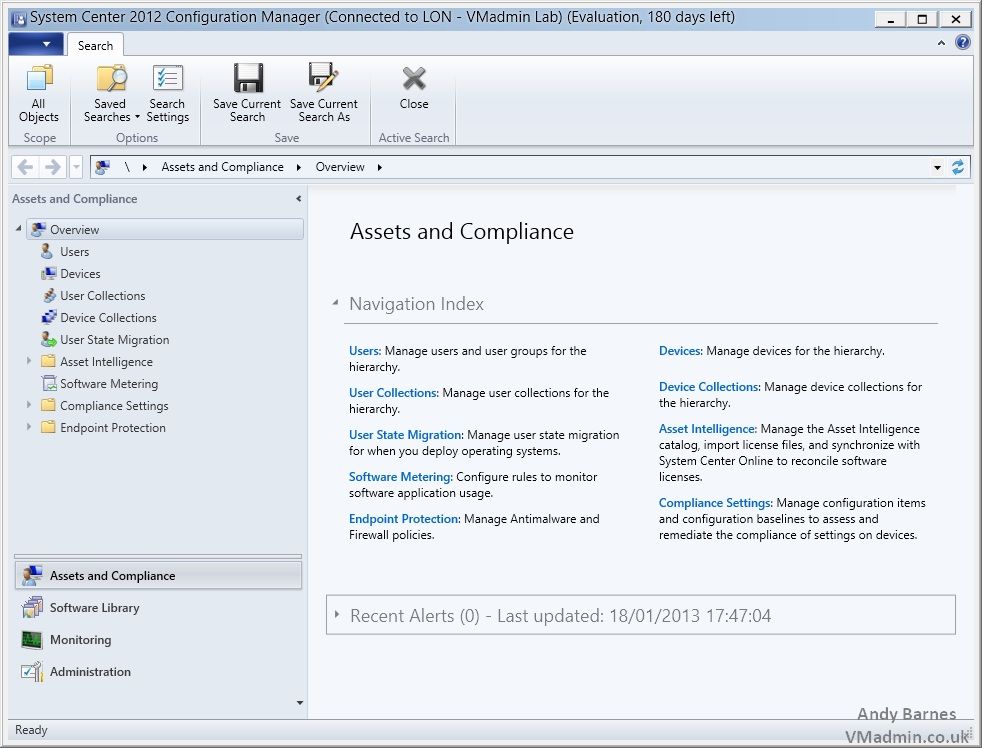
25. The management console will connect to your site and your ready to then perform post tasks such as import your AD users/computers, create task sequences and so on, which I will cover in further posts.
Share this blog post on social media:
Tweet


Latest Blog Posts
- vSphere 7 U1 - Part 3 - Creating a Datacenter, HA/DRS Cluster and Adding a Host
- vSphere 7 U1 - Part 2 - Deploying vCenter 7.0 U1 VCSA
- vSphere 7 U1 - Part 1 - Installing ESXi 7.0 U1
- Veeam CBT Data is Invalid - Reset CBT Without Powering Off VM
- View Administrator Blank Error Dialog/Window After Upgrade