In Part 1 we deployed the vCOPS vApp which contains our 2 VMs; the Analytics VM and the UI VM.
Now that the 2 VMs within the vApp are powered on, we are ready to configure vCOPS.
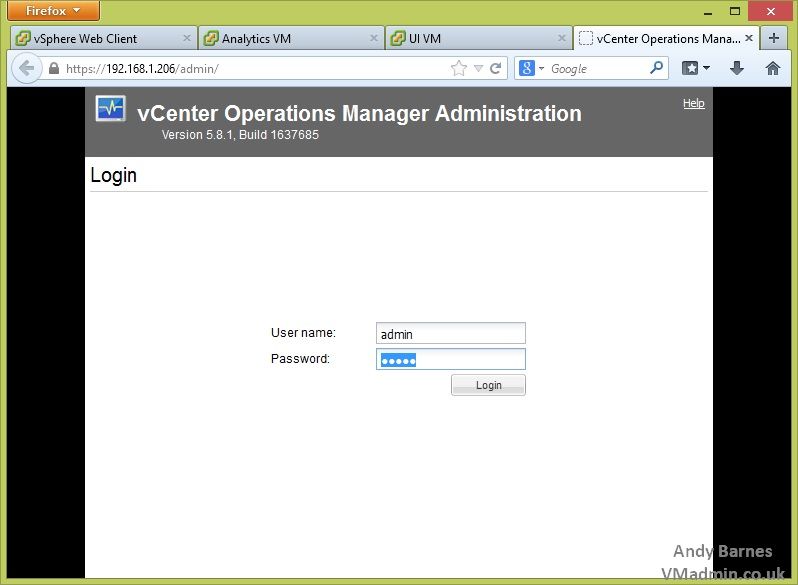
1. Browse to the IP of your UI VM
It will redirect you to https://UI-VM-IP/admin
2. Login with "admin" and "vmware"
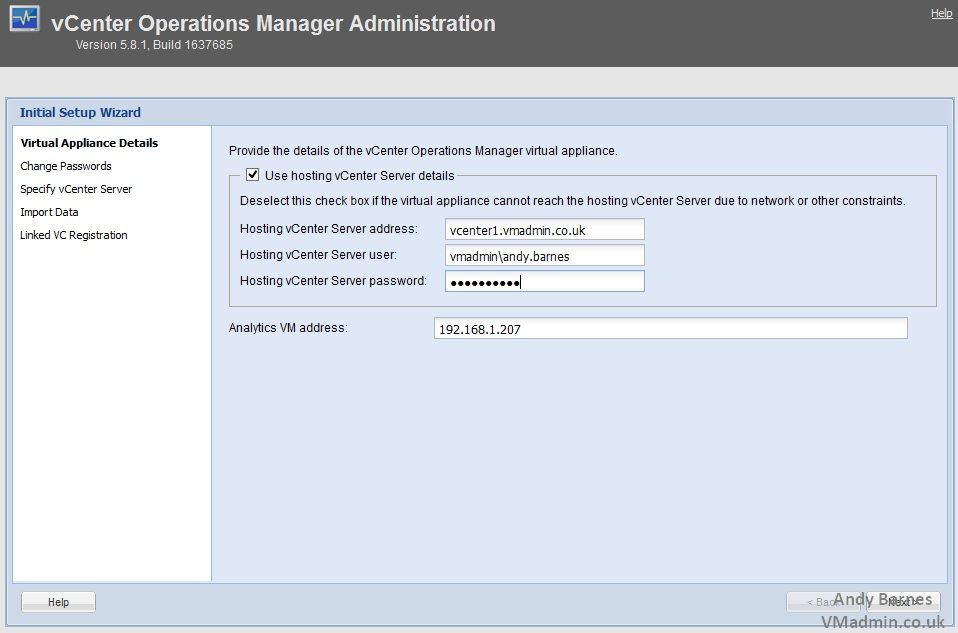
3. The Initial Setup Wizard will run.
Enter your vCenter server FQDN (e.g. vcenter1.vmadmin.co.uk) which hosts your vCOPS virtual appliance (vApp).
Enter the IP address of the Analytics VM (which you provided during the deployment of the virtual appliance).
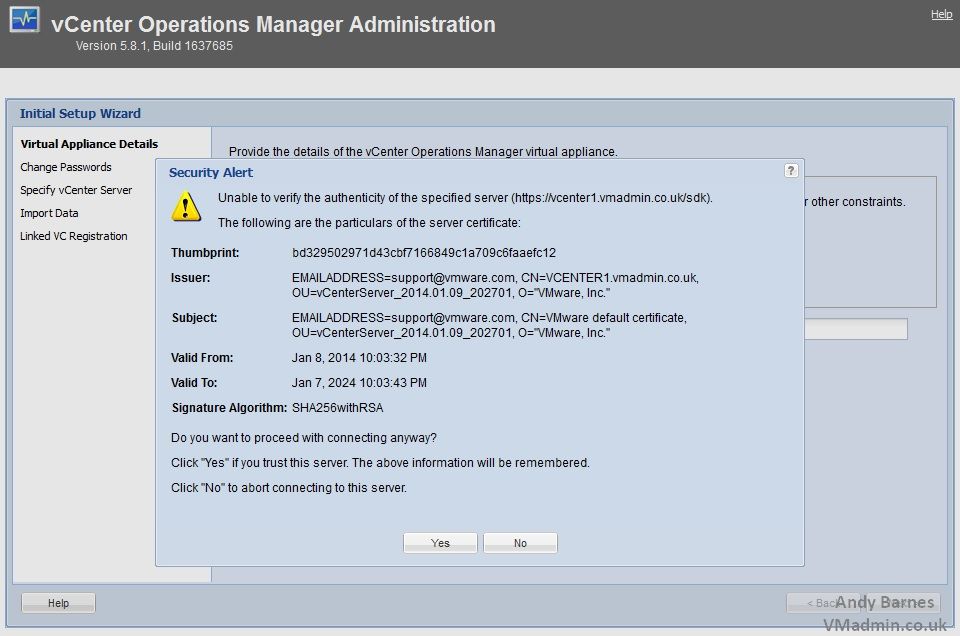
4. Accept the certificate for the vCenter by Clicking Yes.
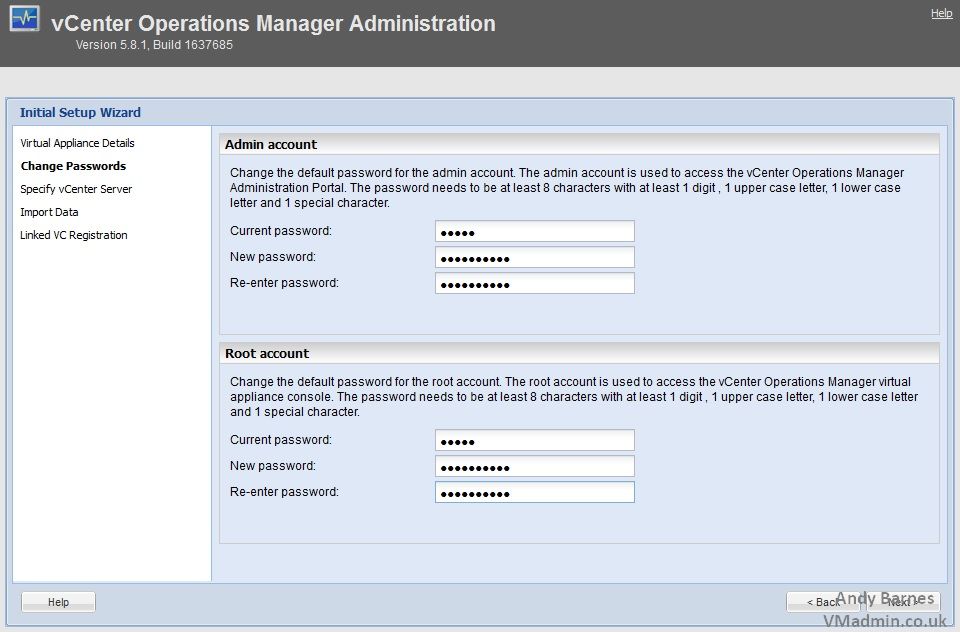
5. Set a new secure password for the "admin" account (it was "vmware")
6. Set a new secure password for the "root" account
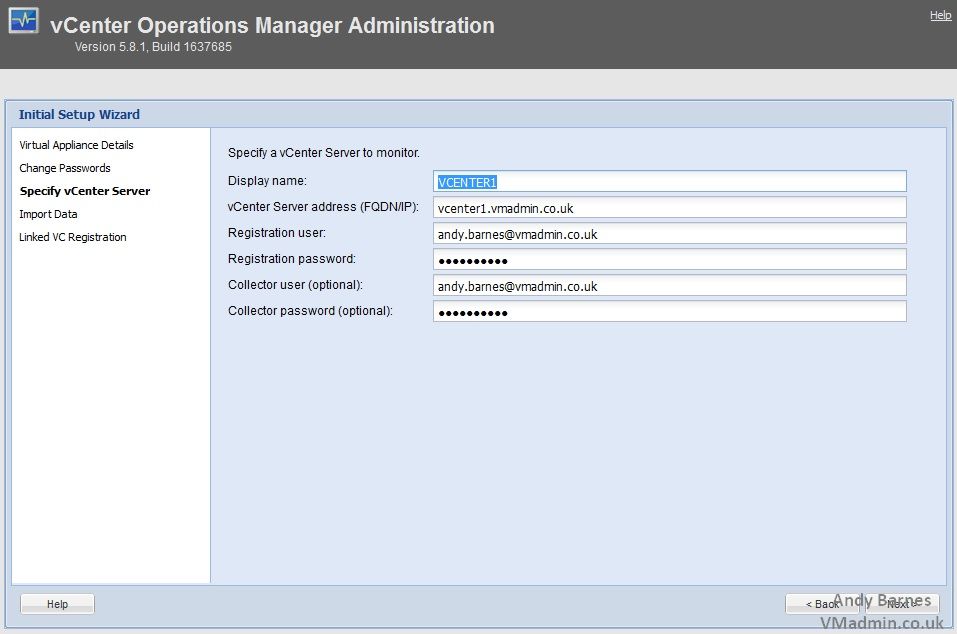
7. Register a vCenter Server to monitor.
Enter the FQDN of the vCenter server
Enter a user account to register vCOPS with vCenter (Must have permissions to register an extension - Administrator role of course includes this)
Optionally enter a collector user account (This account must have Global: Health and Storage Views: View OR you could allow give it the Read-Only role propagated from the top of vCenter)
8. The wizard will try to detect if you were using a previous version of vCOPS (via an existing plug-in) to import the data from it.
If you haven't got one, none will be detected! Click Next.

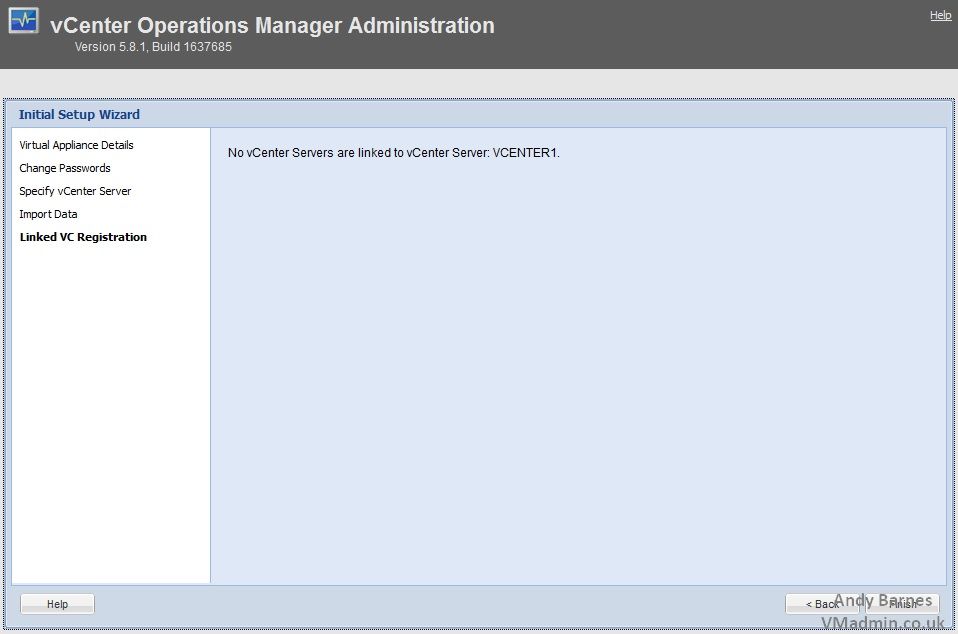
9. The wizard will then try to detect any linked vCenters.
If you haven't got any then it won't find any linked vCenters! Click Finish,
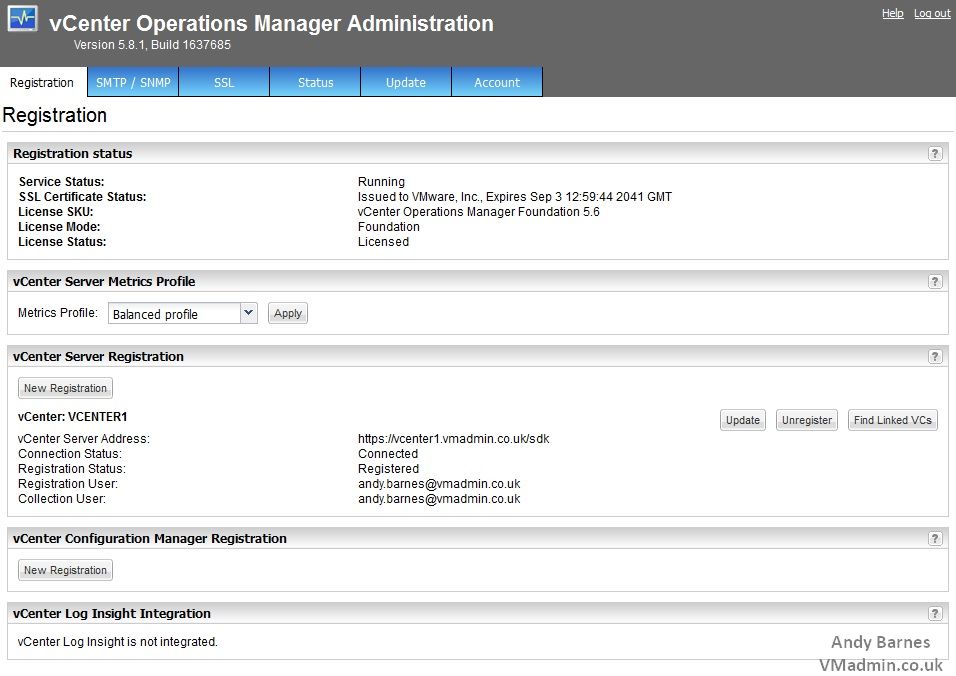
10. With the initial configuration done, you will notice that the "License Mode" is "Foundation" and the "License Status" is "Licenced"
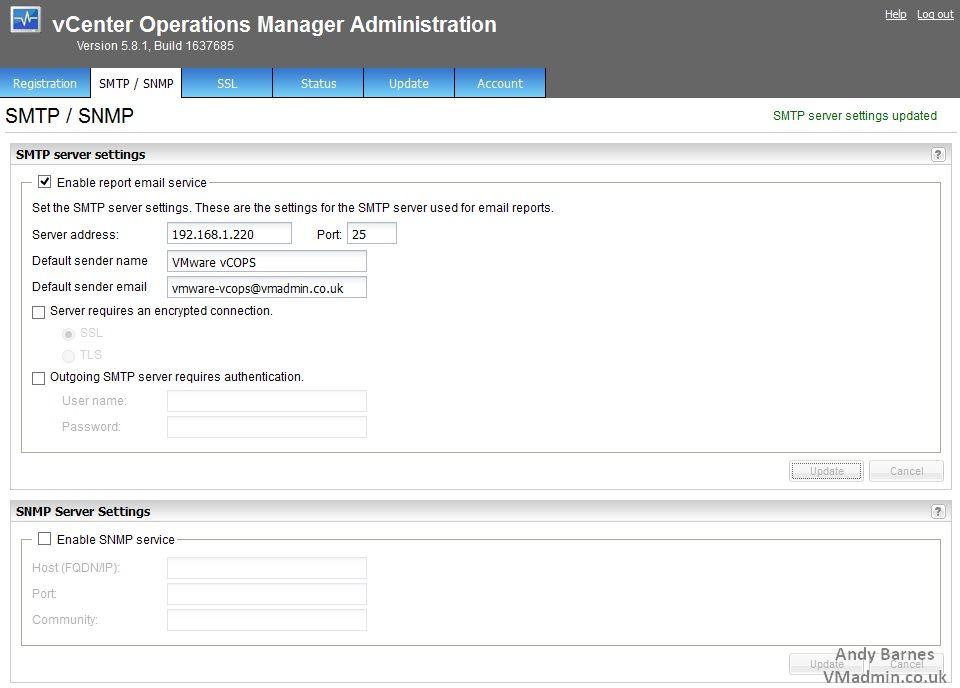
11. Click the SMTP/SNMP tab
12. Tick the "Enable report email service" box
13. Enter your SMTP server details (e.g. Exchange server) and sender email address you want alerts to appear from.
14. Click Update.
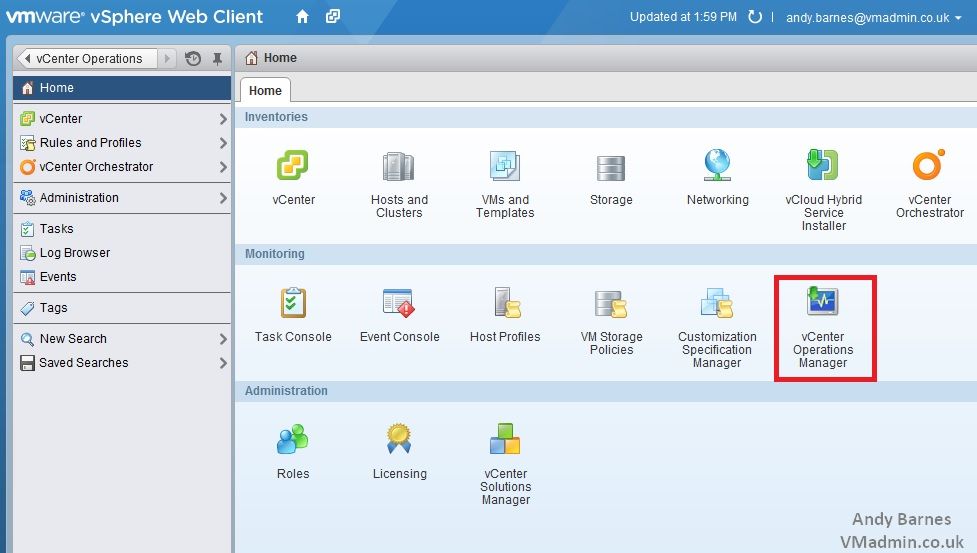
15. Now login to the vSphere Web Client. Go to Home --> vCenter Operations Manager
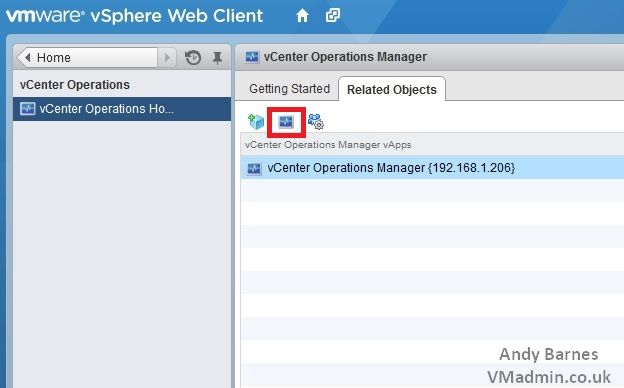
16. Under "Related Objects" you will now see your vCenter Operations Manager vApp, confirming it has been registered to the vCenter successfully.
17. If you click on the little icon (highlighted in red) it will take you to the vCOPS login page on the UI VM.
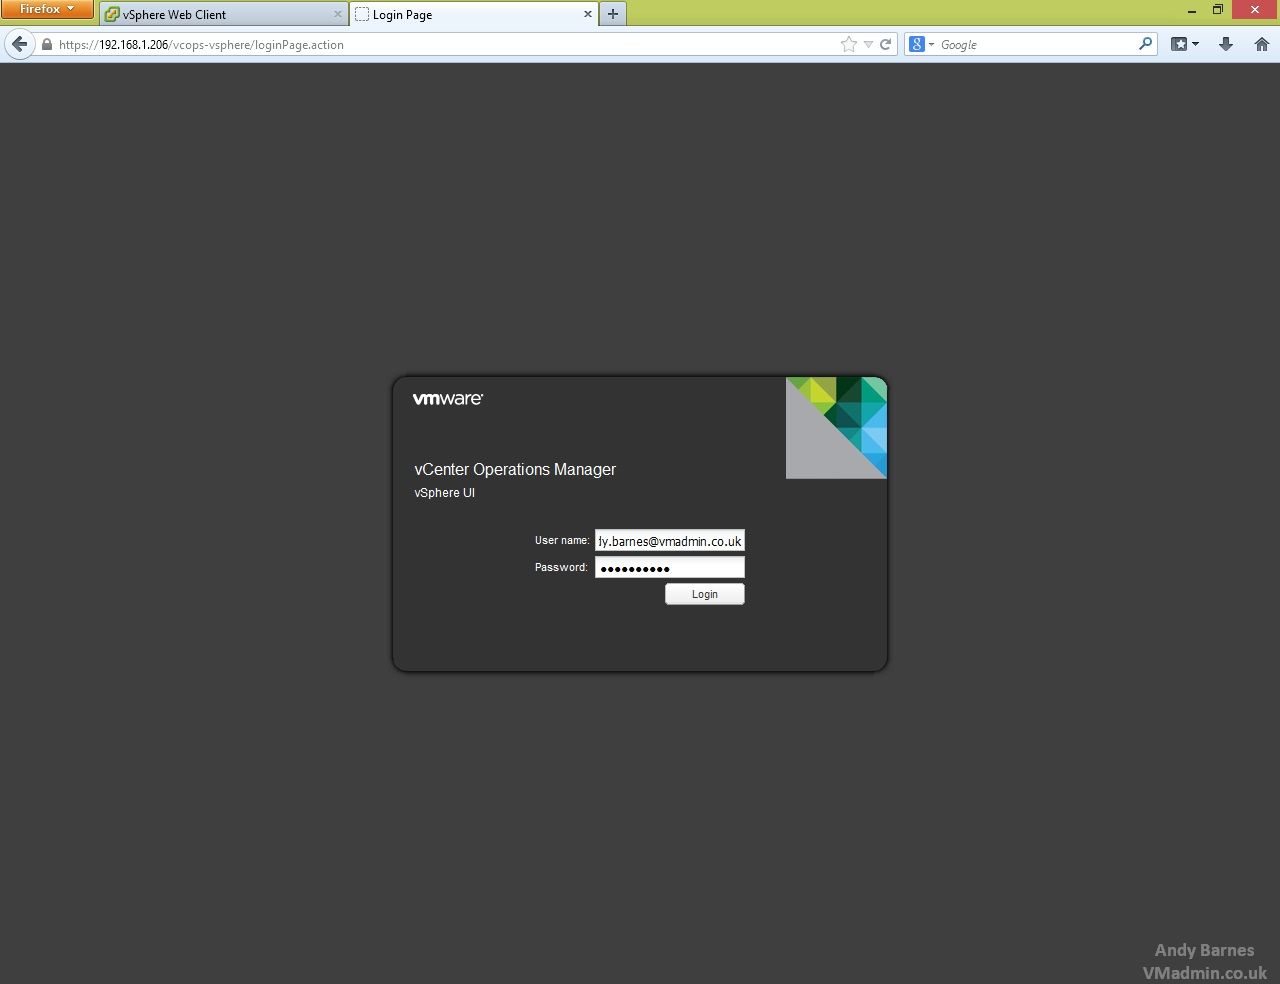
17. Now that the link has opened the vCOPS UI login as the same user you login to vCenter with (via Single Sign On).
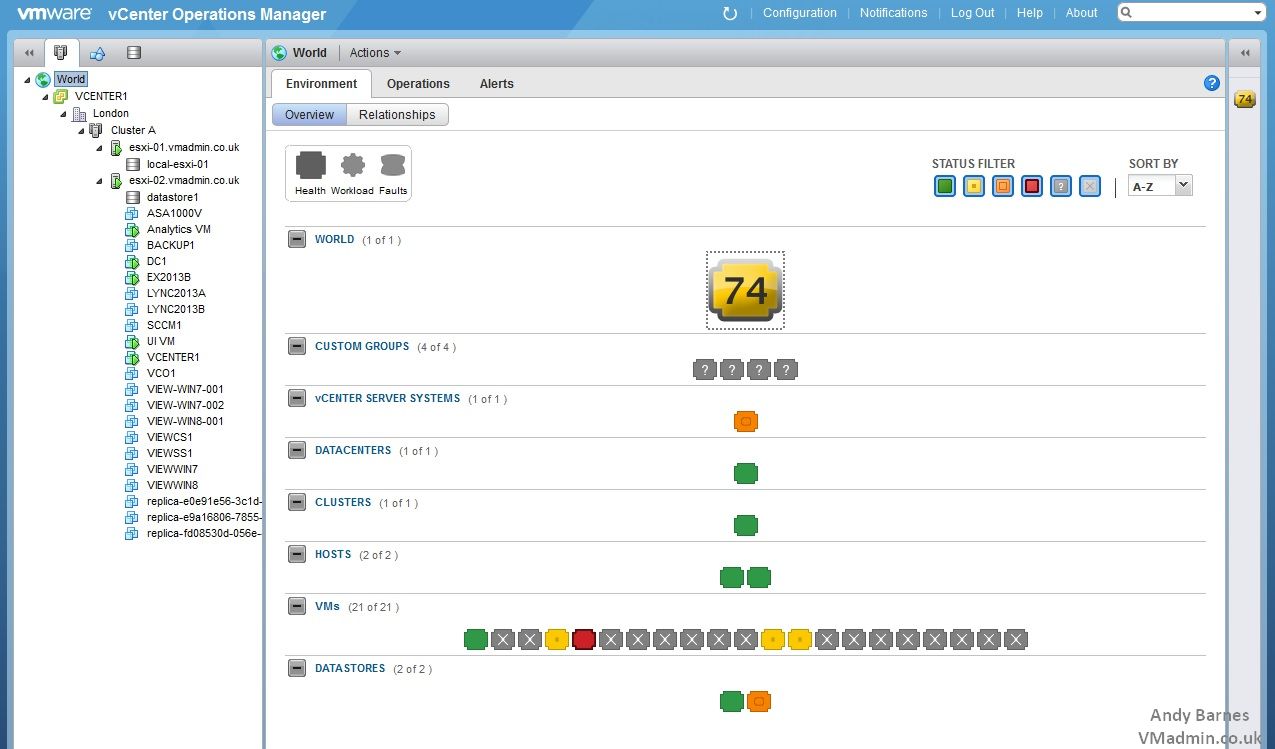
18. Now you can see your environment from various different perspectives within vCOPS foundation.
Note: At this point we are still running in "Foundation" license mode so have limited functionality available. One obvious indicator is the tabs along the top, with Foundation you get the following which is expanded with many more options with Standard.
- Environment
- Operations
- Alerts
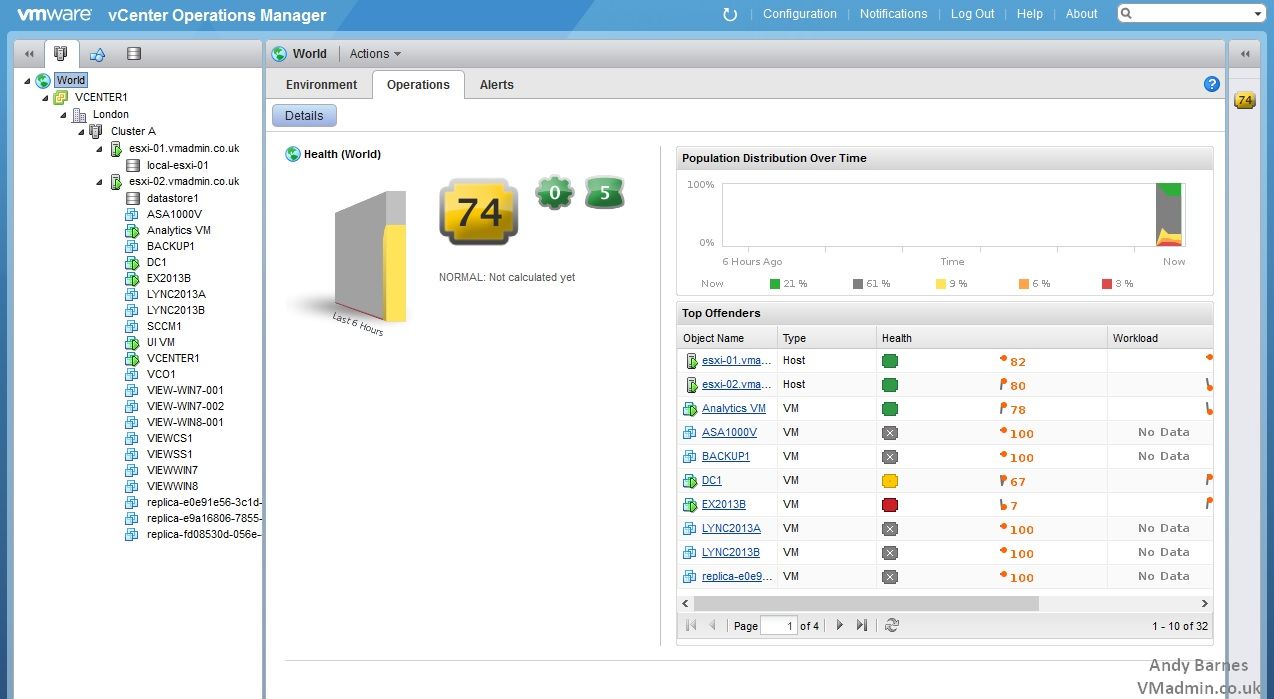
19. Here we are looking at the "Environment" Overview tab at the top level of "World" which includes our vCenter, Datacenter, Clusters, ESXi hosts, VMs and datastores.
There are 3 different ways to view the environment this way; Health, Workload and Faults.
Each object is scored and colour coding makes it easier to see which objects are good and which have problems.
You can click on them to find out more details, but this is one way of getting quick overview of everything!
Note: One thing I will point out is this.. it takes time for vCOPS to gather it's data initially after installation.
20. If you click the "Operations" tab with the world object still in context, you can see all the sub objects and an over time view of their health, workload or faults.
Again at this point it's still building up a history as can be seen in the partial graph since I deployed vCOPS.
From here you can of course click on any of the objects to go to them directly and see more details.
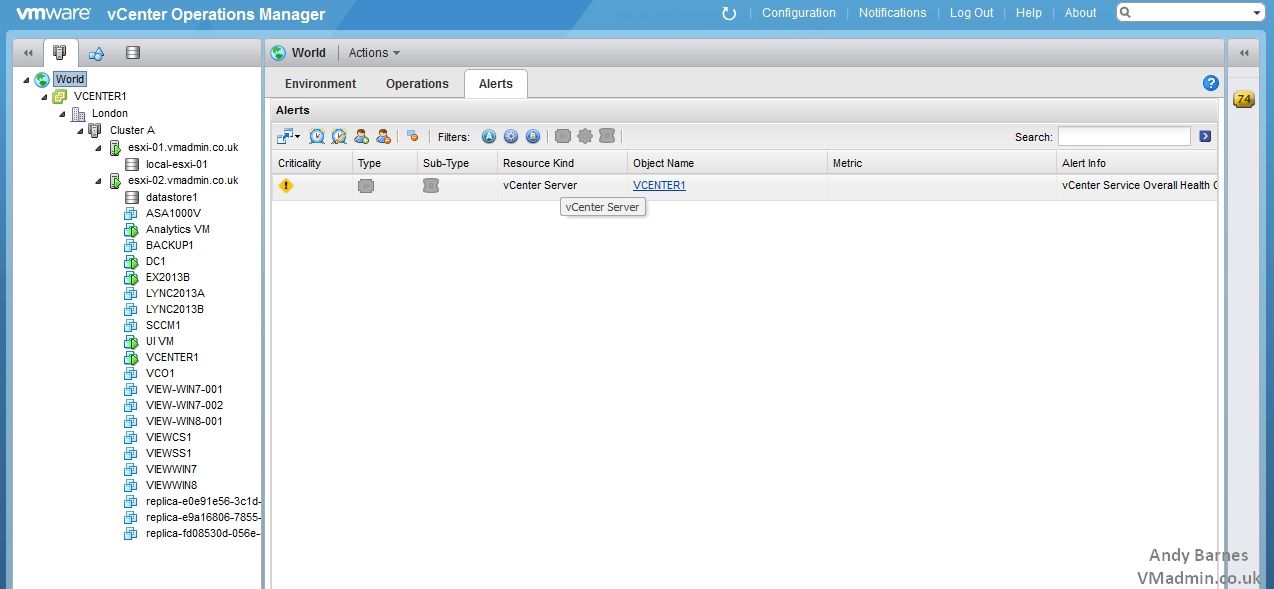
21. Click on the "Alerts" tab takes you to a list of active alerts.
Here I have one relating to my vCenter, which it is stating as critical.
22. Lets click on it and take a look..
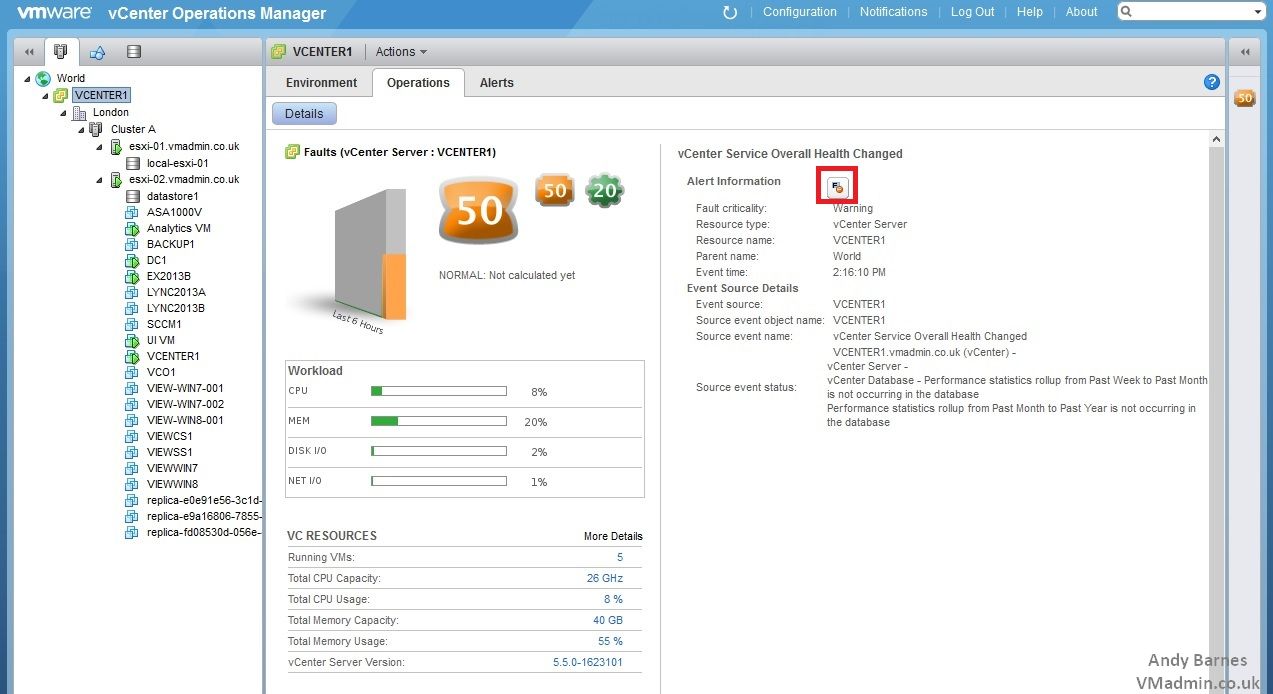
23. As you can see to the right of the vCenter object now is the information on the alert.
It relates to the vCenter database not running performance status rollups for the month and week.
This is because my home lab gets turned off when I'm not using it (to save the polar bears and the wife complaining of the noise), so they haven't been running.
24. You can choose to clear the Alert by clicking the little button (highlighted in red).
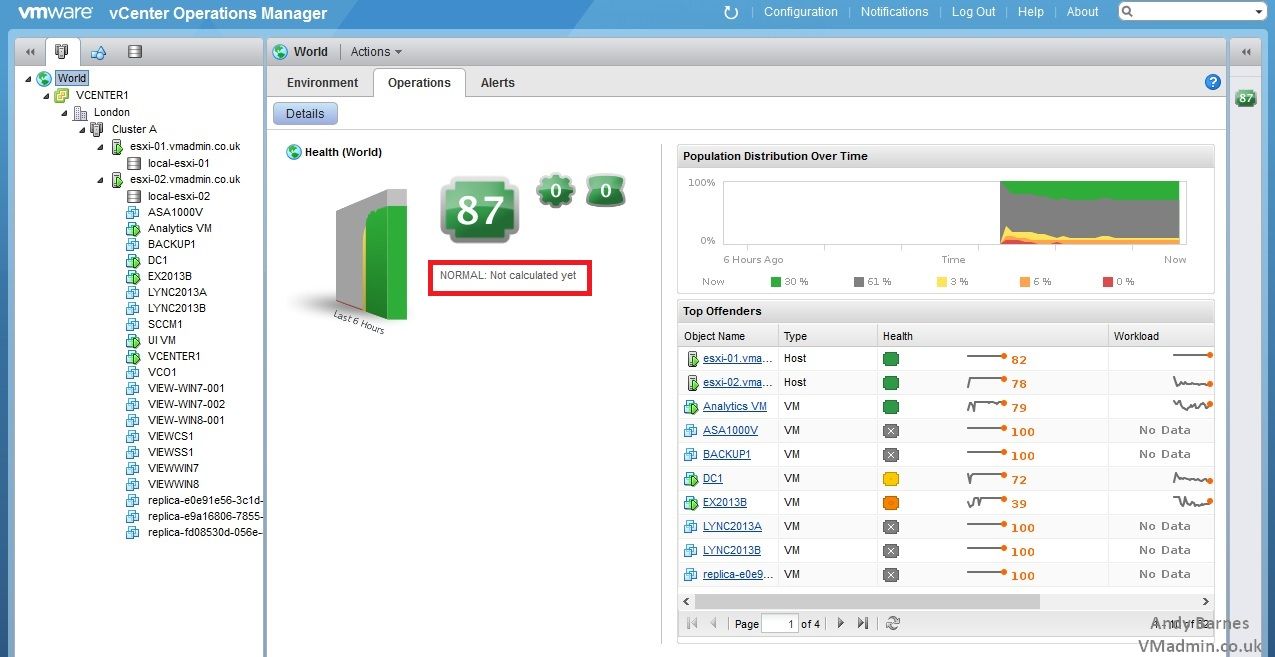
25. If we go back to the "Operations" tab and look at the health of the world! (I love that! It should have indicators such as Economy = screwed and Global Warming = increasing)
On a serious note, take notice the "NORMAL: Not calculated yet" comment, which you will see on all your objects.
vCOPS will monitor what is "normal" and if the object steps out of it's normal behaviour it will alert. Now this takes several days to build up a true picture and more importantly to note, this is not in the Foundation edition! Only Standard edition and upwards. So it will never change from "NORMAL: Not calculated yet".
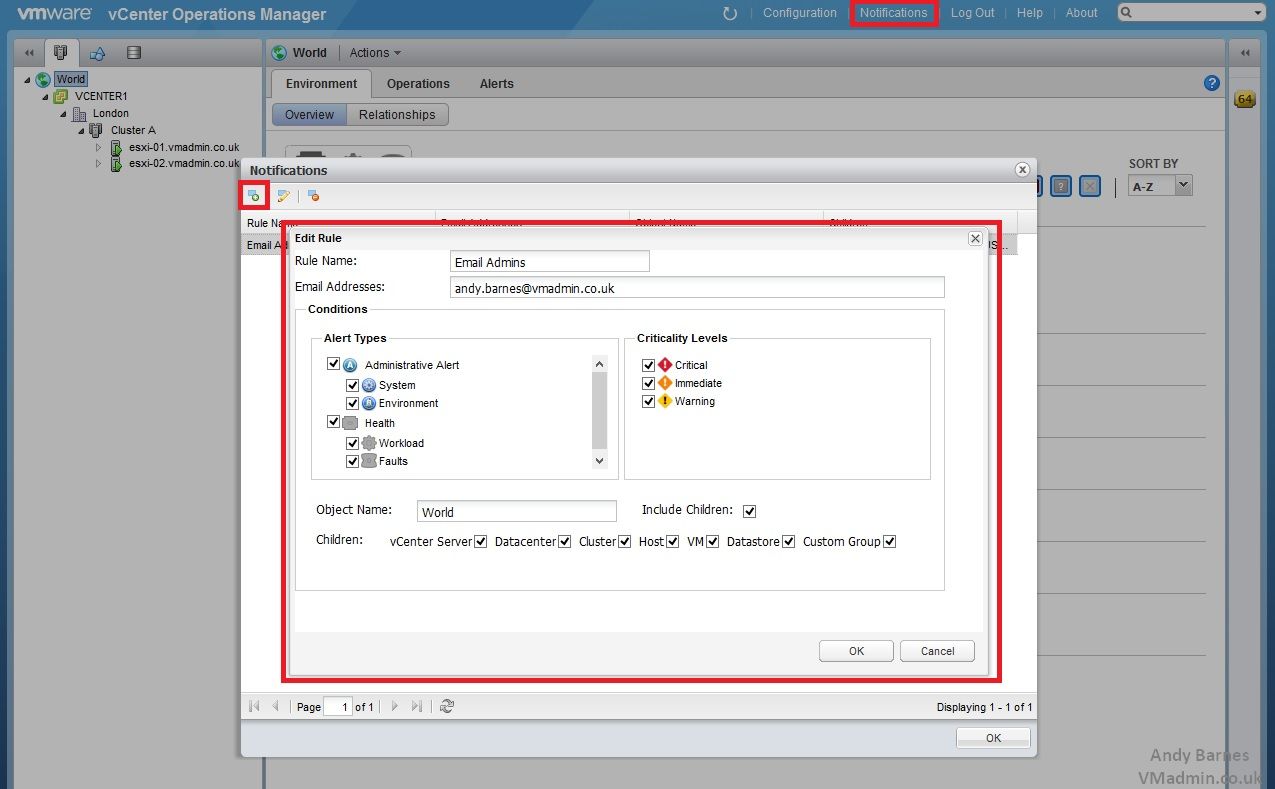
26. Click on the "Notification" link at the top of the page next to Log Out.
27. Add a Notification rule to send an email when the criteria of the rule is met.
Give the rule a name.
Enter an email address.
Tick the alert type(s) and Criticality Level(s) desired.
Type the object name (it auto populates) such as "World" and tick include children.
Select the children object types in include. Click Ok and Ok.
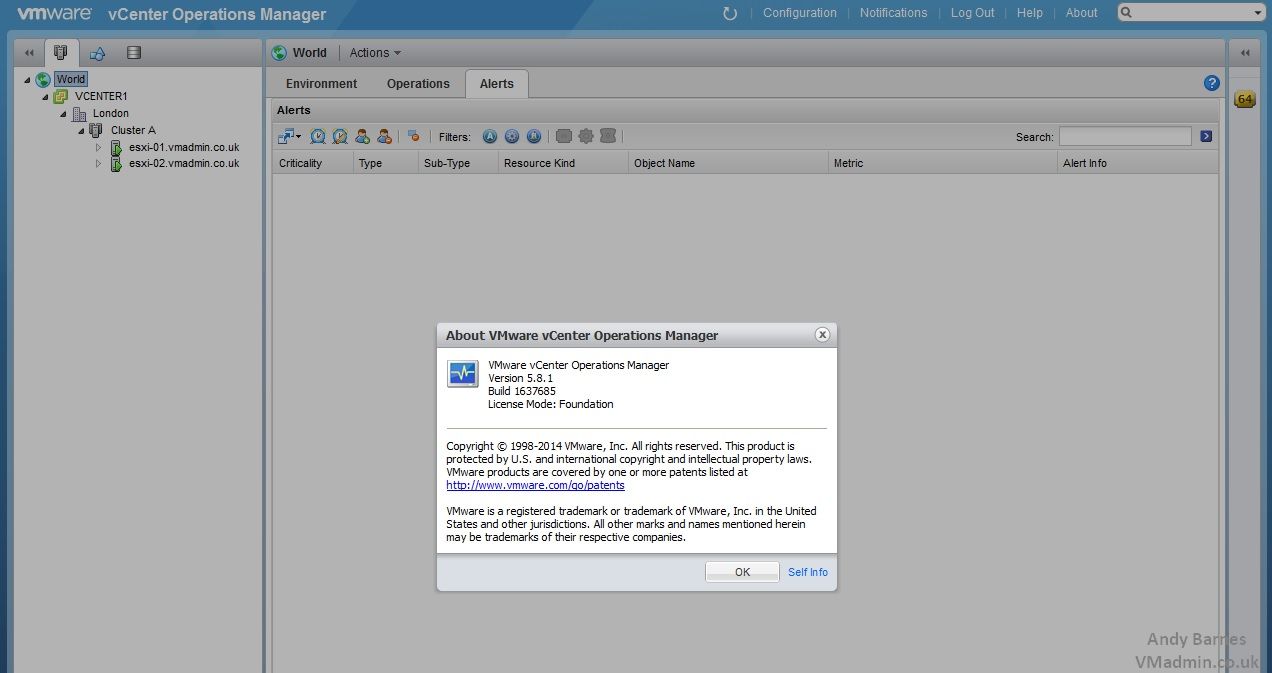
28. Finally Click on "About" next to Help at the top.
29. This confirms you are running in "Foundation" licensed edition mode and as I mentioned a license key is not required.
I hope you have found the first 2 parts of this vCOPS series informative. Everyone that has vCenter can use vCOPS foundation as we have done so here, and have the ability to get this level basic monitoring, insight and notifications into their vSphere environment.
In the next blog post I will cover changing the vCOPS license to "Standard" edition and showing you the extra functionality you can compared to Foundation.
Share this blog post on social media:
Tweet


Latest Blog Posts
- vSphere 7 U1 - Part 3 - Creating a Datacenter, HA/DRS Cluster and Adding a Host
- vSphere 7 U1 - Part 2 - Deploying vCenter 7.0 U1 VCSA
- vSphere 7 U1 - Part 1 - Installing ESXi 7.0 U1
- Veeam CBT Data is Invalid - Reset CBT Without Powering Off VM
- View Administrator Blank Error Dialog/Window After Upgrade