To provision a catalog (aka pool) of desktops with XenDesktop you first need a master image.
This master image will be the parent image for all desktops you provision.
Because of this it is of utmost importance you optimise this image to reduce the CPU, memory, storage and network I/O in a virtual environment.
Summary of Steps:
-
Create Virtual Machine
-
Install Operating System
-
Configure/Optimise Operating System
-
Install VMTools/XenTools
-
Join the domain
-
Install VDA
-
Configure the VDA and Citrix Receiver
-
Shutdown VM
-
Snapshot VM
1. First create a virtual machine in either XenCenter, vSphere or Hyper-V (depending on what virtual infrastructure you are using).
2. Ensure the VM is created with the correct CPU, memory amounts for the guest OS.
e.g. Windows 7 32-bit
1 vCPU
1536 MB vRAM
1 vNIC
24 GB Disk (Thin)
3. Install the guest OS (in this case Windows 7 32Bit).
4. Configure the guest OS, Networking and Software (Install any Updates, AntiVirus, etc)
5. Install VMware Tools or XenTools and reboot.
6. Join to the Active Directory domain and reboot.
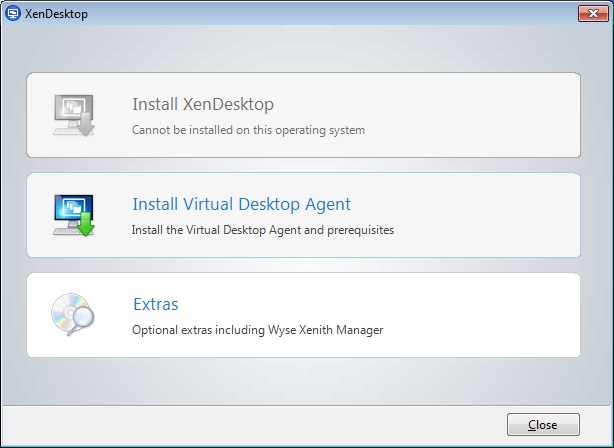
7. Install the Citrix XenDesktop Virtual Desktop Agent (VDA).
This is located within the install ISO, mount the ISO to the VM and the dialog below will autorun.
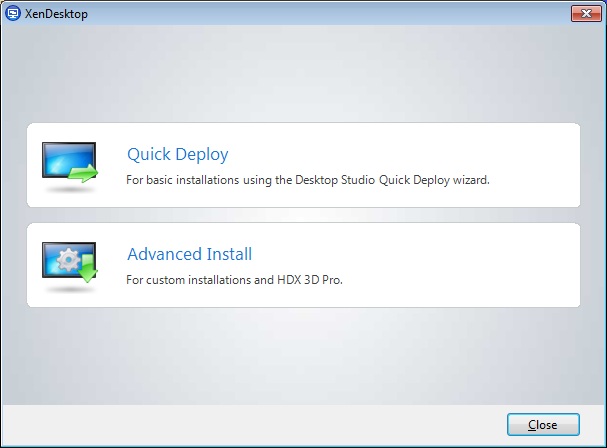
8. Choose "Advaned Install" to go though all the configuration options.
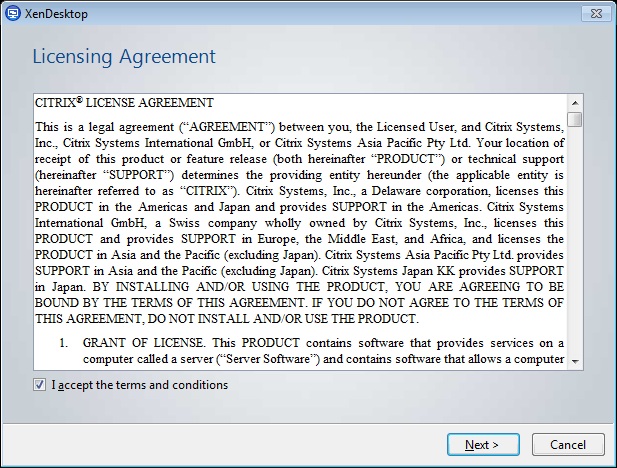
9. Read and Accept the license agreement.
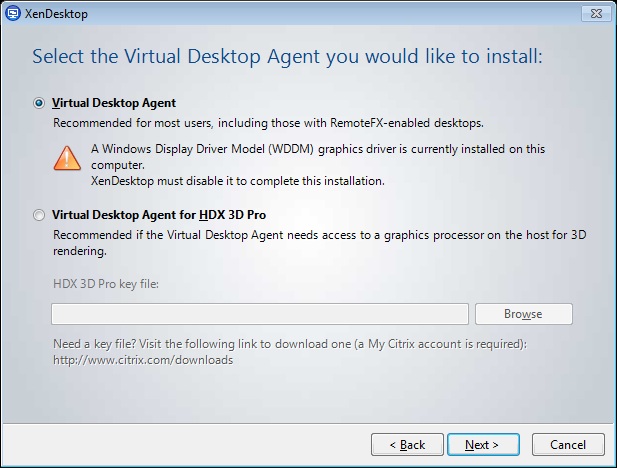
10. There are two type of VDA you can install (select the applicable one - usually the normal VDA).
Basically only select the HDX 3D Pro VDA if you a license for it and have a compatible physical graphics processor installed in the XenServer host.
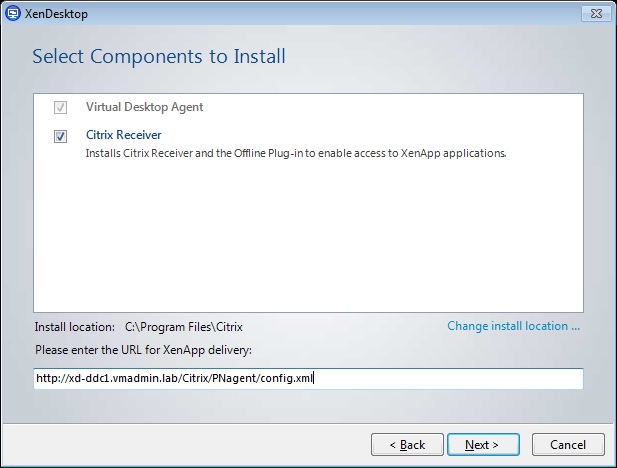
11. The Virtual Desktop Agent component is required, however Citrix Receiver is optional.
If you are installing XenApp now or later to present virtualised applications to these virtual desktops, install this component and enter the URL that will be used for the XenApp web interface.
This will be: http://<web.interface.fqdn>/Citrix/PNAgent/config.xml
(Enter your web interface server FQDN in <web.interface.fqdn>)
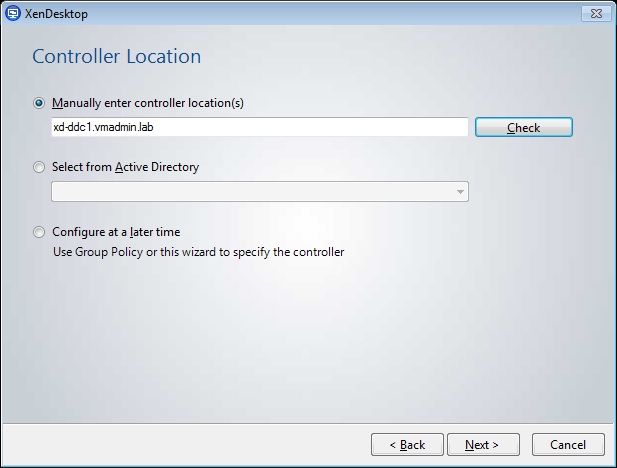
12. The controller location is where you tell the VDA to communicate with.
Enter the FQDN's of all your DDC's into the controller locations and check they can be reached.
If you cannot resolve this now you will almost certainly fail provision a pool of working desktops.
Tip: Check the firewalls, VLAN ACLs etc on both the master image and DDC's.
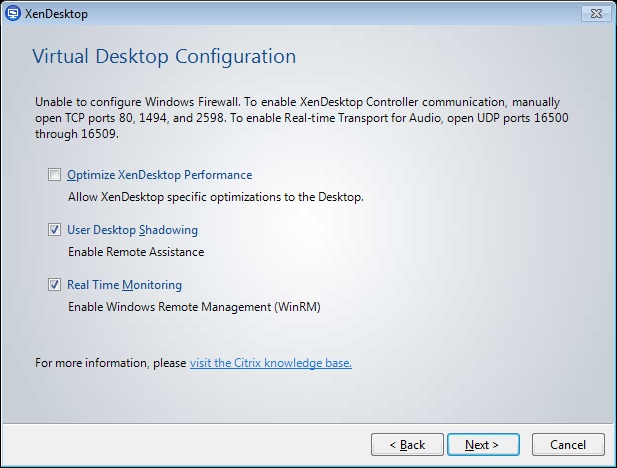
13. Next untick "optimise XenDesktop performance" as this disables some of the features you may want to use - Aero mode for example. We will run a better script manually for this later. (It's important you opitmise correctly).
Tip for the interested if you do tick the optimise box it runs the following http://support.citrix.com/article/CTX125874
Enable shadow the users desktop and real time monitoring.
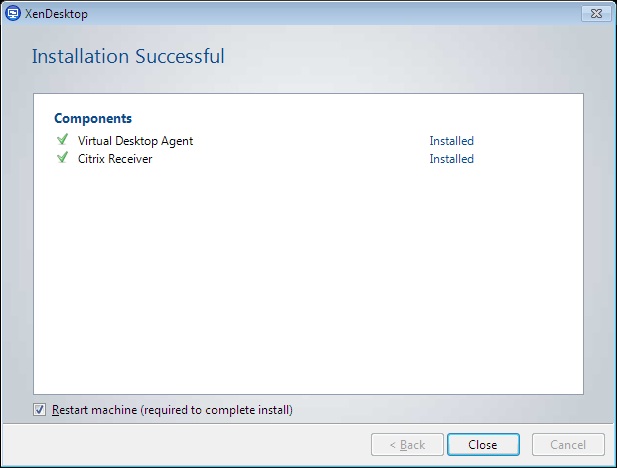
14. Review the components and install location and Install.

15. The installation of the VDA and Citrix Receiver will complete, make sure you reboot.
16. Apply the optimisations to the desktop which could be the standard optimisations provided by Citrix http://support.citrix.com/article/CTX125874 or the optimisations I generally apply which is a combination between Citrix and VMware optmisations plus some of my own (with some removed for a better Windows 7 user experience).
17. Once you have your master image exactly how you require it, shut the VM down gracefully and take a snapshot (with a description that is useful).
This will now form the master image we will deploy our catalog of desktops from with a few simple clicks! :-)
Share this blog post on social media:
Tweet


Latest Blog Posts
- vSphere 7 U1 - Part 3 - Creating a Datacenter, HA/DRS Cluster and Adding a Host
- vSphere 7 U1 - Part 2 - Deploying vCenter 7.0 U1 VCSA
- vSphere 7 U1 - Part 1 - Installing ESXi 7.0 U1
- Veeam CBT Data is Invalid - Reset CBT Without Powering Off VM
- View Administrator Blank Error Dialog/Window After Upgrade